6.49
If using Remote Visualization with Viewpoint Server 9.0.2 or later, your Remote Visualization installation must use FastX 2.2
In this topic:
- 6.49.1 Check Your Current Version
- 6.49.2 Upgrade Remote Visualization
- 6.49.3 Grant Users Remote Visualization Permissions in Viewpoint
6.49.1 Check Your Current Version
On the Remote Visualization Gateway Server Host, run the following command to determine your current version of FastX.
[root]# rpm -q StarNetFastX2
6.49.2 Upgrade Remote Visualization
In this topic:
- 6.49.2.A Upgrade the Gateway Server
- 6.49.2.B Configure the Gateway Server
- 6.49.2.C Upgrade the Session Servers
- 6.49.2.D Configure a Session Server
- 6.49.2.E Copy the Session Server Configuration to the Remaining Session Servers
6.49.2.A Upgrade the Gateway Server
If the version and release of the FastX RPM prior to upgrade is less than 2.2-77.2, do the following:
- Make sure that your DNS server is configured for reverse lookups. Without reverse DNS, Session Servers will fail to register with your Gateway Server. As a result, authentication requests to the Gateway Server will fail because the Gateway Server will not be able to connect to any Session Servers.
- On the Remote Visualization Gateway Server Host, do the following
- If you installed Remote Visualization Gateway Server on its own host or if Remote Visualization Gateway Server is the first component being upgraded on a host with other RPM installations, complete the steps to prepare the host. See 6.31 Preparing the Host – Typical Method or 6.30 Preparing the Host – Offline Method.
Install the new Remote Visualization RPM.
[root]# yum update StarNetFastX2
[root]# zypper update StarNetFastX2
- Change the config directory to be owned by "fastx".
[root]# chown fastx. /usr/lib/fastx2/config/ -R
- Remove the gateway-server.json file, if it exists.
[root]# rm -f /usr/lib/fastx2/config/gateway-server.json
- Restart the FastX service.
[root]# service fastx restart
6.49.2.B Configure the Gateway Server
If the version of the FastX RPM prior to upgrade was less than 2.2, do the following:
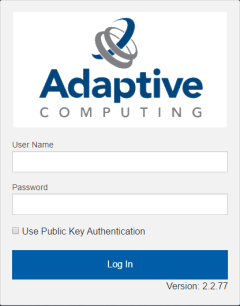
- Using a web browser, navigate to your secure Remote Visualization Gateway Server instance. (https://<gateway_host>:3443; where <gateway_host> is the IP address or name of the Gateway Server Host).
The Log In page displays. For example:
Click to enlarge
-
Log in as the FastX admin user. Do one of the following:
- If your authentication method is password-based, do the following:
- Enter the user name (default is "ace").
- Enter the password (default is "ace").
- Make sure the "Use Public Key Authentication" checkbox is cleared.
- Click Log In.
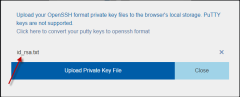
- If your authentication method is key-based, do the following:
- Enter the user name (default is "ace").
- Select the "Use Public Key Authentication" checkbox.
- A prompt will display asking for you to load your private key file.
- Click Upload Private Key File and navigate to your stored key file.
When your key file has uploaded it will be displayed in the prompt. For example:
Click to enlarge
- Click Close. The prompt closes.
- Click Upload Private Key File and navigate to your stored key file.
- Click Log In.
-
Click the icon for Admin\System Configuration. The icon is circled in the example to assist in finding its location.

Click to enlarge
-
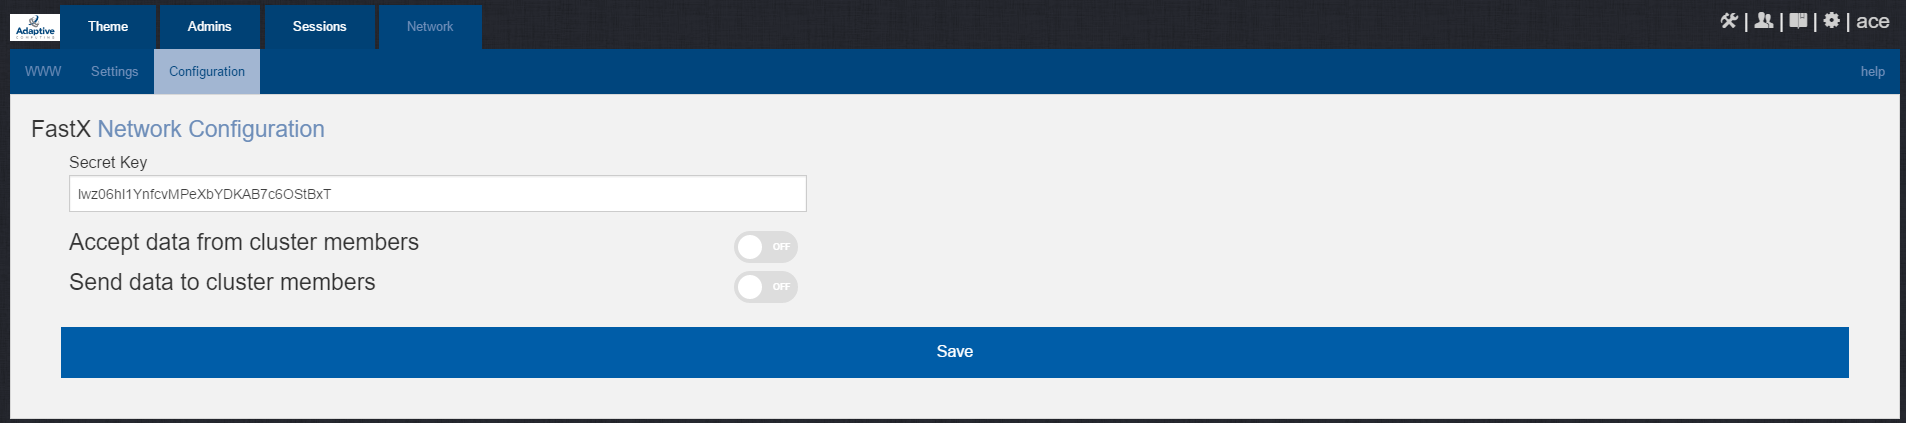
Select the Network tab. If it is not already selected, select the Configuration sub-tab to display the FastX Network Configuration page.

Click to enlarge
- Do the following:
- In the Secret Key field, remove the auto-generated key and enter the secret key referenced by the current (non-upgraded) Session Servers. Record this secret key (e.g. copy to your clipboard) because you will need it when configuring the Session servers later in this topic.
- Enable the connection to accept data from cluster member.
- In the box to specify the log in method, select "Sessions - log in to the system running the fewest sessions".
- Disable the Gateway Server from sending data to cluster members.
The following image is an example of the completed FastX Network Configuration page for the Gateway Server.
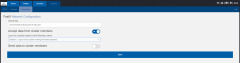
Click to enlarge
- Click Save to submit your changes.


6.49.2.C Upgrade the Session Servers

These instructions assume you installed the Remote Visualization Session Servers on the same hosts on where the Torque MOM Hosts (compute nodes) were installed and that you have prepared those hosts for RPM upgrades.
If the version and release of the FastX RPM prior to upgrade was less than 2.2-77.2, do the following:
- Make sure that your DNS server is configured for reverse lookups. Without reverse DNS, Session Servers will fail to register with your Gateway Server. As a result, authentication requests to the Gateway Server will fail because the Gateway Server will not be able to connect to any Session Servers.
- On the each Session Server host, do the following:
- Upgrade FastX.
[root]#
- Restart the FastX service.
[root]# service fastx restart
- Upgrade FastX.
6.49.2.D Configure a Session Server
This section provides instructions on how to configure one Session Server (referred to as the initial Session Server). The configuration will then be copied to the additional Session Servers in your environment in a later procedure.
If the version of the FastX RPM prior to upgrade was less than 2.2, do the following:
- Using a web browser, navigate to your secure Remote Visualization Session Server instance. (https://<session-host>:3443; where <session_host> is the IP address or name of the initial Remote Visualization Session Server Host).
The Log In page displays. For example:
Click to enlarge
-
Log in as the FastX admin user. Do one of the following:
- If your authentication method is password-based, do the following:
- Enter the user name (default is "ace").
- Enter the password (default is "ace").
- Make sure the "Use Public Key Authentication" checkbox is cleared.
- Click Log In.
- If your authentication method is key-based, do the following:
- Enter the user name (default is "ace").
- Select the "Use Public Key Authentication" checkbox. Upload the public key used when you configured the Gateway Server earlier in this topic.
- Click Log In.
When you first log in, you will get a message that you have no session running. That is expected.
-
Select the icon for Admin\System Configuration. The icon is circled in the example to assist in finding its location.
Click to enlarge
-
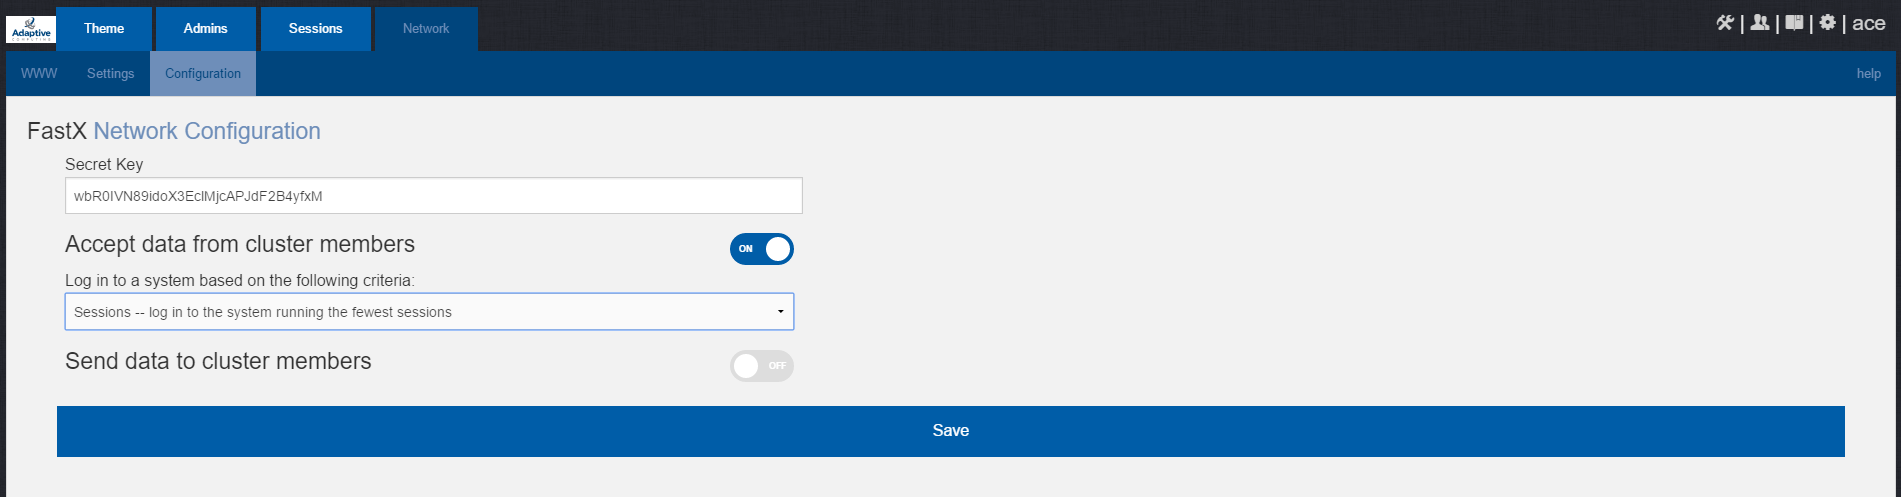
Select the Network tab. If it is not already selected, select the Configuration sub-tab to display the FastX Network Configuration page.
Click to enlarge
- Do the following:If you determined that you need to upgrade Remote Visualization, you will need to upgrade the gateway server and all the session servers (Torque MOM Hosts).
- In the Secret Key field, remove the auto-generated key and enter the secret key used when configuring the Remote Visualization Gateway Server earlier in this topic.
You will not be able to login to the portal on the Gateway Server until you have completed the configuration of at least one Session server. If you did not save it earlier, the secret key can be found in the /usr/lib/fastx2/config/network.json on the Gateway Server.
- Disable the connection to accept data from cluster members.
- Enable the Gateway Server to send data to cluster members.
- In the box to specify whether to SSL certificates, select "I am using a self-signed certificate".
- In the Cluster member URLs area, do the following:
- Click the + icon.
- In the box that displays, enter the IP address or name and the port number of the Gateway Server you just upgraded (for example: "https://mgmtnode:3443").
The following image is an example of the completed FastX Network Configuration page.
Click to enlarge
- In the Secret Key field, remove the auto-generated key and enter the secret key used when configuring the Remote Visualization Gateway Server earlier in this topic.
- Click Save to submit your changes.

6.49.2.E Copy the Session Server Configuration to the Remaining Session Servers
After you configured the initial Session Server, the settings are saved in the network.json file.
For documentation clarity, these instructions use node00 through node09 as the names of the Session Servers; with node00 designated as the initial Session Server.
If the upgrade required you to configure a session server in the prior step, on the initial Session Server Host, copy the network.json file to the remaining Session Server Hosts in your environment, and restart the FastX service.
[root]# for i in {01..09} ; do scp /usr/lib/fastx2/config/network.json root@node$i:/usr/lib/fastx2/config/network.json ; donee
[root]# for i in {01..09} ; do ssh node$i "chown fastx. /usr/lib/fastx2/config/. -R" ; done
[root]# for i in {01..09} ; do ssh node$i "service fastx restart" ; done
6.49.3 Grant Users Remote Visualization Permissions in Viewpoint
If you upgraded Viewpoint from version 9.0.2 or prior, verify that the users who work with Remote Visualization have the appropriate role in their Viewpoint user principal.
These are the Viewpoint Roles for Remote Visualization:
- RemoteVizAdmin – Administrative user, with permission to create remote visualization application templates and manage other user's remote visualization jobs.
- RemoteVizUser – Basic user, with permission to create and manage their own remote visualization jobs.
See Creating or Editing Principals in the Moab Viewpoint Reference Guide for instructions on setting up principals.