Installing Moab Web Services
These instructions describe how to install Moab Web Services (MWS).
Hardware requirements:
- Dual-core Intel/AMD x86-64 processor
- At least 4 GB of RAM
Software requirements:
- Moab® Workload Manager 7.5.0
- Apache Tomcat™ 6 (This was installed in Installation overview)
- Oracle® Java® 7 Runtime Environment (This was installed in Installation overview)
- MongoDB® 2.4.8 (RHEL, CentOS, and Scientific Linux) or 2.4.3 (SLES) (This was installed in Installation overview)
To install Moab Web Services

You must deploy Moab Web Services on the same server as Moab Workload Manager.
- Verify MWM is installed and configured as desired (for details, see Installing Moab Workload Manager).
- Generate a secret key to be used for communication between MWM and MWS.
- Start MWM.
- Create the MWS home directory and subdirectories (for more information, see the "Configuration" section of the Moab Web Services Reference Guide).
- Download the latest MWS build (mws-<version>.tar.gz) from the Adaptive Computing website.
- Extract the contents of the MWS download tarball into a temporary directory. For example:
-
Copy the extracted utility files to the utility directory created above and give the tomcat user ownership of the directory.
[root]# cd /tmp/mws-install/mws-7.5.0/utils [root]# cp * /opt/mws/utils [root]# chown tomcat:tomcat /opt/mws/utils/*
-
Set up the MWS configuration file
- In the extracted MWS directory are several configuration files:
- mws-config.groovy: configuration common to all suites
- mws-config-cloud.groovy: configuration for the Moab Cloud Suite
- mws-config-csa.groovy: configuration for the Moab HP CSA Suite
- mws-config-hpc.groovy: configuration for the Moab HPC Suites
- Copy mws-config.groovy to /opt/mws/etc.
- Copy the appropriate suite-specific file to /opt/mws/etc/mws.d.
- Give the Tomcat user read access to /opt/mws/etc/mws-config.groovy and /opt/mws/etc/mws.d/mws-config-*.groovy.
- In the /opt/mws/etc/mws-config.groovy file, change these settings:
- moab.secretKey: Must match the Moab secret key you generated earlier (contained in /opt/moab/etc/.moab.key).
- auth.defaultUser.username: Any value you like, or leave as is.
- auth.defaultUser.password: Any value you like, but choose a strong password.
- moab.messageQueue.secretKey: Add this property to configure the message queue security key in MWS.
The key you specify must be encoded in Base64, and must match exactly the key specified in the MESSAGEQUEUESECRETKEY when installing Moab Workload Manager (see Installing Moab Workload Manager).
Important: If MWS is configured to encrypt the message queue and Moab is not (or vice versa) then the messages from Moab will be ignored. Furthermore, all attempts to access the MWS service resource will fail.
[root]# nano /opt/mws/etc/mws-config.groovy
moab.secretKey = "<ENTER-KEY-HERE>" moab.server = "localhost" moab.port = 42559 moab.messageQueue.secretKey = "1r6RvfqJa6voezy5wAx0hw=="
// Change these to be whatever you like. auth.defaultUser.username = "moab-admin" auth.defaultUser.password = "changeme!"

If you do not change auth.defaultUser.password, your MWS will not be secure (because anyone reading these instructions would be able to log into your MWS). Here are some tips for choosing a good password.
-
Add the following parameters to configure an MWS connection to your LDAP server:
ldap.server = "192.168.0.5" ldap.port = 389 ldap.baseDNs = ["dc=acme,dc=com"] ldap.bindUser = "cn=Manager,dc=acme,dc=com" ldap.password = "*****" ldap.directory.type = "OpenLDAP Using InetOrgPerson Schema"
This is just an example LDAP connection. Be sure to use the appropriate domain controllers (dc) and common names (cn) for your environment.
If you followed the Adaptive Computing tutorial, "Setting up OpenLDAP on CentOS 6," your ldap.directory.type should be set to "OpenLDAP Using InetOrgPerson Schema." However, the use of other schemas is supported. For more information see "LDAP Configuration Using mws-config.groovy" in the Moab Web Services Reference Guide.
To see how to configure a secure connection to the LDAP server, see "Connection to LDAP" in the Moab Web Services Reference Guide.
-
Add the grails.mongo.username and grails.mongo.password parameters to the mws-config.groovy file. Use the MWS credentials you added to MongoDB in the Installation overview section.
... grails.mongo.username = "mws_user" grails.mongo.password = "secret3"
- In the extracted MWS directory are several configuration files:
- Add the following line to the end of /etc/tomcat6/tomcat6.conf:
- Deploy the mws.war file and start Tomcat.
- Navigate to http://localhost:8080/mws/ in a web browser to verify that MWS is running (you will see some sample queries and a few other actions).
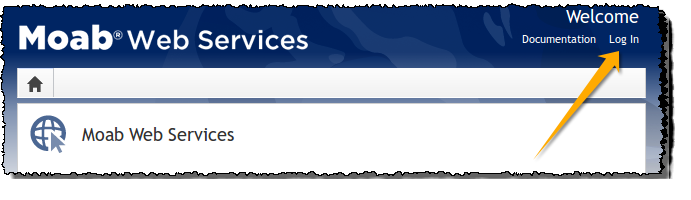
- Log in to MWS to verify that your credentials are working. (Your login credentials are the auth.defaultUser.username and auth.defaultUser.password values you set in the /opt/mws/etc/mws-config.groovy file.)
[root]# service moab stop
[root]# dd if=/dev/urandom count=18 bs=1 2>/dev/null | base64 > /opt/moab/etc/.moab.key
[root]# chown root:root /opt/moab/etc/.moab.key
[root]# chmod 400 /opt/moab/etc/.moab.key
[root]# service moab start
The default location for the MWS home directory is /opt/mws. These instructions assume the default location.
Here is a sample script for this setup:
[root]# mkdir -p \
    /opt/mws/etc/mws.d \
    /opt/mws/hooks \
    /opt/mws/log \
    /opt/mws/plugins \
    /opt/mws/spool/hooks \
    /opt/mws/utils
[root]# chown -R tomcat:tomcat /opt/mws # Depending on your OS, the Tomcat username might be tomcat6.
[root]# chmod -R 555 /opt/mws
[root]# chmod u+w \
    /opt/mws/log \
    /opt/mws/plugins \
    /opt/mws/spool \
    /opt/mws/spool/hooks \
    /opt/mws/utils
[root]# mkdir /tmp/mws-install
[root]# cd /tmp/mws-install
[root]# tar xvzf $HOME/Downloads/mws-7.5.0.tar.gz
[root]# cd /tmp/mws-install/mws-7.5.0
CATALINA_OPTS="-DMWS_HOME=/opt/mws -Xms256m -Xmx3g -XX:MaxPermSize=384m -Dfile.encoding=UTF8"
JAVA_HOME="/usr/java/latest"
Some Linux distributions use /etc/default/tomcat6 or /etc/sysconfig/tomcat6 instead of /etc/tomcat6/tomcat6.conf.
[root]# chkconfig tomcat6 on
[root]# service tomcat6 stop
[root]# cp /tmp/mws-install/mws-7.5.0/mws.war /usr/share/tomcat6/webapps
[root]# service tomcat6 start
|
|
Click to enlarge |
If you encounter problems, or if the application does not seem to be running, see the steps inMoab Web Services issues