Image 2-1: Cart Details page
Click to enlarge
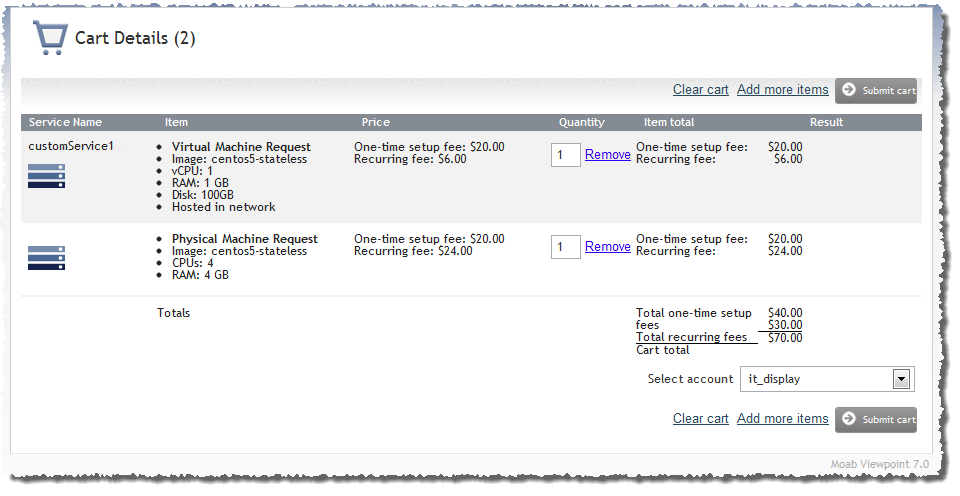
The cart is used for submitting and purchasing services from templates and custom services in Viewpoint. Summaries of items you add to the cart will appear when you hover on the Cart icon at the top-right of the Viewpoint navigation bar. Once you have added all the services you wish to submit (for details, see Requesting services), you can go to the Cart Details page for review and final submission of your order.
|
Image 2-1: Cart Details page |
|
|
|
Click to enlarge |
The Cart Details page displays the following for each item in your cart:
From the Cart Details page, you can do the following:
| Option | Description |
|---|---|
| Quantity |
Lets you specify the number of service items you want to request. By default, Quantity is set to 1. 
Do not enter 0 (zero). If you need to remove the item, click Remove. |
| Remove | Lets you remove service items from the cart. |
| Clear cart | Lets you remove all services from the cart. |
| Add more items |
Lets you leave the Cart Details page to add more items to your cart. When you select Add more items, you are brought to the New Services page where you can request a service from a template or a custom service (for more information, see Requesting services). During this process, the items in your Cart are saved. You can go back to the Cart Details page at any time by clicking the Cart icon. |
| Select account |
Lets you specify which account will be charged for the service(s).
This field will only appear if quoting is turned on in Moab. |
| Submit cart | Lets you submit payment for the items in your cart. |
To use the cart
 ).
).The Cart details page opens and displays the items in your cart.
Related topics
© 2012 Adaptive Computing