To add/delete/modify a list box

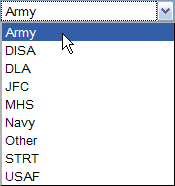
A <select-values> element with cardinality="many" uses the (multi-select) List Box.
<component id=”os” required=”true”>
  <description>Operating Systems</description>
  <select-values cardinality="one" sort=”true”>
    <select-value api-value="RhelAS4u6x86_64" display-value="RedHat AS 4.6 64bit" />
    <select-value api-value="RhelAS4u6x86" display-value="RedHat AS 4.6 32bit" />
    <select-value api-value="RhelES5u1x86_64" display-value="RedHat ES 5.1 64bit" />
    <default api-value="RhelAS4u6x86" display-value="RedHat AS 4.6 32bit" />
    <select-value api-value="Win2003EEr2x86" display-value="Win 2003 Ent 32bit" />
    <select-value api-value="Win2003EEr2x86_64" display-value="Win 2003 Ent 64bit" />
    <select-value api-value="RhelES5u1x86" display-value="RedHat ES 5.1 32bit" />
  </select-values>
</component>
All validation and rule descriptors use the api-value attribute when getting the value of a single select list box.
Related topics
© 2012 Adaptive Computing