
1 Introduction
1.1 Moab® Web Services Overview
Moab Web Services (MWS) is a component of Adaptive Computing Suites that enables programmatic interaction with Moab Workload Manager via a RESTful interface. MWS allows you to create and interact with Moab objects and properties such as jobs, nodes, virtual machines, and reservations. MWS is the preferred method for those wishing to create custom user interfaces for Moab and is the primary method by which Moab Viewpoint communicates with Moab.MWS communicates with the Moab Workload Manager (MWM) server using the same wire protocol as the Moab command-line interface. By publishing a standard interface into Moab's intelligence, MWS significantly reduces the amount of work required to integrate MWM into your solution.This documentation is intended for developers performing such integrations. If you are a Moab administrator, and for conceptual information about MWM, see the Moab Administrator's Guide.1.2 Installation Guide
These instructions describe how to deploy the Moab® Web Services (MWS) to a Tomcat server.1.2.1 Requirements
Hardware Requirements
- Dual core processor
- At least 4 GB of RAM
Software Requirements
- Moab® Workload Manager 7.0
- Oracle® Java® 6 Runtime Environment
- Apache Tomcat™ 6
- MongoDB® 2.0.1 or later
Oracle Java 6 Runtime Environment is the only supported Java environment.All other versions of Java, including Oracle Java 7, OpenJDK/IcedTea, GNU Compiler for Java, and so on, cannot run Moab Web Services.
1.2.2 Quickstart Guide
You must deploy Moab Web Services (MWS) on the same server as Moab Workload Manager (MWM).
- Make sure that you have first installed and configured Moab Workload Manager as desired.
- Generate a secret key to be used for communication between MWM and MWS.
Before you create the key file, make sure Moab Workload Manager is not
running. Otherwise, all Moab client commands will stop working. Example:
service moab stop
- Here is a script you can use to generate the key:
dd if=/dev/urandom count=18 bs=1 2>/dev/null | base64 > /opt/moab/etc/.moab.key
chown root /opt/moab/etc/.moab.key
chmod 400 /opt/moab/etc/.moab.key
ln -f /opt/moab/etc/.moab.key /opt/moab/.moab.key
- Start MWM. Example:
service moab start - Install MongoDB version 2.0.1 or later on the MWM server using packages (recommended) or manual installation.
- Packages (recommended) are available from the Mongo-provided repositories for CentOS and Fedora or Ubuntu and Debian.
- After installing the packages, start MongoDB and arrange for it to start automatically during server startup.
- Here is an example for CentOS and Fedora:
/sbin/chkconfig mongod on/etc/init.d/mongod start- For Ubuntu and Debian, see the Configuration section of this page for examples.
- For manual installation (not recommended), follow these instructions. Be sure to start the Mongo server (
mongod) after installation and arrange for it to start automatically during server startup (by writing and registering an/etc/init.dscript, for example). - Download, install, and enable the 64-bit version of the Oracle Java SE 6 JRE.
Oracle Java 6 Runtime Environment is the only supported Java environment.All other versions of Java, including Oracle Java 7, OpenJDK/IcedTea, GNU Compiler for Java, and so on, cannot run Moab Web Services.
- Here is an example for a CentOS system:
sh jre-6u33-linux-x64-rpm.bin
rm -f /usr/bin/java
ln -s /etc/alternatives/java /usr/bin/java
/usr/sbin/alternatives --install /usr/bin/java java /usr/java/jre1.6.0_33/bin/java 500
/usr/sbin/alternatives --set java /usr/java/jre1.6.0_33/bin/java
Thealternativescommand is calledupdate-alternativeson some Linux distributions.
- You can verify the Java installation by running the following command:
java -version
- The output should look similar to this:
java version "1.6.0_33"
Java(TM) SE Runtime Environment (build 1.6.0_33-b03)
Java HotSpot(TM) 64-Bit Server VM (build 20.8-b03, mixed mode)
- Create the MWS home directory and its subdirectories
etc,hooks,plugins, andlog.
The default location for the MWS home directory is /opt/mws. These instructions assume the default location.
- Give the Tomcat user read access to these directories and write access to the
pluginsandlogdirectories. - Here is a sample script for these steps:
mkdir -p /opt/mws/etc /opt/mws/hooks /opt/mws/plugins /opt/mws/log
chown -R tomcat /opt/mws # Depending on your OS, the Tomcat username might be tomcat6.
chmod -R 555 /opt/mws
chmod u+w /opt/mws/plugins /opt/mws/log
- Extract the contents of the MWS tarball into a temporary directory. Example:
mkdir /tmp/mws-install
cd /tmp/mws-install
tar xvzf $HOME/Downloads/mws-<VERSION>.tar.gz
cd /tmp/mws-install/mws-<VERSION>
- Set up the MWS configuration file.
- In the extracted MWS directory is a sample configuration file:
mws-config.groovy. Copy this file to/opt/mws/etc. - Give the Tomcat user read access to
/opt/mws/etc/mws-config.groovy. - In the
/opt/mws/etc/mws-config.groovyfile, change these settings: moab.secretKey: needs to match the MWM secret key you generated earlier (contained in/opt/moab/etc/.moab.key)auth.defaultUser.username: any value you like, or leave as isauth.defaultUser.password: any value you like, but choose a good password
vi /opt/mws/etc/mws-config.groovy…
moab.secretKey = "<ENTER-KEY-HERE>"
moab.server = "localhost"
moab.port = 42559// Change these to be whatever you like.
auth.defaultUser.username = "admin"
auth.defaultUser.password = "adminpw"
If you do not change auth.defaultUser.password, then your MWS is not secure, since anyone reading these instructions can log into your MWS.
Here are some tips for choosing a good password.
- Set the following parameters in your Tomcat CATALINA_OPTS:
CATALINA_OPTS="-DMWS_HOME=/opt/mws -Xms256m -Xmx3g -XX:MaxPermSize=384m"Where you choose to storeCATALINA_OPTSdepends on various factors, including operating system and sysadmin preference. Here are some suggestions:
- CentOS™ 5 and 6:
/etc/sysconfig/tomcat6- Red Hat® Enterprise Linux 5 and 6:
/etc/sysconfig/tomcat6- SUSE® Linux Enterprise Server 11:
/etc/tomcat6/tomcat6.conf- Ubuntu® 10.04:
/etc/default/tomcat6
- Start Tomcat and deploy
mws.war. Example:
chkconfig tomcat6 on
service tomcat6 start
cp /tmp/mws-install/mws-<VERSION>/mws.war /var/lib/tomcat6/webapps- Visit http://localhost:8080/mws/ in a web browser to verify that MWS is running. You will see some sample queries and a few other actions.
- Log into MWS to verify that the MWS credentials are working. (The credentials are the values of
auth.defaultUser.usernameandauth.defaultUser.passwordthat you set above.)
If you encounter problems, or if MWS does not seem to be running, see the steps below in the Troubleshooting section.
1.2.3 Troubleshooting Installation
If something goes wrong with MWS, look in the following files:- The MWS log file. By default this is
/opt/mws/log/mws.log. - The Tomcat
catalina.outfile, usually in/var/log/tomcat6or$CATALINA_HOME/logs.
If you remove theHere is a list of some errors and their fixes:log4jconfiguration frommws-config.groovy, MWS will write its log files tojava.io.tmpdir. For Tomcat,java.io.tmpdiris generally set to$CATALINA_BASE/temporCATALINA_TMPDIR.
MongoDB Errors
If the application fails to start and gives error messages such as these:Error creating bean with name 'mongoDatastore' can't say something; nested exception is com.mongodb.MongoException
java.lang.OutOfMemoryError: Java heap space
Increase the size of the heap using JVM options-Xms and -Xmx. Here are the suggested values from the Quickstart Guide:
CATALINA_OPTS="-DMWS_HOME=/opt/mws -Xms256m -Xmx3g -XX:MaxPermSize=384m"-Xms: Set initial Java heap size.-Xmx: Set maximum Java heap size.
java.lang.OutOfMemoryError: PermGen space
Increase the size of the permanent generation using JVM option-XX:MaxPermSize. Here are the suggested values from the Quickstart Guide:
CATALINA_OPTS="-DMWS_HOME=/opt/mws -Xms256m -Xmx3g -XX:MaxPermSize=384m"SEVERE: Context [/mws] startup failed due to previous errors
Ifcatalina.out contains this error, look in /opt/mws/log/mws.log and /opt/mws/log/stacktrace.log for more details on the error.Moab Reached Maximum Number of Concurrent Client Connections
When this error message is encountered, simply add a new line to themoab.cfg file:CLIENTMAXCONNECTIONS 256
changeparam CLIENTMAXCONNECTIONS 256
The number 256 above may be substituted for the desired maximum number of MWM client connections.
1.3 Configuration
This section describes where Moab Web Services searches for its configuration files. It also shows some examples of how to configure logging.To see a full reference to all configuration and logging parameters available in MWS, see the Configuration page under Moab Web Services in the Quick Reference menu.
Home Directory
The MWS home directory contains all configuration as well as other files that serve features of MWS such as hooks and plugins. This is typically set by using theMWS_HOME property as
explained in the Quickstart Guide. If MWS_HOME is not set
as a Java property or as an environment variable for the current application
container (i.e. Tomcat), /opt/mws will be used as the default MWS_HOME. If no configuration files
are found in MWS_HOME, MOABHOMEDIR will be used. If this property also does
not exist, the home directory will default to /opt/moab.The home directory consists of several sub-directories:MWS_HOMEorMOABHOMEDIRcan be set either as a Java property or as an environment variable. See the Quickstart Guide for suggestions on how to setMWS_HOME.
etc- Used for storing configuration files.hooks- Used for storing hook files. This is not required if hooks are not being used.plugins- Used for storing plugin types. This is not required if custom plugin types are not being used.
Thehooksandpluginsdirectories should be writable by the application container's user, such as thetomcatuser.
Configuration File Locations
MWS searches the following directories for configuration files in the order shown below. As soon as a configuration file is found in one of these directories, that file is loaded and searching stops. If alog4j.properties file exists in the same directory, it will be loaded
as well.
MWS_HOME/etcMWS_HOME/opt/mws/etc/opt/mwsMOABHOMEDIR/etcMOABHOMEDIR/opt/moab/etc/opt/moab
- In each directory, MWS looks first for
mws-config.groovyand then formws-config.properties. If it findsmws-config.groovy, it does not look formws-config.properties.mws-config.groovyuses a style that is similar to a Java properties file with some extensions from Groovy.mws-config.propertiesis a regular Java properties file.
Logging Configuration Using mws-config.groovy
Shown below is an example that logs all error messages and fatal
messages to /opt/mws/log/mws.log. It also logs all stack traces to
/opt/mws/log/stacktrace.log.Minimal Logging Configuration
log4j = {
	appenders {
		rollingFile name: 'stacktrace',
			file: '/opt/mws/log/stacktrace.log',
			maxFileSize: '1GB'
		rollingFile name: 'rootLog',
			file: '/opt/mws/log/mws.log',
			threshold: org.apache.log4j.Level.ERROR,
			maxFileSize: '1GB'
	}
	root {
		debug 'rootLog'
	}
}Console Logging Configuration
log4j = {
	appenders {
		rollingFile name: 'stacktrace',
			file: '/opt/mws/log/stacktrace.log',
			maxFileSize: '1GB'
		console name: 'consoleLog',
			threshold: org.apache.log4j.Level.ERROR
	}
	root {
		debug 'consoleLog'
	}
}
For all possible configuration options, see the Configuration section in the reference guide.
- For the examples above, you must make sure that
/opt/mws/logexists and is writable by the application server.- You may configure logging using either
mws-config.groovyor a regularlog4j.propertiesfile. Thelog4j.propertiesfile must be in the same directory as themws-config.groovyfile.- If you do not define any
log4jconfiguration, MWS will write its log files tojava.io.tmpdir. For Tomcat,java.io.tmpdiris generally set to$CATALINA_BASE/temporCATALINA_TMPDIR.
1.4 Security
When running MWS in production environments, security is a major concern. This section focuses on securing the three kinds of connections with MWS:- The connection between MWS and Moab Workload Manager (MWM)
- The connection between MWS and MongoDB
- The connections between clients and MWS
Connection with MWM
MWS communicates with MWM via the Moab Wire Protocol, which uses a direct connection between the two applications. The communication over this connection uses a shared secret key, which is discussed in the Quickstart Guide. However, the communication is not encrypted and is therefore susceptible to eavesdropping and replay attacks. For this reason, MWS is supported only when running on the same machine as MWM. This assures that any connections between the two applications occur internally on the server and are not exposed to external users.Connection with MongoDB
By default, the connection between MWS and MongoDB is not authenticated. To enable authentication between them, see the instructions below.- MWS Configuration: see the Configuration reference guide for information on the
grails.mongoproperties to set inmws-config.groovy. - MongoDB Configuration: see the MongoDB Security and Authentication guide. Generally, the following steps are required:
- Add an administrative user to MongoDB in the
admindatabase. - Start MongoDB with authentication activated (using the
--authcommand-line option for example). - Log in as the administrative user to the
admindatabase. - Add a user for MWS to use with full read and write access to the database specified in the configuration file (
mwsby default). - Change the proper configuration file properties with the created username and password.
- Restart MWS by restarting the servlet container (Tomcat).
Client Connections to MWS
All connections to MWS, except those requesting the documentation or the main page, must be authenticated properly. MWS uses a single-trusted-user authentication model, meaning a single user exists that has access to all aspects of MWS. The username and password for this user are configured with theauth.defaultUser properties in the configuration file. See the
Configuration reference guide for more information.When using the MWS user interface in a browser, the user will be prompted
for username and password. For information on how to authenticate requests
when not using a browser, see the API Security
section in the user guide.The username and password in the Basic Authentication header are encoded but not encrypted. Therefore, it is strongly recommended that MWS be run behind a proxy (like Apache) with SSL enabled. The instructions below provide an example of how to do this.
Encrypting Client Connections using Apache and SSL
This section shows how to encrypt client connections to MWS using Apache and SSL. These instructions have been tested on CentOS™ 6.2 with the "Web Server" software set installed. The same ideas are applicable to other operating systems, but the details might be different. As shown in the diagram below, these instructions assume that Tomcat and Apache are running on the same server.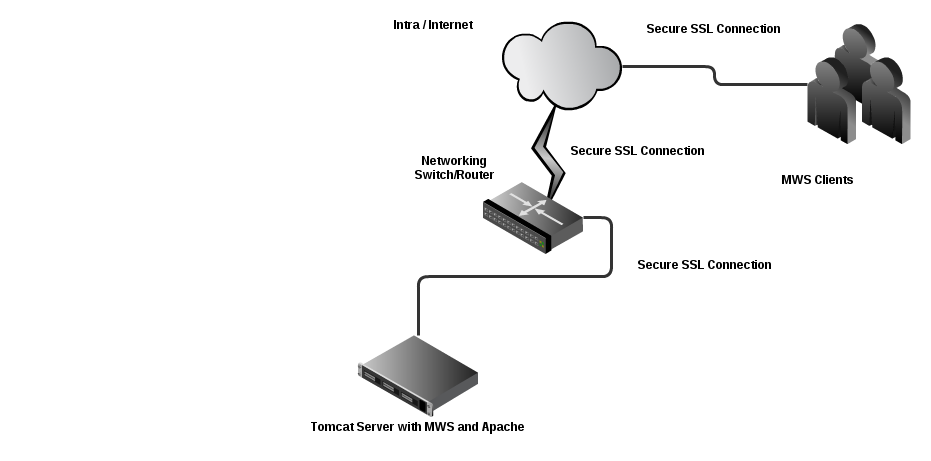
- Create a self-signed certificate. See http://www.openssl.org/docs/HOWTO/certificates.txt for more details if desired.
Instead of creating a self-signed certificate, you can buy a certificate from a certificate vendor. If you do, then the vendor will provide instructions on how to configure Apache with your certificate.
- Run these commands:
cd /etc/pki/tls/certs
cp -p make-dummy-cert make-dummy-cert.bak
cp -p localhost.crt localhost.crt.bak
- Edit
make-dummy-certand replace theanswers()function with code similar to this:
answers() {
		echo US
		echo Utah
		echo Provo
		echo Adaptive Computing Enterprises, Inc.
		echo Engineering
		echo test1.adaptivecomputing.com
		echo
}- Run this command:
./make-dummy-cert localhost.crt
- Configure Apache to use the new certificate and to redirect MWS requests to Tomcat. To do so, edit
/etc/httpd/conf.d/ssl.conf. - Comment out this line:
SSLCertificateKeyFile /etc/pki/tls/private/localhost.key
- Add these lines near the end, just above
</VirtualHost>:
ProxyPass /mws http://127.0.0.1:8080/mws retry=5
ProxyPassReverse /mws http://127.0.0.1:8080/mws
- Configure Apache to use SSL for all MWS requests.
- Add these lines to the end of
/etc/httpd/conf/httpd.conf:
RewriteEngine On
RewriteCond %{HTTPS} off
RewriteRule (/mws.*) https://%{HTTP_HOST}%{REQUEST_URI}- Give Apache permission to connect to Tomcat.
setsebool -P httpd_can_network_connect 1
- Turn on Apache.
chkconfig httpd on
service httpd start
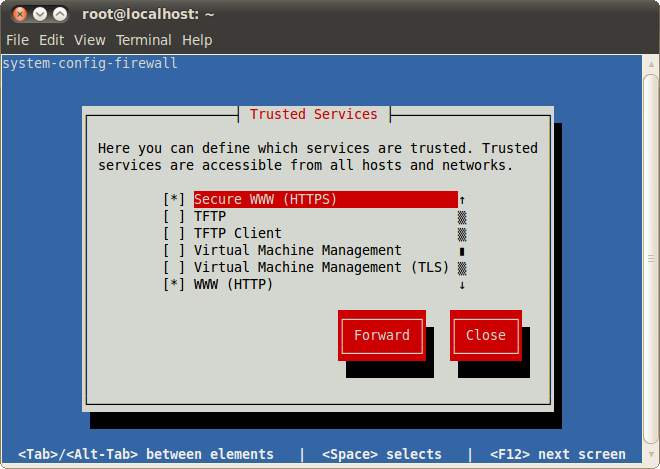
- Using
system-config-firewall-tui, enable "Secure WWW (HTTPS)" and "WWW (HTTP)" as trusted services.
1.5 Version and Build Information
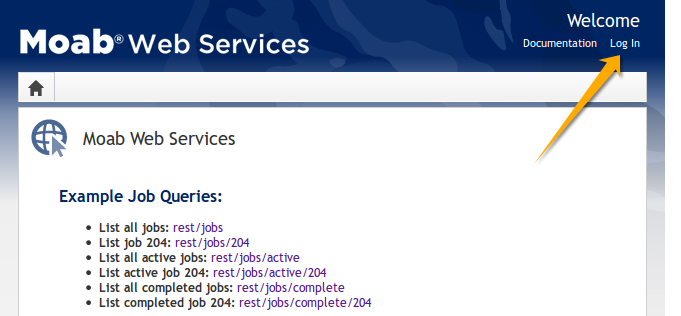
To get detailed version information about MWS, use one of the following three methods:Browser
Using a browser, visit the MWS home page (for example, http://localhost:8080/mws/). At the bottom of the page is the MWS version information. See the screenshot below:
REST Request
Using a REST client or other HTTP client software, send a GET request to therest/diag/about resource. Here is an example:curl -u username:password http://localhost:8080/mws/rest/diag/about
MANIFEST.MF File
If MWS fails to start, version and build information can be found in theMETA-INF/MANIFEST.MF file inside the MWS WAR file. The version
properties begin with Implementation. Below is an excerpt of a
MANIFEST.MF file:Manifest-Version: 1.0 Ant-Version: Apache Ant 1.7.1 Created-By: 20.4-b02 (Sun Microsystems Inc.) Bundle-ManifestVersion: 2 Bundle-Name: mws Bundle-SymbolicName: mws Bundle-Version: 7.0.0...Implementation-Build: 4 Implementation-Build-Date: 2012-02-07_17-01-39 Implementation-Revision: 9e109b9a4289800a2c985082d7595d759807aca9Name: Grails Application Implementation-Title: mws Implementation-Version: 7.0.0 Grails-Version: 1.3.7
2 API Documentation
Introduction
The Moab® Web Services (MWS) provide a set of RESTful resources that can be used to create, read, update, and delete various objects in the Moab® Workload Manager.2.1 Data Format
JSON (JavaScript Object Notation) is the data format used for all communication with MWS. This format makes use of two main structures: collections of key/value pairs called objects and ordered lists of values called arrays . Objects are defined by using curly braces ({}), and arrays are defined by using square brackets ([]). A JSON
object or array may contain several different types of values including numbers, booleans (true/false), strings,
objects, arrays, or the keyword 'null' representing no value.
For
example, a simple JSON object might be defined as:{
"number": 1,
"decimalNumber": 1.2,
"boolean": true,
"string": "Any string",
"object": {
"key": "value"
},
"array": [
"value1",
"value2"
],
"nullValue": null
}- Input for a POST or PUT must be in JSON format. Set the
Content-Typeheader toapplication/json. - Output is in JSON format and always consists of an object with zero or more key/value pairs.
- The output may also be "pretty-printed" or formatted for human viewing by sending a URL parameter. See Global URL Parameters for more information.
2.2 Global URL Parameters
All URL parameters are optional.
| Parameter | Valid Values | Description |
|---|---|---|
| pretty | true | Controls pretty printing of output |
| fields | Comma-Separated String | Includes only specified fields in output |
| exclude-fields | Comma-Separated String | Excludes specified fields from output |
| max | Integer | The maximum number of items to return |
| offset | Integer | The index of the first item to return |
Pretty (pretty)
By default, the output is easy for a machine to read but difficult for humans to read. The pretty parameter formats the output so that it is easier to read.Field Selection (fields)
The fields parameter will include only the specified fields in the output. For list queries, the field selection acts on the objects in results and not on the totalCount or results properties themselves.The format of the fields parameter is a comma-separated list of properties that should be included, as inid,state. Using periods, sub-objects may also be specified, and fields of these objects may be
included as well. This is done with the same syntax for both single sub-objects and lists of sub-objects,
as in id,requirements.requiredNodeCountMinimum,blockReason.message.Example for a job query
Request
GET /rest/jobs?fields=id,flags,requirements.requiredProcessorCountMinimum,schedule.offset
Response
{
  "totalCount": 1,
  "resultCount": 1,
  "results": [  {
    "id": "job.1",
    "flags": ["RESTARTABLE"],
    "requirements": [{"requiredProcessorCountMinimum": 4}],
    "schedule": {"offset": 100}
  }]
}
Field Exclusion (exclude-fields)
The exclude-fields parameter is the opposite of the fields parameter. All fields will be included in the output except those that are specified. For list queries, the field exclusion acts on the objects in results and not on the totalCount or results properties themselves.The format of the exclude-fields parameter is a comma-separated list of properties that should be excluded from the output, as inid,state. Using periods, sub-objects may also be specified, and fields of these
objects may be excluded as well. This is done with the same syntax for both single sub-objects and lists of sub-objects,
as in id,requirements.requiredNodeCountMinimum,blockReason.message.Example
Suppose a query returns the following JSON:Request with No Field Exclusion
GET /objects
Response
{
  "id": "1",
  "listOfStrings":   [
    "string1",
    "string2"
  ],
  "listOfObjects": [  {
    "item1": "value1",
    "item2": "value2"
  }],
  "singleObject":   {
    "id": "obj1",
    "field1": "value1"
  }
}Request with Field Exclusion
GET /objects?exclude-fields=id,listOfObjects.item2,singleObject.field1,listOfStrings
Response
{
  "listOfObjects": [{"item1": "value1"}],
  "singleObject": {"id": "obj1"}
}
Sorting (sort)
Services, Service Templates, and Images support sorting based on MongoDB syntax by using the sort parameter. To sort in ascending order, specify a1 for the sorting field.
To sort in descending order, specify a -1. Objects can also be sorted on nested fields by using
dot notation to separate the sub-fields, such as field.subfield1.subfield2.Examples
To sort services in ascending order by account:http://localhost/mws/rest/services?sort={"account":1}http://localhost/mws/rest/services?sort={"account":-1}http://localhost/mws/rest/services?sort={"attributes.moab.job.resources.procs":-1}http://localhost/mws/rest/service-templates?sort={"name":1}http://localhost/mws/rest/service-templates?sort={"name":-1}http://localhost/mws/rest/service-templates?sort={"attributes.moab.job.template":1}2.3 Responses and Return Codes
Various HTTP responses and return codes are generated from MWS operations. These are documented below according to the operation that they are associated with.Listing and Showing Resources
For any successful list or show operation (GET), a 200 OK response code is always returned.
No additional headers beyond those typical of a HTTP response are given in the response.The body of this response consists of the results of the list or show operation. For a list operation,
the results are wrapped in metadata giving total and result counts. The result count represents
the number of resource records returned in the current request, and the total count represents the
number of all records available. These differ when querying or the max and offset parameters are
used. The following is an example of a list operation response:JSON List Response Body
{
	"resultCount":1,
	"totalCount":5,
	"results":[
		{
			"id":"Moab.1",
			…
		}
	]
}JSON Show Response Body
{
	"id":"Moab.1",
	…
}
Creating Resources
A successful creation (POST) of a resource has two potential response codes:
- If the resource was created immediately, a
201 Createdresponse code is returned. - If the resource is still being created, a
202 Acceptedresponse code is returned.
Location header is added to the response with the full URL which
can be used to get more information about the newly created resource or the task
associated with creating the resource (if a 202 is returned).Additionally, the body of the response will contain the unique identifier of the
newly created resource or the unique identifier for the task associated with creating
the resource (if a 202 is returned).For example, during creation or submission of a job, a 201 response code is returned
with the following response headers and body:Job Creation Response Headers
HTTP/1.1 201 Created
Server: Apache-Coyote/1.1
Location: /mws/rest/jobs/Moab.21
X-Moab-Status: Success
X-Moab-Code: 000
Content-Type: application/json;charset=utf-8
Content-Length: 16
Date: Wed, 21 Dec 2011 23:04:47 GMT
Job Creation Response Body
{"id":"Moab.21"}VM Creation Response Headers
HTTP/1.1 202 Accepted
Server: Apache-Coyote/1.1
Location: /mws/rest/jobs/vmcreate-1
X-Moab-Status: Success
X-Moab-Code: 000
Content-Type: application/json;charset=utf-8
Content-Length: 23
Date: Wed, 21 Dec 2011 23:12:50 GMT
VM Creation Response Body
{"jobId":"vmcreate-1"}Modifying Resources
For any successful resource modification operation (PUT), a 200 OK or
202 Accepted response code is returned. A 200 response code signifies
that the modification was immediately completed. No additional headers are
returned in this case. A 202 response code is used again to signify that the
modification is not yet complete and additional actions are taking place. In this case,
a Location header is also returned with the full URL of the resource describing
the additional actions.In the case of a 200 response code, the body of this response typically consists of
an object with a single messages property containing a list of statuses or results
of the modification(s). However, a few exceptions to this rule exist as documented in the
Resources section. In the case of a 202 response code, the format is
the same as for a 202 during a creation operation, in that the body consists of an object
with the unique identifier for the task associated with the additional action(s).For example, when modifying a job, several messages may be returned as follows with the
associated 200 response code.Job Modification Response Headers
HTTP/1.1 200 OK
Server: Apache-Coyote/1.1
X-Moab-Status: Success
X-Moab-Code: 000
X-Moab-Message:
Content-Type: application/json;charset=utf-8
Content-Length: …
Date: Thu, 22 Dec 2011 16:49:43 GMT
JSON Modify Response Body
{
	"messages":[
		"gevent processed",
		"variables successfully modified"
	]
}VM Modification Response Headers
HTTP/1.1 202 Accepted
Server: Apache-Coyote/1.1
Location: /mws/rest/jobs/vmmigrate-1
X-Moab-Status: Success
X-Moab-Code: 000
Content-Type: application/json;charset=utf-8
Content-Length: 22
Date: Wed, 21 Dec 2011 23:12:50 GMT
VM Modification Response Body
{"jobId":"vmmigrate-1"}Deleting Resources
For any successful resource deletion operation (DELETE), a 200 OK or
202 Accepted response code is returned. A 200 response code signifies
that the deletion was immediately completed. No additional headers are
returned in this case. A 202 response code is used again to signify that the
deletion is not yet complete and additional actions are taking place. In this case,
a Location header is also returned with the full URL of the resource describing
the additional actions.In the case of a 200 response code, the body of this response is empty. In the
case of a 202 response code, the format is the same as for a 202 during a
creation operation, in that the body consists of an object with the unique
identifier for the task associated with the additional action(s).For example, when deleting a job, a 200 response code is returned with an empty
body as shown below.Job Deletion Response
HTTP/1.1 200 OK
Server: Apache-Coyote/1.1
X-Moab-Status: Success
X-Moab-Code: 000
X-Moab-Message:
Content-Type: application/json;charset=utf-8
Content-Length: 0
Date: Thu, 22 Dec 2011 16:49:43 GMT
VM Deletion Response Headers
HTTP/1.1 202 Accepted
Server: Apache-Coyote/1.1
Location: /mws/rest/jobs/vmdestroy-1
X-Moab-Status: Success
X-Moab-Code: 000
Content-Type: application/json;charset=utf-8
Content-Length: 22
Date: Wed, 21 Dec 2011 23:12:50 GMT
VM Deletion Response Body
{"jobId":"vmdestroy-1"}Moab Response Headers
In addition to the typical HTTP headers and theLocation header described above,
several headers are returned if the operations directly interact with
Moab. These headers are described in the following table:| Name | Description |
|---|---|
| X-Moab-Status | One of Success, Warning, or Failure. Describes the overall status of the Moab request. |
| X-Moab-Code | A three digit code specifying the exact error encountered, used only in debugging. |
| X-Moab-Message | An optional message returned by Moab during the request. |
2.4 Error Messages
Below is an explanation of what error message format to expect when an HTTP status code other than 20x is returned. All error codes have a response code of 400 or greater.400 Bad Request
This response code is returned when the request itself is at fault, such as when trying to modify a resource with an emptyPUT request body or when
trying to create a new resource with invalid parameters. The response body is as
follows:{
"messages":[
"Message describing error",
"Possible prompt to take action"
]
}401 Unauthorized
This response code is returned when authentication credentials are not supplied or are invalid. The response body is as follows:{
"messages":[
"You are unauthorized to access this area"
]
}404 Not Found
This response code is returned when the request specifies a resource that does not exist. The response body is as follows:{
"messages":[
"The resource with id 'uniqueId' was not found"
]
}405 Method Not Allowed
This response code is returned when a resource does not support the specified HTTP method as an operation. The response body is as follows:{
"messages":[
"The specified HTTP method is not allowed for the requested resource"
]
}500 Internal Server Error
This indicates that there was an internal server error while performing the request, or that an operation failed in an unexpected manner. These are the most serious errors returned by MWS. If additional information is needed, the MWS log may contain further error data. The response body is as follows:{
"messages":[
"A problem occurred while processing the request",
"A message describing the error"
]
}2.5 Pre and Post-Processing Hooks
MWS provides functionality to intercept and modify data sent to and returned from web services for all available resources. This is done by creating hooks in Groovy files located in a sub-directory of theMWS_HOME directory (/opt/mws/hooks,
MOABHOMEDIR/hooks, or /opt/moab/hooks if MWS_HOME is not set).The full reference for available hooks and methods available to them can be found on the Hooks page in the reference guide.
Configuring Hooks
The directory of the hooks folder may be changed by providing a value formws.hooks.location in the configuration file.
If the directory starts with a path separator (ie /path/to/hooks), it will be treated as an absolute path. Otherwise, it
will be used relative to the location of the MWS home directory.For example, if the MWS home directory is set to /opt/mws, the hooks directory by default
would be in /opt/mws/hooks. Changing the mws.hooks.location property to myhooks would result in the hooks directory
being located at /opt/mws/myhooks. Due to the default location of the MWS home directory, the default directory
of the hooks directory is /opt/moab/hooks.On startup, if the hooks directory does not exist, it will be created with a simple README.txt file with instructions
on how to create hooks, the objects available, and the hooks available. If the folder or file is unable to be created,
a message will be printed on the log with the full location of a README file, copied into a temporary directory.Defining Hooks for a Resource
Hooks are defined for resources by creating groovy class files in the hooks directory (MWS_HOME/hooks by default).
Each groovy file must be named by the resource URL it is associated with and end in ".groovy". The following table shows
some possible hook files that may be created. Notice that the virtual machines hook file is abbreviated as vms, just
as the URL for virtual machines is /rest/vms. In all cases, the hook file names will match the URLs.| Resource | Hook Filename |
|---|---|
| Jobs | jobs.groovy |
| Nodes | nodes.groovy |
| Virtual Machines | vms.groovy |
| Pending Actions | pending-actions.groovy |
| url | url.groovy |
Complete Hook File
// Example before hook
def beforeList = {
	// Perform actions here
	// Return true to allow the API call to execute normally
	return true
}def beforeShow = {
	// Perform actions here
	// Render messages to the user with a 405 Method Not Allowed
	//	HTTP response code
	renderMessages("Custom message here", 405)
	// Return false to stop normal execution of the API call
	return false
}// Example after hook
def afterList = { o ->
	if (!isSuccess()) {
		// Handle error here
		return false
	}
	// Perform actions here
	return o
}before and after are different, each will be explained separately.Before Hooks
As shown above,before hooks require no arguments. They can directly act on several properties, objects, and methods
as described in the Hooks reference guide. The return value is one of the most important aspects of
a before hook. If it is false, a renderMessages, renderObject, renderList, render, or redirect method must
first be called. This signifies that the API call should be interrupted and the render or redirect action specified within
the hook is to be completed immediately.A return value of true signifies that the API call should continue normally. Parameters, session variables, request and
response variables may all be modified within a before hook.If no return value is explicitly given, the result of the last statement in theFor all methods available tobeforehook to be executed will be returned. This may cause unexpected behavior if the last statement resolves tofalse.
before hooks as well as specific examples, see the Hooks page in the reference guide.After Hooks
After hooks are always passed one argument: the object or list that is to be rendered as JSON. This may be modified as
desired, but note that the object or list value is either a
JSONArray or
JSONObject. Therefore, it may not be accessed and modified as a typical groovy Map.Unlike before hooks, after hooks should not call the render* methods directly. This method will automatically be called on the
resulting object or list returned. The redirect and render methods should also not be called at this point. Instead, if a custom object
or list is desired to be used, the serializeObject and serializeList methods are available to create suitable results to return.The return value of an after hook may be one of two possibilities:
- The potentially modified object or list passed as the first argument to the hook. In this case, this value will override the output object or list unless it is null.
- Null or false. In this case, the original, unmodified object or list will be used in the output.
The return value of theFor all methods available toafterhook, if not null or false, must be the modified object passed into the hook or an object or list created with theserialize*methods.
after hooks as well as specific examples, see the Hooks page in the reference guide.Error Handling
After hooks, unlike the before hooks, have the possibility of handling errors encountered during the course of the request.
Handling errors is as simple as adding a one-line check to the hook as shown above or in the following code:if (!isSuccess()) { // Handle error return false }
after hook contain at least these lines of code to prevent confusion on what the input object or list represents
or should look like.The isSuccess() function is true if and only if the HTTP response code is 400 or higher, such as a 404 Not Found, 400 Bad Request, or
500 Internal Server Error and the cause of the error state was not in the associated before hook. In other words, objects and lists
rendered in the before hook with any HTTP response code will never run the associated after hook.When handling errors, the passed in object will always contain a messages property containing a list of Strings describing
the error(s) encountered.Defining Common Hooks
Sometimes it is beneficial to create hooks which are executed for all calls of a certain type, such as abeforeList hook that is
executed during the course of listing any resource. These are possible using an all.groovy file. The format of this file
is exactly the same as other hook files. The order of execution is as follows:
Beforecommon hook executedBeforeresource-specific hook executed- Normal API call executed
Afterresource-specific hook executedAftercommon hook executed
2.6 API Security
MWS uses Basic Authentication for all REST API requests. This means that a username and password must be provided for each call to resources. See the "Client Connections to MWS" section in the Security section of the user guide for instructions on how to configure the username and password.To use Basic Authentication, each client request must contain a header that looks like this:Authorization: Basic YWRhcHRpdmU6YzNVU3R1bkU=
Basic is the base64 encoding of
username : password . In the example above, YWRhcHRpdmU6YzNVU3R1bkU=
is the base64 encoding of adaptive:c3UStunE. See section 2 of
RFC 2617 for more details.The username and password in the Basic Authentication header are encoded but not encrypted. Therefore, it is strongly recommended that MWS be run behind a proxy (like Apache) with SSL enabled. Another approach would be to enable SSL on the servlet container on which MWS is deployed.
3 Resources
The sections below show the MWS resources and the HTTP methods defined on them. The prefix for these resources depends on how themws.war file is deployed. A typical prefix would be
http://localhost:8080/mws. Using this example, one absolute resource
URI would be http://localhost:8080/mws/rest/jobs.
3.1 Access Control Lists
This section describes behavior of the ACL Rules (Access Control List Rules) object in Moab Web Services. It contains the URLs, payloads, and responses delivered to and from Moab Web Services.The ACL API contains the type and description of all fields in the ACL Rules object. It also contains details regarding which fields are valid during PUT and POST actions.
Supported Methods
ACLs are not directly manipulated through a single URL, but with sub-URLs of the other objects such as Virtual Containers and Reservations.
| Resource | GET | PUT | POST | DELETE |
|---|---|---|---|---|
| /rest/reservations/rsvId/acl-rules/aclId | Create or Update ACLs | Delete ACL | ||
| /rest/vcs/vcId/acl-rules/aclId | Create or Update ACLs | Delete ACL |
3.1.1 Getting ACLs
Although ACL Rules cannot be retrieved directly using the GET method on any of theacl-rules resources, ACL Rules are attached to supported
objects when querying for them. Each supported object contains a field
named aclRules, which is a collection of the ACL Rules defined on
that object.Supported Objects
The following is a list of objects that will return ACL Rules when queried:3.1.2 Creating or Updating ACLs
The HTTP PUT method is used to create or update ACL Rules. The payload can contain one or more ACL Rules. If an ACL Rule with the sametype
and value exists, then it will be overwritten.Quick Reference
PUT http://localhost/mws/rest/reservations/<rsvId>/acl-rules
PUT http://localhost/mws/rest/vcs/<vcId>/acl-rules
3.1.2.1 Create or Update ACL
URLs and Parameters
PUT http://localhost/mws/rest/reservations/<objectId>/acl-rules
PUT http://localhost/mws/rest/vcs/<objectId>/acl-rules
| Parameter | Required | Type | Valid Values | Description |
|---|---|---|---|---|
| objectId | Yes | String | - | The unique identifier of the object. |
Payload
The payload below shows all the fields that are available for the PUT method, along with some sample values.JSON Payload
{"aclRules": [{
  "affinity": "POSITIVE",
  "comparator": "LEXIGRAPHIC_EQUAL",
  "type": "USER",
  "value": "ted"
}]}
Sample Response
This message may not match the message returned from Moab exactly, but is given as an example of the structure of the response.
JSON Response
{"messages":["Virtual container 'vc1' successfully modified"]}Samples
Create or update multiple ACLs on a single object:PUT http://localhost/mws/rest/reservations/system.21/acl-rules
{"aclRules": [
    {
    "affinity": "POSITIVE",
    "comparator": "LESS_THAN_OR_EQUAL",
    "type": "DURATION",
    "value": "3600"
  },
    {
    "affinity": "POSITIVE",
    "comparator": "LEXIGRAPHIC_EQUAL",
    "type": "USER",
    "value": "ted"
  }
]}
Restrictions
- ACL Rules cannot be added to or updated on Standing Reservations.
- The affinity and comparator fields are ignored for Virtual Containers.
3.1.3 Deleting ACLs
The HTTP DELETE method is used to remove ACL Rules.Quick Reference
ACL Rules cannot be removed from Standing Reservations.
DELETE http://localhost/mws/rest/reservations/<rsvId>/acl-rules/<aclId>
DELETE http://localhost/mws/rest/vcs/<vcId>/acl-rules/<aclId>
3.1.3.1 Delete ACL
URLs and Parameters
DELETE http://localhost/mws/rest/reservations/<objectId>/acl-rules/<aclId>
DELETE http://localhost/mws/rest/vcs/<objectId>/acl-rules/<aclId>
| Parameter | Required | Type | Valid Values | Description |
|---|---|---|---|---|
| objectId | Yes | String | - | The unique identifier of the object from which to remove the ACL Rule. |
| aclId | Yes | String | - | A string representing the ACL Rule, with the format type:value. |
Sample Response
This message may not match the message returned from Moab exactly, but is given as an example of the structure of the response.
JSON Response
{"messages":["Successfully modified virtual container 'vc1'"]}Restrictions
- ACL Rules cannot be removed from Standing Reservations.
3.2 Diagnostics
This section describes additional REST calls that are available for performing diagnostics on Moab Web Services.Supported Methods
| Resource | GET | PUT | POST | DELETE |
|---|---|---|---|---|
| /rest/diag/about | Get version information |
3.2.1 Version and Build Information
The HTTP GET method is used to retrieve version and build information.Quick Reference
GET http://localhost/mws/rest/diag/about
URLs and Parameters
GET http://localhost/mws/rest/diag/about
Sample Response
The response contains the application version, build number, build date, and revision.{
"version":"7.0",
"build":"100",
"buildDate":"2012-01-01_16-00-00",
"revision":"1000"
}3.3 Images
This section describes behavior of the Image resource in Moab Web Services. An image resource is used to track the different types of operating systems and hypervisors available in the data center. It also tracks which virtual machines are available on the hypervisors. This section describes the URLs, payloads, and responses delivered to and from Moab Web Services.The Image API contains the type and description of all fields in the Image object. It also contains details regarding which fields are valid during PUT and POST actions.
Supported Methods
| Resource | GET | PUT | POST | DELETE |
|---|---|---|---|---|
| /rest/images | Get All Images | Create Image | ||
| /rest/images/id | Get Specified Image | Modify Image | Delete Image | |
| /rest/images/name | Get Specified Image | Modify Image | Delete Image |
3.3.1 Getting Images
The HTTP GET method is used to retrieve Image information. You can query all objects or a single object.Quick Reference
GET http://localhost/mws/rest/images/<id>
GET http://localhost/mws/rest/images/<name>
GET http://localhost/mws/rest/images[?query={"field":"value"}&sort={"field":<1|-1>}]
3.3.1.1 Get All Images
URLs and Parameters
GET http://localhost/mws/rest/images[?query={"field":"value"}&sort={"field":<1|-1>}]| Parameter | Required | Valid Values | Description | Example |
|---|---|---|---|---|
| query | No | JSON | Queries for specific results. | query={"type":"stateful","osType":"linux"} |
| sort | No | JSON | Sort the results. Use 1 for ascending and -1 for descending. | sort={"name":-1} |
Sample Response
GET http://localhost/mws/rest/images?fields=id,name
{
  "totalCount": 1,
  "resultCount": 1,
  "results": [  {
    "id": "4fa197e68ca30fc605dd1cf0",
    "name": "centos5-stateful"
  }]
}
Sorting and Querying
See the sorting and querying sections of Global URL Parameters3.3.1.2 Get Single Image
URLs and Parameters
GET http://localhost/mws/rest/images/<id>
GET http://localhost/mws/rest/images/<name>
| Parameter | Required | Type | Valid Values | Description |
|---|---|---|---|---|
| id | Yes | String | - | The unique identifier of the Image. |
| name | Yes | String | - | The name of the Image. |
You must specify either id or name, but you do not have to specify both.
Sample Response
GET http://localhost/mws/rest/images/centos5-compute-stateful
{
  "active":true,
  "extensions":{
    "xcat":{
      "os":"centos",
      "architecture":"x86_64",
      "profile":"compute"
    }
  },
  "features":[],
  "hypervisor":false,
  "id":"4fa197e68ca30fc605dd1cf0",
  "name":"centos5-compute-stateful",
  "osType":"linux",
  "supportsPhysicalMachine":false,
  "supportsVirtualMachine":true,
  "templateName":"",
  "type":"stateful",
  "version":0,
  "virtualizedImages":[]
}
The version field contains the current version of the database entry and does not
reflect the version of the operating system. See Modify Image for more
information.
3.3.2 Creating Images
The HTTP POST method is used to submit Images.Quick Reference
POST http://localhost/mws/rest/images
3.3.2.1 Create Single Image
URLs and Parameters
POST http://localhost/mws/rest/images
Request Body
Three fields are required to submit an image: name, hypervisor, and osType. Each image must also support provisioning to either a physical machine or a virtual machine by using the supportsPhysicalMachine or supportsVirtualMachine fields.The name field must contain only letters, digits, periods, dashes, and underscores.The array of virtualized images are themselves objects that contain image IDs or names. For more information on available fields and types, see the Image API.The following is an example of the most basic image that can be created:
POST http://localhost/mws/rest/images
{
  "name": "centos5-stateful",
  "osType": "linux",
  "hypervisor": false,
  "supportsVirtualMachine":true
}xcat and must contain certain fields.
These extension keys are documented in the Image API. See the following
examples of creating images with xCAT-specific provisioning information below.Sample Response
If the request was successful, the response body is the new image that was created exactly as shown in Get Single Image. On failure, the response is an error message.Samples
The virtualizedImages field only accepts input when the image is a hypervisor and expects an array of image IDs or names, as shown in the following example:Example payload of hypervisor with 2 vms
{
  "hypervisor":true,
  "name":"esx5-stateful",
  "osType":"linux",
  "supportsPhysicalMachine":true,
  "type":"stateful",
  "virtualizedImages":   [
    {"id": "4fa197e68ca30fc605dd1cf0"},
    {"name": "centos5-stateful"}
  ]
}linkedclone in order to set the templateName field.)VM Utilizing a Cloned Template
{
  "active": true,
  "hypervisor": false,
  "name": "centos5-compute-stateful",
  "osType": "linux",
  "type": "linkedclone",
  "supportsVirtualMachine":true,
  "templateName":"centos5-compute"
}xCAT Virtual Machine Image
{
  "active": true,
  "features": [],
  "hypervisor": false,
  "name": "centos5-compute-stateful",
  "osType": "linux",
  "type": "stateful",
  "supportsVirtualMachine":true,
  "extensions": {
     "xcat": {
        "os": "centos",
        "architecture": "x86_64",
        "profile": "compute"
     }
  }
}
xCAT Hypervisor Image
{
  "active": true,
  "features": [],
  "hypervisor": true,
  "name": "esxi5-base-stateless",
  "osType": "linux",
  "virtualizedImages":   [
    {"name": "centos5-compute-stateless"}
  ],
  "type": "stateless",
  "supportsPhysicalMachine":true,
  "extensions": {
     "xcat": {
        "os": "esxi5",
        "architecture": "x86_64",
        "profile": "base",
        "hvType": "esx",
        "hvGroupName": "esx5hv",
        "vmGroupName": "esx5vm"
     }
  }
}
3.3.3 Modifying Images
The HTTP PUT method is used to modify Images.Quick Reference
PUT http://localhost/mws/rest/images/<id>
PUT http://localhost/mws/rest/images/<name>
3.3.3.1 Modify Single Image
URLs and Parameters
PUT http://localhost/mws/rest/image/<id>
PUT http://localhost/mws/rest/image/<name>
| Parameter | Required | Type | Valid Values | Description |
|---|---|---|---|---|
| id | Yes | String | - | The unique identifier of the Image. |
| name | Yes | String | - | The name of the Image. |
- You must specify either id or name, but you do not have to specify both.
- The name field must contain only letters, digits, periods, dashes, and underscores.
Example Request
PUT http://locahost/mws/rest/image/centos5-stateful
{
  "name": "centos5-stateful",
  "type": "stateful",
  "hypervisor": false,
  "osType": "linux",
  "virtualizedImages": []
}
The version field contains the current version of the database entry and does not reflect the version of the operating system. This field cannot be updated directly. However, if version is included in the modify request, it will be used to verify that another client did not update the object in between the time the data was retrieved and the modify request was delivered.
Sample Response
If the request was successful, the response body is the modified image as shown in Get Single Image. On failure, the response is an error message.3.3.4 Deleting Images
The HTTP DELETE method is used to delete Images.Quick Reference
DELETE http://localhost/mws/rest/images/<id>
DELETE http://localhost/mws/rest/images/<name>
3.3.4.1 Delete Single Image
URLs and Parameters
DELETE http://localhost/mws/rest/image/<id>
DELETE http://localhost/mws/rest/image/<name>
| Parameter | Required | Type | Valid Values | Description |
|---|---|---|---|---|
| id | Yes | String | - | The unique identifier of the Image. |
| name | Yes | String | - | The name of the Image. |
Only one of id or name are required.
Sample Response
JSON Response
{}3.4 Jobs
This section describes behavior of the Job object in Moab Web Services. It contains the URLs, payloads, and responses delivered to and from Moab Web Services.The Job API contains the type and description of all fields in the Job object. It also contains details regarding which fields are valid during PUT and POST actions.
Supported Methods
| Resource | GET | PUT | POST | DELETE |
|---|---|---|---|---|
| /rest/jobs | Get all jobs | Submit new job | ||
| /rest/jobs/active | Get all active jobs | |||
| /rest/jobs/complete | Get all complete jobs | |||
| /rest/jobs/id | Get specified job | Modify job | Cancel job | |
| /rest/jobs/active/id | Get specified active job | |||
| /rest/jobs/complete/id | Get specified complete job |
3.4.1 Getting Job Information
The HTTP GET method is used to retrieve Job information. Queries for all objects and a single object are available.Quick Reference
GET http://localhost/mws/rest/jobs/<id>3.4.1.1 Get All Jobs
URLs and Parameters
GET http://localhost/mws/rest/jobs
Sample Response
JSON Response
{
  "totalCount": 1,
  "resultCount": 1,
  "results": [  {
    "id": "...",
	…
  }]
}
Samples
GET http://localhost/mws/rest/jobs?fields=id,state,flags
{
  "totalCount": 3,
  "resultCount": 3,
  "results":   [
        {
      "id": "job.1",
      "state": "IDLE",
      "flags": ["PREEMPTABLE"]
    },
        {
      "id": "job.2",
      "state": "RUNNING",
      "flags": []
    },
        {
      "id": "job.3",
      "state": "REMOVED",
      "flags":       [
        "PREEMPTABLE",
        "RESTARTABLE"
      ]
    }
  ]
}
Known Issues
- Some jobs are not returned if
DisplayFlags UseBlockingis set in themoab.cfgfile.
3.4.1.2 Get All Active Jobs
URLs and Parameters
GET http://localhost/mws/rest/jobs/active
Sample Response
Same as Get All.3.4.1.3 Get All Complete Jobs
URLs and Parameters
GET http://localhost/mws/rest/jobs/complete
Sample Response
Same as Get All.Known Issues
This query can take a long time and slow down the Moab Workload Manager, especially on systems with many completed jobs. Avoid this query if possible.3.4.1.4 Get Single Job
URLs and Parameters
GET http://localhost/mws/rest/jobs/<id>| Parameter | Required | Type | Valid Values | Description |
|---|---|---|---|---|
| id | Yes | String | - | The unique identifier of the object. |
Sample Response
JSON Response
{
  "account": "account",
  "activeDuration": 150,
  "allocatedNodes": [{"id": "node01"}],
  "allocatedVMs": [{"id": "vm1"}],
  "blockReason":   {
    "message": "Check valid user",
    "type": "BADUSER"
  },
  "bypass": 5,
  "commandFile": "/tmp/test.sh",
  "commandLineArguments": "-x -v",
  "completionCode": 0,
  "completionDate": "2011-11-08 13:18:47 MST",
  "dedicatedProcessorSeconds": 1.5,
  "destinationRmJobId": "1000011",
  "earliestStartDate": "2011-11-08 13:18:47 MST",
  "earliestStartDateRequested": "2011-11-08 13:18:47 MST",
  "effectivePartitionAccessList": ["ALL"],
  "effectiveQueueDuration": 600,
  "emailNotifyTypes": ["END"],
  "emailNotifyUsers": ["[email protected]"],
  "environmentVariables": {"var1": "val1"},
  "expectedState": "IDLE",
  "flags": ["RESTARTABLE"],
  "genericAttributes": ["attr1"],
  "group": "group",
  "holds": ["USER"],
  "hosts": ["host1"],
  "id": "Moab.1",
  "initialWorkingDirectory": "/tmp",
  "latestCompletedDateRequested": "2011-11-08 13:18:47 MST",
  "masterHost": "masterHost",
  "memoryRequested": 1024,
  "messages": [  {
    "creationTime": null,
    "expireTime": null,
    "index": 0,
    "message": "Message one",
    "messageCount": 0,
    "author": "moab",
    "priority": 0
  }],
  "name": "myJob",
  "os": "linux",
  "partitionAccessList": ["ALL"],
  "qos": "QOS1",
  "qosRequested": "QOS1",
  "queue": "BATCH",
  "queueStatus": "ACTIVE",
  "durationRequested": 300,
  "requirements": [  {
    "allocatedNodes": [{"id": "node01"}],
    "allocatedPartition": "",
    "genericResources":     {
      "resource1": 10,
      "resource2": 30
    },
    "nodeAccessPolicy": null,
    "preferredNodeFeatures": [],
    "requiredArchitecture": "",
    "requiredClass": "",
    "requiredDiskPerTask": 0,
    "requiredMemoryPerTask": 0,
    "requiredNetwork": "",
    "requiredNodeCountMinimum": 0,
    "requiredNodeDisk": 0,
    "requiredNodeFeatures": [],
    "requiredNodeMemory": 0,
    "requiredNodeProcessors": 0,
    "requiredNodeSwap": 0,
    "requiredPartition": "",
    "requiredProcessorCountMinimum": 4,
    "requiredProcessorsPerTask": 0,
    "requiredSwapPerTask": 0,
    "tasksPerNode": 0
  }],
  "reservationRequested": "rsv.1",
  "reservationStartDate": "2011-11-08 13:18:47 MST",
  "rmExtension": "x=PROC=4",
  "rmName": "torque",
  "rmStandardErrorFilePath": "/tmp/error.out",
  "rmStandardInputFilePath": "/tmp/input.in",
  "rmStandardOutputFilePath": "/tmp/output.out",
  "runPriority": 5,
  "sourceRmJobId": "1000011",
  "standardErrorFilePath": "/tmp/job.error.out",
  "standardOutputFilePath": "/tmp/job.output.out",
  "startCount": 1,
  "startDate": "2011-11-08 13:18:47 MST",
  "startPriority": 2,
  "state": "COMPLETED",
  "submitDate": "2011-11-08 13:18:47 MST",
  "submitHost": "admin-node",
  "suspendDuration": 60,
  "systemPriority": 6,
  "userPriority": 5,
  "user": "saadmin",
  "variables": {"var1": "val1"},
  "virtualContainers": [{"id":"vc1"}],
  "vmUsagePolicy": "CREATEVM"
}
3.4.1.5 Get Single Active Job
URLs and Parameters
GET http://localhost/mws/rest/jobs/active/<id>| Parameter | Required | Type | Valid Values | Description |
|---|---|---|---|---|
| id | Yes | String | - | The unique identifier of the object. |
Sample Response
Same as Get Single.3.4.1.6 Get Single Active Job
URLs and Parameters
GET http://localhost/mws/rest/jobs/complete/<id>| Parameter | Required | Type | Valid Values | Description |
|---|---|---|---|---|
| id | Yes | String | - | The unique identifier of the object. |
Sample Response
Same as Get Single.3.4.2 Submitting Jobs
The HTTP POST method is used to submit Jobs.Quick Reference
POST http://localhost/mws/rest/jobs[?proxy-user=<username>]Restrictions
- The user given in
usermust have read access to the file given incommandFile. - No more than one virtual container can be specified in the request. The virtual container must already exist.
- The
userandgroupproperties are used to submit a job as the specified user belonging to the specified group. - Job
variableshave the following restrictions: variablenames cannot contain equals (=), semicolon (;), colon (:), plus (+), question mark (?), caret (^), backslash (\), or white space.variablevalues cannot contain semicolon (;), colon (:), plus (+), or caret (^).- When submitting jobs, the only supported hold type is
USER. - The proxy-user parameter is ignored unless you set
ENABLEPROXY=TRUEin themoab.cfgfile. Example:
ADMINCFG[1] USERS=root,ted ENABLEPROXY=TRUE
3.4.2.1 Submit Job with Host List
URLs and Parameters
POST http://localhost/mws/rest/jobs[?proxy-user=<username>]| Parameter | Required | Type | Valid Values | Description |
|---|---|---|---|---|
| proxy-user | No | String | - | Perform the action as this user. |
Payload
To submit a job with a specified host list, only two fields are required:commandFile and hosts.The payload below shows all the fields that are available during job submission.JSON Payload (specified host list)
{
  "account": "project name",
  "commandFile": "/tmp/myscript.sh",
  "commandLineArguments": "-x",
  "earliestStartDateRequested": "2011-09-26 16:28:20 MDT",
  "emailNotifyTypes": ["END"],
  "emailNotifyUsers": ["[email protected]"],
  "environmentRequested": true,
  "environmentVariables":   {
    "SHELL": "/bin/bash",
    "LC_ALL": "en_US.utf8"
  },
  "flags":   [
    "SUSPENDABLE",
    "BESTEFFORT"
  ],
  "group": "wheel",
  "holds": ["USER"],
  "hosts":   [
    "node2",
    "node3"
  ],
  "initialWorkingDirectory": "/tmp",
  "name": "job name",
  "os": "Ubuntu",
  "qosRequested": "highprio",
  "queue": "priority",
  "durationRequested": 3600,
  "requirements": [  {
    "genericResources":     {
      "resource1": 10,
      "resource2": 30
    },
    "nodeAccessPolicy": "SHARED",
    "requiredArchitecture": "x86_64",
    "requiredDiskPerTask": 500,
    "requiredMemoryPerTask": 1024,
    "requiredNodeFeatures": ["bluray"],
    "requiredPartition": "cs",
    "requiredProcessorsPerTask": 3,
    "requiredSwapPerTask": 600,
    "tasksPerNode": 8
  }],
  "reservationRequested": "grid.3",
  "standardErrorFilePath": "/home/jacob/err",
  "standardOutputFilePath": "/home/jacob/out",
  "submitHost": "admin-node",
  "templateList":   [
    "template1",
    "template2"
  ],
  "user": "jacob",
  "userPriority": 25,
  "variables":   {
    "var1": "val1",
    "var2": "val2"
  },
  "virtualContainers": [{"id": "vc1"}],
  "vmUsagePolicy": "REQUIREPM"
}
Sample Response
The response of this task is one of three possibilities:- An object with a single
messagesproperty containing a list of error messages on failure
{"messages":["Could not create job - invalid requirements"]}- An object with an
idproperty containing the ID of the newly created job
{"id":"Moab.1"}- An object with an
idproperty and avirtualContainerslist containing the ID of the newly created virtual container
{"id":"Moab.1","virtualContainers":[{"id":"vc1"}]}The virtual container will only be reported when a new virtual container has been created by Moab for the job.
3.4.2.2 Submit Job with Node Count
URLs and Parameters
POST http://localhost/mws/rest/jobs[?proxy-user=<username>]| Parameter | Required | Type | Valid Values | Description |
|---|---|---|---|---|
| proxy-user | No | String | - | Perform the action as this user. |
Payload
To submit a job with a specified node count, only two fields are required:commandFile and requiredProcessorCountMinimum (in the requirements array).The payload below shows all the fields that are available during job submission.JSON Payload (specified node count)
{
  "account": "project name",
  "commandFile": "/tmp/myscript.sh",
  "commandLineArguments": "-x",
  "earliestStartDateRequested": "2011-09-26 16:28:20 MDT",
  "emailNotifyTypes": ["END"],
  "emailNotifyUsers": ["[email protected]"],
  "environmentRequested": true,
  "environmentVariables":   {
    "SHELL": "/bin/bash",
    "LC_ALL": "en_US.utf8"
  },
  "flags":   [
    "SUSPENDABLE",
    "BESTEFFORT"
  ],
  "group": "wheel",
  "holds": ["USER"],
  "initialWorkingDirectory": "/tmp",
  "name": "job name",
  "os": "Ubuntu",
  "qosRequested": "highprio",
  "queue": "priority",
  "durationRequested": 3600,
  "requirements": [  {
    "genericResources":     {
      "resource1": 10,
      "resource2": 30
    },
    "nodeAccessPolicy": "SHARED",
    "requiredArchitecture": "x86_64",
    "requiredDiskPerTask": 500,
    "requiredMemoryPerTask": 1024,
    "requiredNodeFeatures": ["bluray"],
    "requiredPartition": "cs",
    "requiredProcessorCountMinimum": 4,
    "requiredProcessorsPerTask": 3,
    "requiredSwapPerTask": 600,
    "tasksPerNode": 8
  }],
  "reservationRequested": "grid.3",
  "standardErrorFilePath": "/home/jacob/err",
  "standardOutputFilePath": "/home/jacob/out",
  "submitHost": "admin-node",
  "templateList":   [
    "template1",
    "template2"
  ],
  "user": "jacob",
  "userPriority": 25,
  "variables":   {
    "var1": "val1",
    "var2": "val2"
  },
  "virtualContainers": [{"id": "vc1"}],
  "vmUsagePolicy": "REQUIREPM"
}
Sample Response
The response of this task is the same as submitting a job with a host list.3.4.2.3 Examples of Job Submission
This section includes some sample job submission requests.Submit job to run on node2 and node3
POST http://localhost/mws/rest/jobs
{
  "commandFile": "/tmp/test.sh",
  "group": "adaptive",
  "hosts":   [ "node2", "node3" ]
  "initialWorkingDirectory": "/tmp",
  "user": "adaptive",
}
Submit job that requires 20 processors
POST http://localhost/mws/rest/jobs
{
  "commandFile": "/tmp/test.sh",
  "group": "adaptive",
  "initialWorkingDirectory": "/tmp",
  "requirements": [{"requiredProcessorCountMinimum": "20"}]
  "user": "adaptive",
}
Submit job to run after a certain time
POST http://localhost/mws/rest/jobs
{
  "commandFile": "/tmp/test.sh",
  "earliestStartDateRequested": "2012-08-26 16:28:20 MDT",
  "group": "adaptive",
  "initialWorkingDirectory": "/tmp",
  "requirements": [{"requiredProcessorCountMinimum": "20"}]
  "user": "adaptive",
}
Submit job based on msub example
Given this msub command:
msub -l nodes=3:ppn=2,walltime=1:00:00,pmem=100 script2.pbs.cmd
POST http://localhost/mws/rest/jobs
{
  "user": "adaptive",
  "group": "adaptive",
  "initialWorkingDirectory": "/home/adaptive",
  "commandFile": "/home/adaptive/script2.pbs.cmd",
  "requirements": [  {
    "requiredProcessorCountMinimum": 6,
    "tasksPerNode": 2,
    "requiredMemoryPerTask": 100
  }],
  "durationRequested": 3600
}
- To emulate what
msubdoes, makecommandFilean absolute path, and adduser,group, andinitialWorkingDirectory.- As shown above,
nodes=3:ppn=2is equivalent to settingrequiredProcessorCountMinimumto 6 andtasksPerNodeto 2.
3.4.3 Modifying Jobs
The HTTP PUT method is used to modify Jobs.Quick Reference
PUT http://localhost/mws/rest/jobs/<id>[/<modifyAction>][?proxy-user=<username>]
Restrictions
- The proxy-user parameter is ignored unless you set
ENABLEPROXY=TRUEin themoab.cfgfile. Example:
ADMINCFG[1] USERS=root,ted ENABLEPROXY=TRUE
3.4.3.1 Modify Job Attributes
URLs and Parameters
PUT http://localhost/mws/rest/jobs/<id>[?proxy-user=<username>]
| Parameter | Required | Type | Valid Values | Description |
|---|---|---|---|---|
| id | Yes | String | - | The unique identifier of the object. |
| proxy-user | No | String | - | Perform the action as this user. |
Payload
JSON Payload
{
  "account": "engineering",
  "earliestStartDateRequested": "2011-08-24 15:02:00",
  "flags":   [
    "RESTARTABLE",
    "SUSPENDABLE"
  ],
  "holds": ["USER"],
  "messages":   [
    {"message": "First message"},
    {"message": "Second message"}
  ],
  "name": "EngineeringJob",
  "qosRequested": "NORMAL",
  "queue": "BATCH",
  "durationRequested": 600,
  "requirements": [{"requiredPartition": "msm"}],
  "reservationRequested": "rsv.1",
  "trigger": "triggerString",
  "userPriority": 10,
  "variables":   {
    "var1": "val1",
    "var2": "val2"
  }
}
Sample Response
These messages may not match the messages returned from Moab exactly, but are given as an example of the structure of the response.
Not all messages are shown for the above payload.
JSON Response
{
  "messages":[
    "Account modified successfully",
    "Messages modified successfully",
    "Variables modified successfully"
  ]
}
Restrictions
- Old messages are not removed from jobs; only new messages are added.
- Job
variableshave the restrictions documented in Submitting Jobs
3.4.3.2 Perform Actions on Job
URLs and Parameters
PUT http://localhost/mws/rest/jobs/<id>/<modifyAction>[?proxy-user=<username>]
| Parameter | Required | Type | Valid Values | Description |
|---|---|---|---|---|
| id | Yes | String | - | The unique identifier of the object. |
| modifyAction | Yes | String | cancel | Attempts to cancel the job. |
| checkpoint | Attempts to checkpoint the job. Note that the OS must support checkpointing for this to work. | |||
| execute | Executes the job if possible. | |||
| hold | Attempts to hold the job using the holds set in the payload. | |||
| requeue | Attempts to requeue the job. | |||
| resume | Attemps to resume the job. | |||
| suspend | Attempts to suspend the job. | |||
| unhold | Attempts to release the holds set in the payload. | |||
| proxy-user | No | String | - | Perform the action as this user. |
Performing a cancel function on a job is equivalent to deleting a job.See Global URL Parameters for available URL parameters.
Payload
Payloads are only required for holding or unholding jobs. All other actions do not require payloads of any kind.JSON Payload to Add Holds to a Job
{
  "holds": ["USER"]
}
JSON Payload to Remove Holds from a Job
{
  "holds": ["USER"]
}
If no holds are specified when unholding a job, all holds will be removed. This is equivalent to specifyingholdsas a list with a single element ofALL.
Sample Response
This message may not match the message returned from Moab exactly, but is given as an example of the structure of the response.
JSON Response
{
  "messages":[
    "Job modified successfully"
  ]
}
3.4.4 Deleting (Canceling) Jobs
The HTTP DELETE method is used to cancel Jobs.Quick Reference
DELETE http://localhost/mws/rest/jobs/<id>[?proxy-user=<username>]
Restrictions
- The proxy-user parameter is ignored unless you set
ENABLEPROXY=TRUEin themoab.cfgfile. Example:
ADMINCFG[1] USERS=root,ted ENABLEPROXY=TRUE
3.4.4.1 Cancel Job
URLs and Parameters
DELETE http://localhost/mws/rest/jobs/<id>[?proxy-user=<username>]
| Parameter | Required | Type | Valid Values | Description |
|---|---|---|---|---|
| id | Yes | String | - | The unique identifier of the object. |
| proxy-user | No | String | - | Perform the action as this user. |
Sample Response
JSON Response for successful DELETE
{}
Additional information about the DELETE can be found in the HTTP response header X-MWS-Message.
3.5 Job Templates
This section describes behavior of the Job Template object in Moab Web Services. It contains the URLs, payloads, and responses delivered to and from Moab Web Services.The Job Template API contains the type and description of all fields in the Job Template object. It also contains details regarding which fields are valid during PUT and POST actions.
Supported Methods
| Resource | GET | PUT | POST | DELETE |
|---|---|---|---|---|
| /rest/job-templates | Get all job templates | |||
| /rest/job-templates/id | Get specified job template |
3.5.1 Getting Job Templates
The HTTP GET method is used to retrieve Job Template information. Queries for all objects and a single object are available.Quick Reference
GET http://localhost/mws/rest/job-templates/<id>3.5.1.1 Get All Job Templates
URLs and Parameters
GET http://localhost/mws/rest/job-templates
Sample Response
GET http://localhost/mws/rest/job-templates?fields=id
{
  "totalCount": 14,
  "resultCount": 14,
  "results":   [
    {"id": "DEFAULT"},
    {"id": "genericVM"},
    {"id": "genericVM-setup"},
    {"id": "genericVM-destroy"},
    {"id": "genericVM-migrate"},
    {"id": "genericPM"},
    {"id": "genericPM-setup"},
    {"id": "genericPM-destroy"},
    {"id": "OSStorage"},
    {"id": "OSStorage-setup"},
    {"id": "OSStorage-destroy"},
    {"id": "extraStorage"},
    {"id": "extraStorage-setup"},
    {"id": "extraStorage-destroy"}
  ]
}
3.5.1.2 Get Single Job Template
URLs and Parameters
GET http://localhost/mws/rest/job-templates/<id>| Parameter | Required | Type | Valid Values | Description |
|---|---|---|---|---|
| id | Yes | String | - | The unique identifier of the object. |
Sample Response
JSON Response
{
  "account": "account",
  "args": "arg1 arg2",
  "commandFile": "/tmp/script",
  "description": "description",
  "genericSystemJob": true,
  "id": "genericVM",
  "inheritResources": false,
  "jobDependencies": [  {
    "name": "genericVM-setup",
    "type": "JOBSUCCESSFULCOMPLETE"
  }],
  "jobFlags": ["VMTRACKING"],
  "jobTemplateFlags": ["SELECT"],
  "jobTemplateRequirements": [  {
    "architecture": "x86_64",
    "diskRequirement": 500,
    "genericResources": {"tape": 3},
    "nodeAccessPolicy": "SINGLEJOB",
    "operatingSystem": "Ubuntu 10.04.3",
    "requiredDiskPerTask": 200,
    "requiredFeatures": ["dvd"],
    "requiredMemoryPerTask": 1024,
    "requiredProcessorsPerTask": 2,
    "requiredSwapPerTask": 512,
    "taskCount": 4
  }],
  "priority": 20,
  "qos": "qos",
  "queue": "queue",
  "durationRequested": 600,
  "select": true,
  "trigger": null,
  "version": 0,
  "vmUsagePolicy": "REQUIREPM"
}
3.6 Nodes
This section describes behavior of the Node object in Moab Web Services. It contains the URLs, payloads, and responses delivered to and from Moab Web Services.The Node API contains the type and description of all fields in the Node object. It also contains details regarding which fields are valid during PUT and POST actions.
Supported Methods
| Resource | GET | PUT | POST | DELETE |
|---|---|---|---|---|
| /rest/nodes | Get all nodes | |||
| /rest/nodes/id | Get specified node | Modify node |
3.6.1 Getting Nodes
The HTTP GET method is used to retrieve Node information. Queries for all objects and a single object are available.Quick Reference
GET http://localhost/mws/rest/nodes/<id>3.6.1.1 Get All Nodes
URLs and Parameters
GET http://localhost/mws/rest/nodes
Sample Response
GET http://localhost/mws/rest/nodes?fields=id
{
  "totalCount": 3,
  "resultCount": 3,
  "results":   [
    {"id": "node1"},
    {"id": "node2"},
    {"id": "node3"}
  ]
}
3.6.1.2 Get Single Node
URLs and Parameters
GET http://localhost/mws/rest/nodes/<id>| Parameter | Required | Type | Valid Values | Description |
|---|---|---|---|---|
| id | Yes | String | - | The unique identifier of the object. |
Sample Response
JSON Response
{
  "accessPolicy": null,
  "aliases": [],
  "architecture": "",
  "availableClasses": [],
  "availableDisk": -1,
  "availableEndDate": null,
  "availableGenericResources": {},
  "availableMemory": -1,
  "availableProcessors": -1,
  "availableStartDate": null,
  "availableSwap": -1,
  "blockReason": "",
  "comments": "",
  "configuredClasses": [],
  "cpuLoad": 0,
  "dynamic": false,
  "externalLoad": 0,
  "features": [],
  "flags":   [
    "VM_CREATE_ENABLED",
    "RM_DETECTED"
  ],
  "genericEvents": [],
  "genericMetrics": {},
  "genericResources": {},
  "hypervisorType": "",
  "iOLoad": 0,
  "id": "",
  "index": -1,
  "jobs": [{"id": "Moab.1"}],
  "lastStateUpdateDate": null,
  "lastUpdateDate": null,
  "maxIOIn": 0,
  "maxIOLoad": 0,
  "maxIOOut": 0,
  "maxJob": 0,
  "maxJobPerUser": 0,
  "maxLoad": 0,
  "maxPEPerJob": 0,
  "maxPageIn": 0,
  "maxPageOut": 0,
  "maxProc": 0,
  "maxProcPerClass": 0,
  "messages": [],
  "network": "",
  "networkAddress": "",
  "networkLoad": 0,
  "nextOS": "",
  "operations": [],
  "os": "",
  "osList": [],
  "overcommit": null,
  "partition": "",
  "power": null,
  "powerPolicy": null,
  "powerSelected": null,
  "priority": 0,
  "priorityFunction": "",
  "procSpeed": 0,
  "profilingEnabled": false,
  "rack": 0,
  "reservationCount": 0,
  "reservations": [],
  "rmAccessList": "",
  "size": 1,
  "slot": 0,
  "speed": 1,
  "speedWeight": 1,
  "state": null,
  "substate": "",
  "taskCount": -1,
  "totalActiveTime": 0,
  "totalAvailableTime": 0,
  "totalDisk": -1,
  "totalMemory": -1,
  "totalProcessors": -1,
  "totalStatsTime": 0,
  "totalSwap": -1,
  "totalUpTime": 0,
  "type": "",
  "variables": {},
  "version": 0,
  "virtualMachines": [{"id": "vm1"}],
  "vmOsList": []
}
3.6.2 Modifying Nodes
The HTTP PUT method is used to modify Nodes.Quick Reference
PUT http://localhost/mws/rest/nodes/<id>[?proxy-user=<username>]
Restrictions
- The proxy-user parameter is ignored unless you set
ENABLEPROXY=TRUEin themoab.cfgfile. Example:
ADMINCFG[1] USERS=root,ted ENABLEPROXY=TRUE
3.6.2.1 Modify Node
URLs and Parameters
PUT http://localhost/mws/rest/nodes/<id>[?proxy-user=<username>]
| Parameter | Required | Type | Valid Values | Description |
|---|---|---|---|---|
| id | Yes | String | - | The unique identifier of the object. |
| proxy-user | No | String | - | Perform the action as this user. |
Payload
Sample JSON Payload to Modify a Node
{
  "genericEvents": [  {
    "name": "event1",
    "message": "Sample message"
  }],
  "genericMetrics":   {
    "metric1": 3,
    "metric2": 5
  },
  "messages":   [
    "message1",
    "message2"
  ],
  "os": "linux",
  "partition": "local",
  "power": "off|on",
  "state": "Busy",
  "variables":   {
    "var1": "val1",
    "var2": "val2"
  }
}
Sample Response
This message may not match the message returned from Moab exactly, but is given as an example of the structure of the response.
JSON Response
{"messages":[
  "Successfully modified os to 'linux'",
  "Successfully powered node off"
]}
3.7 Pending Actions
This section describes behavior of the Pending Action object in Moab Web Services. It contains the URLs, payloads, and responses delivered to and from Moab Web Services.The Pending Action API contains the type and description of all fields in the Pending Action object. It also contains details regarding which fields are valid during PUT and POST actions.
Supported Methods
| Resource | GET | PUT | POST | DELETE |
|---|---|---|---|---|
| /rest/pending-actions | Get all pending actions |
3.7.1 Getting Pending Actions
The HTTP GET method is used to retrieve Pending Action information.Quick Reference
GET http://localhost/mws/rest/pending-actions
3.7.1.1 Get All Pending Actions
URLs and Parameters
GET http://localhost/mws/rest/pending-actions
Sample Response
GET http://localhost/mws/rest/pending-actions
{
  "totalCount": 1,
  "resultCount": 1,
  "results": [  {
    "failureDetails": "",
    "hosts": ["hv3"],
    "id": "vmcreate-27",
    "maxDurationInSeconds": 3600,
    "migrationDestination": "",
    "migrationSource": "",
    "motivation": "requested by root",
    "pendingActionState": "RUNNING",
    "pendingActionType": "VMCREATE",
    "requester": "root",
    "serviceId": "Rhel55Vm.200",
    "startTime": "2011-11-15 21:57:55 MST",
    "substate": "installing",
    "targetOS": "",
    "topLevelServiceId": "Lamp.132",
    "vmId": "vm8"
  }]
}
Generic vs Non-Generic Types
If generic job templates are used in Moab, MWS may be configured to translate pending actions with the generic type to the proper type such asVMCREATE. This is done in the configuration file.
The Quickstart Guide provides the default mappings
for this feature, as well as an example of adding a custom mapping from
a custom template name to the correct type.The default mappings are shown in the table below. The available pending
action types may be seen on the
PendingActionType API
page.| Template Name | Mapped Type |
|---|---|
| genericVM-setup | VMCREATE |
| genericVM-migrate | VMMIGRATE |
| genericVM-destroy | VMDESTROY |
| OSStorage-setup | VMSTORAGE |
| OSStorage-destroy | VMSTORAGEDESTROY |
| extraStorage-setup | STORAGE |
| extraStorage-destroy | STORAGEDESTROY |
| genericPM-setup | OSPROVISION |
When generic mappings are used, MWS will match the first template mapping that the pending action ID ends with. For example, an ID ofTo enable mapping for a custom template name such asMoab.1.genericVM-setupwill map the type toVMCREATE.
myCustomVM-setup,
simply add the following line to the MWS configuration file. The value of
the pending action type is case insensitive.
mws.pendingActions.mappings["myCustomVM-setup"] = "vmcreate"
mws.pendingActions.displayGeneric
setting as shown below. A false value will prevent generic pending
actions from being displayed, while a true value will display all
pending actions. By default this value is true.
mws.pendingActions.displayGeneric = false3.8 Plugins
This section describes behavior of the Plugin object in Moab Web Services. It contains the URLs, payloads, and responses delivered to and from Moab Web Services.The Plugin API page contains the type and description of all fields in the Plugin object. It also contains details regarding which fields are valid during PUT and POST actions.
Supported Methods
| Resource | GET | PUT | POST | DELETE |
|---|---|---|---|---|
| /rest/plugins | Get all plugins | Create new plugin | ||
| /rest/plugins/id | Get specified plugin | Modify plugin | Delete plugin |
3.8.1 Getting Plugins
The HTTP GET method is used to retrieve Plugin information. Queries for all objects and a single object are available.Quick Reference
GET http://localhost/mws/rest/plugins/<id>3.8.1.1 Get All Plugins
URLs and Parameters
GET http://localhost/mws/rest/plugins
Sample Response
GET http://localhost/mws/rest/plugins?fields=id
{
  "totalCount": 3,
  "resultCount": 3,
  "results":   [
    {"id": "plugin1"},
    {"id": "plugin2"},
    {"id": "plugin3"}
  ]
}
The plugin objects contain two additional fields that are not in the API documentation: nextPollDate and lastPollDate.
These represent that next and last date that polling will occur or has occurred. The values may also be null if polling
has not occurred or if the plugin is in the STOPPED state.
3.8.1.2 Get Single Plugin
URLs and Parameters
GET http://localhost/mws/rest/plugins/<id>| Parameter | Required | Type | Valid Values | Description |
|---|---|---|---|---|
| id | Yes | String | - | The unique identifier of the object. |
Sample Response
JSON Response
{
  "id":"plugin1",
  "pluginType":"Native",
  "pollInterval":30,
  "autoStart":true,
  "config":{
    "getJobs":"exec:///opt/moab/tools/workload.query.pl"
  },
  "state":"STARTED",
  "nextPollDate":"2011-12-02 17:28:52 MST",
  "lastPollDate":"2011-12-02 17:28:22 MST"
}
The plugin object contains two additional fields that are not in the API documentation: nextPollDate and lastPollDate.
These represent the next and last date that polling will occur or has occurred. The values may also be null if polling
has not occurred or if the plugin is in the STOPPED state.
3.8.2 Creating Plugins
The HTTP POST method is used to create Plugins.Quick Reference
POST http://localhost/mws/rest/plugins
3.8.2.1 Create Plugin
URLs and Parameters
POST http://localhost/mws/rest/plugins
Payload
When creating a plugin, theid and pluginType fields are required. The payload below shows all
fields that are available when creating a Plugin, along with some sample values.JSON Payload
{
  "id":"plugin1",
  "pluginType":"Native",
  "pollInterval":30,
  "autoStart":true,
  "config":{
    "getJobs":"exec:///opt/moab/tools/workload.query.pl"
  }
}
If a state is specified for the new plugin, it will be ignored.Sample Response
JSON Response for successful POST
{"id": "plugin1"}Restrictions
While it is possible to create a plugin with arbitrary nested configuration, such as:… "config":{ "nestedObject":{ "property1":"value1", "property2":"value2" }, "nestedList:["listItem1", "listItem2"] }
3.8.3 Modifying Plugins
The HTTP PUT method is used to modify Plugins.Quick Reference
PUT http://localhost/mws/rest/plugins/<id>3.8.3.1 Modify Plugin
URLs and Parameters
PUT http://localhost/mws/rest/plugins/<id>| Parameter | Required | Type | Valid Values | Description |
|---|---|---|---|---|
| id | Yes | String | - | The unique identifier of the object. |
Payload
The payload below shows all the fields that are available when modifying a Plugin, along with some sample values.JSON Payload for Plugin Modification
{
  "state":"STARTED",
  "pollInterval":30,
  "autoStart":true,
  "config":{
    "getJobs":"exec:///opt/moab/tools/workload.query.pl"
  },
  "state":"STARTED"
}
Sample Response
JSON Response
{"messages":["Plugin plugin1 updated", "Started Plugin 'plugin1'"]}3.8.4 Deleting Plugins
The HTTP DELETE method is used to delete Plugins.Quick Reference
DELETE http://localhost/mws/rest/plugins/<id>3.8.4.1 Delete Plugin
URLs and Parameters
DELETE http://localhost/mws/rest/plugins/<id>| Parameter | Required | Type | Valid Values | Description |
|---|---|---|---|---|
| id | Yes | String | - | The unique identifier of the object. |
Sample Response
JSON Response for successful DELETE
{}
Additional information about a successful DELETE can be found in the HTTP response header X-MWS-Message.
JSON Response for an unsuccessful DELETE
{"messages":["Plugin plugin1 could not be deleted", "Error message describing the problem"]}3.9 Plugin Types
This section describes behavior of the Plugin Type object in Moab Web Services. It contains the URLs, payloads, and responses delivered to and from Moab Web Services.The Plugin Type API page contains the type and description of all fields in the Plugin Type object. It also contains details regarding which fields are valid during PUT and POST actions.
Supported Methods
| Resource | GET | PUT | POST | DELETE |
|---|---|---|---|---|
| /rest/plugin-types | Get all plugin types | Create or update plugin type | ||
| /rest/plugin-types/id | Get specified plugin type |
3.9.1 Getting Plugin Types
The HTTP GET method is used to retrieve Plugin Type information. Queries for all objects and a single object are available.Quick Reference
GET http://localhost/mws/rest/plugin-types/<id>3.9.1.1 Get All Plugin Types
URLs and Parameters
GET http://localhost/mws/rest/plugin-types
Sample Response
GET http://localhost/mws/rest/plugin-types?fields=id
{
  "totalCount": 2,
  "resultCount": 2,
  "results":   [
    {"id": "MSM"},
    {"id": "Native"}
  ]
}
3.9.1.2 Get Single Plugin Type
URLs and Parameters
GET http://localhost/mws/rest/plugin-types/<id>| Parameter | Required | Type | Valid Values | Description |
|---|---|---|---|---|
| id | Yes | String | - | The unique identifier of the object. |
Sample Response
JSON Response
{
  "id":"Native",
  "author":"Adaptive Computing",
  "description":"Basic implementation of a native plugin",
  "instances":[
    {"id":"plugin1"}
  ]
}
3.9.2 Creating or Updating Plugin Types
The HTTP POST method is used to create or update Plugin Types. TheContent-Type HTTP
header is used to determine if the request contains a single class file as plaintext or
the binary data of a JAR file. Each request is explained in the following sections.Quick Reference
PUT http://localhost/mws/rest/plugin-types
3.9.2.1 Update Plugin Type (File)
URLs and Parameters
PUT http://localhost/mws/rest/plugin-types
Payload
This function is idempotent, meaning it will create the Plugin Type if it does not exist or update it if it does. The payload is the actual contents of the class file to upload. This web service is an exception to most as it requires a content type other than JSON. The preferred content type to use for this request istext/plain.Plaintext upload
package testimport com.ace.mws.plugins.*
import com.ace.mws.plugins.exceptions.*class UploadPlugin {
	static author = "Adaptive Computing"
	static description = "A sample plugin class"
	String id	public void verifyConfiguration() throws InvalidPluginConfigurationException {
		def myConfig = config
		def errors = []
		if (!myConfig.arbitraryKey)
			errors << "Missing arbitraryKey!"
		if (errors)
			throw new InvalidPluginConfigurationException("Invalid plugin ${id} configuration", errors)
	}	public def customService(Map params) {
		return params
	}
}
If using the curl library to perform plugin type uploading, the equivalent of the command-line
option --data-binary must be used to send the payload. Otherwise compilation errors may be encountered
when uploading the plugin type.Sample Response
The response of this task is the same as the get all plugin types task. The reason that the return of this task is a list is to accommodate the possibility of uploading multiple plugin types in a single JAR file as explained in the next section.3.9.2.2 Update Plugin Type (JAR)
URLs and Parameters
PUT http://localhost/mws/rest/plugin-types
Payload
This function is idempotent, meaning it will create the Plugin Types if they do not exist or update them if they do. The payload is the binary contents of the JAR file to upload. This web service is an exception to most as it requires a content type ofapplication/x-jar.If the application/x-jar content type is not used in the request, it will be interpreted as
a single class file, resulting in a failure to compile.If using the curl library to perform plugin type uploading, the equivalent of the command-line
option --data-binary must be used to send the payload. Otherwise compilation errors may be encountered
when uploading the plugin type.Sample Response
The response of this task is the same as the get all plugin types task. Note that when using a JAR file, multiple plugin types may be uploaded in the same request.3.10 Reports
This section describes behavior of the reporting framework in Moab Web Services. It contains the URLs, payloads, and responses delivered to and from Moab Web Services.The Report, Sample, and Datapoint API contains the type and description of all fields in the Report, Sample, and Datapoint objects. They also contains details regarding which fields are valid during PUT and POST actions.
Supported Methods
| Resource | GET | PUT | POST | DELETE |
|---|---|---|---|---|
| /rest/reports | Get all reports | Create Reports | Deleting Reports | |
| /rest/reports/name | Get single report with data | |||
| /rest/reports/id | Get single report with data | |||
| /rest/reports/name/datapoints | Get datapoints for report | |||
| /rest/reports/id/datapoints | Get datapoints for report | |||
| /rest/reports/name/samples | Get samples for report | Create sample(s) for report | ||
| /rest/reports/id/samples | Get samples for report | Create sample(s) for report |
3.10.1 Getting Reports
The HTTP GET method is used to retrieve Report information. Queries for all reports with no attached data and a single report with associated data are available.Quick Reference
GET http://localhost/mws/rest/reports/<id>
GET http://localhost/mws/rest/reports/<name>
3.10.1.1 Get All Reports (No Data Included)
URLs and Parameters
GET http://localhost/mws/rest/reports
Sample Response
JSON Response
{
  "totalCount": 1,
  "resultCount": 1,
  "results": [  {
    "id": "3efe5c670be86ba8560397ff",
    "name": "cpu-util"
	…
  }]
}
No datapoints are returned when querying for all reports. To view the consolidated datapoints, the Get Single Report API call must be used.
Samples
GET http://localhost/mws/rest/reports?fields=id,name
{
  "totalCount": 3,
  "resultCount": 3,
  "results":   [
        {
      "id": "3efe5c670be86ba8560397ff",
      "name": "cpu-util"
    },
        {
      "id": "3efe5c670be86ba856039800",
      "name": "cpu-temp"
    },
        {
      "id": "3efe5c670be86ba856039801",
      "name": "cpu-load"
    }
  ]
}
3.10.1.2 Get Single Report (Includes Data)
URLs and Parameters
GET http://localhost/mws/rest/reports/<id>
GET http://localhost/mws/rest/reports/<name>
| Parameter | Required | Type | Valid Values | Description |
|---|---|---|---|---|
| id | Yes | String | - | The unique identifier of the report. |
| name | Yes | String | - | The name of the report. |
Only one of id or name are required.
Sample Response
In the example below, the first datapoint has anull data element, which means that the minimumSampleSize
configured for the report was not met when consolidating the datapoint. The second datapoint contains
actual data.JSON Response
{
  "consolidationFunction": "average",
  "datapointDuration": 15,
  "datapoints":   [
        {
      "endDate": "2011-12-02 17:28:22 MST",
      "startDate": "2011-12-02 17:28:22 MST",
      "firstSampleDate": null,
      "lastSampleDate": null,
      "data": null
    },
        {
      "endDate": "2011-12-02 17:28:23 MST",
      "startDate": "2011-12-02 17:28:37 MST",
      "firstSampleDate": "2011-12-02 17:28:23 MST",
      "lastSampleDate": "2011-12-02 17:28:30 MST",
      "data":       {
        "utilization": 99.89,
        "time": 27.433333333333337
      }
    }
  ],
  "description": "Example of CPU utilization reporting",
  "id": "3efe5c670be86ba8560397ff",
  "keepSamples": false,
  "minimumSampleSize": 1,
  "name": "cpu-util",
  "reportSize": 2
}
3.10.1.3 Get Datapoints For Single Report
URLs and Parameters
GET http://localhost/mws/rest/reports/<id>/datapoints
GET http://localhost/mws/rest/reports/<name>/datapoints
| Parameter | Required | Type | Valid Values | Description |
|---|---|---|---|---|
| id | Yes | String | - | The unique identifier of the report. |
| name | Yes | String | - | The name of the report. |
Only one of id or name are required.
Sample Response
This function is exactly the same as requesting a single report with only the datapoints returned. No report metadata (i.e. description, minimumSampleSize, etc.) is returned.JSON Response
{
  "resultCount":1,
  "totalCount":1,
  "results":[
        {
      "endDate": "2011-12-02 17:28:22 MST",
      "startDate": "2011-12-02 17:28:22 MST",
      "firstSampleDate": null,
      "lastSampleDate": null,
      "data": null
    },
        {
      "endDate": "2011-12-02 17:28:37 MST",
      "startDate": "2011-12-02 17:28:37 MST",
      "firstSampleDate": "2011-12-02 17:28:23 MST",
      "lastSampleDate": "2011-12-02 17:28:23 MST",
      "data":       {
        "utilization": 99.89,
        "time": 27.433333333333337
      }
    }
  ]
}
3.10.2 Getting Samples For Reports
The HTTP GET method is used to retrieve Sample information.Quick Reference
GET http://localhost/mws/rest/reports/<id>/samples
GET http://localhost/mws/rest/reports/<name>/samples
3.10.2.1 Get Samples For Report
URLs and Parameters
GET http://localhost/mws/rest/reports/<id>/samples
GET http://localhost/mws/rest/reports/<name>/samples
| Parameter | Required | Type | Valid Values | Description |
|---|---|---|---|---|
| id | Yes | String | - | The unique identifier of the report. |
| name | Yes | String | - | The name of the report. |
Only one of id or name are required.
Sample Response
JSON Response
{
  "totalCount": 1,
  "resultCount": 1,
  "results": [  {
	"timestamp": "2011-12-02 17:28:37 MST"
	"data":{
		"cpu1":2.3,
		"cpu2":1.2,
		"cpu3":0.0,
		"cpu4":12.1
	},
	…
  }]
}
3.10.3 Creating Reports
The HTTP POST method is used to create Reports. Operations are available to create reports with or without historical datapoints.Quick Reference
POST http://localhost/mws/rest/reports
3.10.3.1 Create Report
URLs and Parameters
POST http://localhost/mws/rest/reports
Payload
To create a report, several fields are required as documented in the Report API.The payload below shows all the fields that are available during report creation.JSON Payload
{
	"name":"cpu-util",
	"description":"An example report on cpu utilization",
	"consolidationFunction":"average",
	"datapointDuration":15,
	"minimumSampleSize":1,
	"reportSize":2,
	"keepSamples":true,
	"datapoints":[
		{
			"startDate":"2011-12-01 19:16:57 MST",
			"endDate":"2011-12-01 19:16:57 MST",
			"data":{
				"time":30,
				"util":99.98
			}
		}
	]
}
Sample Response
{
	"messages":["Report cpu-util created"],
	"id":"3efe5c670be86ba8560397ff",
	"name":"cpu-util"
}
Samples
POST http://localhost/mws/rest/reports (Minimal report without datapoints)
{
	"name":"cpu-util",
	"datapointDuration":15,
	"reportSize":2
}
3.10.4 Creating Samples
The HTTP POST method is used to create Samples for Reports.Quick Reference
POST http://localhost/mws/rest/reports
3.10.4.1 Create Samples For Report
URLs and Parameters
GET http://localhost/mws/rest/reports/<id>/samples
GET http://localhost/mws/rest/reports/<name>/samples
| Parameter | Required | Type | Valid Values | Description |
|---|---|---|---|---|
| id | Yes | String | - | The unique identifier of the report. |
| name | Yes | String | - | The name of the report. |
Only one of id or name are required.
Payload
To create samples for a report, simply send data and an optional timestamp to the URL above.The payload below shows all the fields that are available during sample creation. Note that thedata field can contain arbitrary JSON.JSON Payload
{
	"timestamp":"2011-12-01 19:16:57 MST",
	"agent":"my agent",
	"data":{
		"cpu1":2.3,
		"cpu2":1.2,
		"cpu3":0.0,
		"cpu4":12.1
	}
}
Sample Response
{"messages":["1 sample(s) created for report cpu-util"]}3.10.5 Deleting Reports
The HTTP DELETE method is used to delete Reports.Quick Reference
DELETE http://localhost/mws/rest/reports/<id>
DELETE http://localhost/mws/rest/reports/<name>
3.10.5.1 Delete Report
URLs and Parameters
DELETE http://localhost/mws/rest/reports/<id>
DELETE http://localhost/mws/rest/reports/<name>
| Parameter | Required | Type | Valid Values | Description |
|---|---|---|---|---|
| id | Yes | String | - | The unique identifier of the report. |
| name | Yes | String | - | The name of the report. |
Only one of id or name are required.
Sample Response
JSON Response
{"messages":["Report cpu-util deleted"]}3.11 Reservations
This section describes behavior of the Reservation object in Moab Web Services. It contains the URLs, payloads, and responses delivered to and from Moab Web Services.The Reservation API contains the type and description of all fields in the Reservation object. It also contains details regarding which fields are valid during PUT and POST actions.
Supported Methods
| Resource | GET | PUT | POST | DELETE |
|---|---|---|---|---|
| /rest/reservations | Get all reservations | Create reservation | ||
| /rest/reservations/id | Get specified reservation | Modify reservation | Release reservation |
3.11.1 Getting Reservations
The HTTP GET method is used to retrieve Reservation information. Queries for all objects and a single object are available.Quick Reference
GET http://localhost/mws/rest/reservations/<id>Restrictions
- Only admin or user reservations are returned with this call.
3.11.1.1 Get All Reservations
URLs and Parameters
GET http://localhost/mws/rest/reservations
Sample Response
GET http://localhost/mws/rest/reservations?fields=id
{
  "totalCount": 3,
  "resultCount": 3,
  "results":   [
    {"id": "system.1"},
    {"id": "system.2"},
    {"id": "system.3"}
  ]
}
3.11.1.2 Get Single Reservation
URLs and Parameters
GET http://localhost/mws/rest/reservations/<id>| Parameter | Required | Type | Valid Values | Description |
|---|---|---|---|---|
| id | Yes | String | - | The unique identifier of the object. |
Sample Response
JSON Response
{
  "accountingAccount": "",
  "accountingGroup": "",
  "accountingQOS": "",
  "accountingUser": "root",
  "aclRules": [  {
    "affinity": "NEUTRAL",
    "comparator": "LEXIGRAPHIC_EQUAL",
    "type": "RESERVATION_ID",
    "value": "system.43"
  }],
  "allocatedNodeCount": 1,
  "allocatedProcessorCount": 8,
  "allocatedTaskCount": 1,
  "allocatedNodes": [
  	{"id":"node001"}
  ],
  "comments": "",
  "creationDate": null,
  "duration": 200000000,
  "endDate": "2018-03-17 16:49:10 MDT",
  "excludeJobs":   [
    "job1",
    "job2"
  ],
  "expireDate": null,
  "flags":   [
    "REQFULL",
    "ISACTIVE",
    "ISCLOSED"
  ],
  "globalId": "",
  "hostListExpression": "",
  "id": "system.43",
  "idPrefix": "",
  "isActive": true,
  "isTracked": false,
  "label": "",
  "maxTasks": 0,
  "messages": [],
  "owner":   {
    "name": "adaptive",
    "type": "USER"
  },
  "partitionId": "switchB",
  "profile": "",
  "requirements":   {
    "architecture": "",
    "featureList":     [
      "feature1",
      "feature2"
    ],
    "featureMode": "",
    "memory": 0,
    "nodeCount": 0,
    "nodeIds": ["node001:1"],
    "os": "",
    "taskCount": 1
  },
  "reservationGroup": "",
  "resources": {"PROCS": 0},
  "startDate": "2011-11-14 20:15:50 MST",
  "statistics":   {
    "caps": 0,
    "cips": 2659.52,
    "taps": 0,
    "tips": 0
  },
  "subType": "Other",
  "taskCount": 0,
  "trigger": null,
  "triggerIds": [],
  "uniqueIndex": "",
  "variables": {}
}
3.11.2 Creating Reservations
The HTTP POST method is used to create Reservations.Quick Reference
POST http://localhost/mws/rest/reservations
3.11.2.1 Create Reservation
URLs and Parameters
POST http://localhost/mws/rest/reservations
Payload
The payload below shows all the fields that are available when creating a Reservation, along with some sample values.JSON Payload
{
  "accountingAccount": "",
  "accountingGroup": "",
  "accountingQOS": "",
  "accountingUser": "root",
  "aclRules": [  {
    "affinity": "POSITIVE",
    "comparator": "LEXIGRAPHIC_EQUAL",
    "type": "GROUP",
    "value": "staff"
  }],
  "comments": "",
  "duration": 200000000,
  "endDate": "2018-03-17 16:49:10 MDT",
  "excludeJobs":   [
    "job1",
    "job2"
  ],
  "flags":   [
    "SPACEFLEX",
    "ACLOVERLAP",
    "SINGLEUSE"
  ],
  "hostListExpression": "",
  "idPrefix": "",
  "owner":   {
    "name": "adaptive",
    "type": "USER"
  },
  "partitionId": "",
  "profile": "",
  "requirements":   {
    "architecture": "",
    "featureList":     [
      "feature1",
      "feature2"
    ],
    "memory": 0,
    "os": "",
    "taskCount": 1
  },
  "reservationGroup": "",
  "resources":   {
    "PROCS": 2,
    "MEM": 1024,
    "DISK": 1024,
    "SWAP": 1024,
    "other1": 17,
    "other2": 42
  },
  "startDate": "2011-11-14 20:15:50 MST",
  "subType": "Other",
  "trigger": {
    "eventType":"START",
    "actionType":"EXEC",
    "action":"date"
  },
  "variables":   {
    "var1": "val1",
    "var2": "val2"
  }
}
Create reservation if no conflicting reservations are found.
This is equivalent to mrsvctl -c -h node01 -E.JSON Request Body
{
  "flags":   [
    "DEDICATEDRESOURCE"
  ],
  "hostListExpression": "node01"
}
Sample Response
JSON Response for successful POST
{"id": "system.44"}3.11.3 Modifying Reservations
The HTTP PUT method is used to modify Reservations.Quick Reference
PUT http://localhost/mws/rest/reservations/<id>?change-mode=<add|remove|set>
3.11.3.1 Modify Reservation
URLs and Parameters
PUT http://localhost/mws/rest/reservations/<id>?change-mode=<add|remove|set>
| Parameter | Required | Type | Valid Values | Description |
|---|---|---|---|---|
| id | Yes | String | - | The unique identifier of the object. |
| change-mode | Yes | String | add | Add the given variables to the variables that already exist. |
| remove | Delete the given variables from the variables that already exist. | |||
| set | Replace all existing variables with the given variables. |
Payload
The payload below shows all the fields that are available when modifying a Reservation, along with some sample values.JSON Payload for Reservation Modify
{
  "variables":   {
    "var1": "val1",
    "var2": "val2"
  }
}
Sample Response
This message may not match the message returned from Moab exactly, but is given as an example of the structure of the response.
JSON Response
{"messages":["reservation 'system.43' attribute 'Variable' changed."]}Restrictions
- You can change the ACL Rules on a reservation, but not using this resource. See Create or Update ACLs.
3.11.4 Releasing Reservations
The HTTP DELETE method is used to release Reservations.Quick Reference
DELETE http://localhost/mws/rest/reservations/<id>3.11.4.1 Release Reservation
URLs and Parameters
DELETE http://localhost/mws/rest/reservations/<id>| Parameter | Required | Type | Valid Values | Description |
|---|---|---|---|---|
| id | Yes | String | - | The unique identifier of the object. |
Sample Response
JSON Response for successful DELETE
{}3.12 Services
This section describes the behavior of a Service (an interdependent collection of workflows). It is possible for a Service to be composed of multiple Services. This section describes the URLs, payloads, and responses delivered to and from Moab Web Services for each approach.The Service API contains the type and description of all fields in the Service object. It also contains details regarding which fields are valid during PUT and POST actions.
Supported Methods
| Resource | GET | PUT | POST | DELETE |
|---|---|---|---|---|
| /rest/services | Get all Services | Create Service | ||
| /rest/services/id | Get specified Service | Modify Service | Delete Service |
3.12.1 Getting Service Information
The HTTP GET method is used to retrieve Service information. Queries for all objects and a single object are available.Quick Reference
GET http://localhost/mws/rest/services[?query={"field":"value"}&sort={"field":<1|-1>}[&[show-recursive-vc|show-vc]=true]]
GET http://localhost/mws/rest/services/<id>[?[show-recursive-vc|show-vc]=true]
GET http://localhost/mws/rest/services/<name>[?[show-recursive-vc|show-vc]=true]
3.12.1.1 Get All Services
URLs and Parameters
GET http://localhost/mws/rest/services[?query={"field":"value"}&sort={"field":<1|-1>}[&[show-recursive-vc|show-vc]=true]]| Parameter | Required | Valid Values | Description | Example |
|---|---|---|---|---|
| query | No | JSON | Queries for specific results. | query={"type":"storage","label":"exlabel"} |
| sort | No | JSON | Sort the results. Use 1 for ascending and -1 for descending. | sort={"account":-1} |
| show-recursive-vc | No | true | Show extended details about the service's virtual container including nested virtual containers and nested jobs. | show-recursive-vc=true |
| show-vc | No | true | Show details about the service's virtual container. | show-vc=true |
Sample Response
GET http://localhost:8080/mws/rest/services?query={user:"bob"}
{
  "totalCount": 9,
  "resultCount": 3,
  "results":   [
        {
      "dateCreated": "2011-12-07 16:03:40 MST",
      "lastUpdated": "2011-12-07 16:03:40 MST",
      "name": "bobService.1",
      "version": 1,
      "type": "container",
      "label": null,
      "user": "bob",
      "account": "bamboo",
      "status": "A custom status message",
      "statusCode": 0,
      "includedServices":       [
        "machine0.1",
        "OSStoremachine0.1"
      ],
      "parent": null,
      "serviceTemplate":       {
        "id": "4fbd42cfc4aa4c444cc54112",
        "name": "CentosVmPlusStorage"
      },
      "attributes": {"moab":       {
        "vc": {"id": "vc56"},
        "dependencies": [        {
          "service": "machine0.1",
          "dependency": ["OSStoremachine0.1"]
        }]
      }},
      "id": "4edff0cc6852f709fa777826"
    },
        {
      "dateCreated": "2011-12-07 16:03:40 MST",
      "lastUpdated": "2011-12-07 16:03:40 MST",
      "name": "machine0.1",
      "version": 1,
      "type": "vm",
      "label": "bobs machine",
      "user": "bob",
      "account": "bamboo",
      "status": "A custom status message",
      "statusCode": 0,
      "includedServices": [],
      "parent": "bobService.1",
      "serviceTemplate":       {
        "id": "4fbd42cfc4aa4c444cc54113",
        "name": "CentosVm"
      },
      "attributes": {"moab":       {
        "vc": {"id": "vc57"},
        "job":         {
          "id": "Moab.24",
          "template": "genericVM",
          "image": "centos5.5-stateless",
          "features": ["vlan3"],
          "variables": {"QOS": "High"},
          "resources":           {
            "mem": 2,
            "procs": 2,
            "disk": 2
          }
        }
      }},
      "id": "4edff0cc6852f709fa777827"
    },
        {
      "dateCreated": "2011-12-07 16:03:40 MST",
      "lastUpdated": "2011-12-07 16:03:40 MST",
      "name": "OSStoremachine0.1",
      "version": 1,
      "type": "storage",
      "label": null,
      "user": "bob",
      "account": "bamboo",
      "status": "A custom status message",
      "statusCode": 0,
      "includedServices": [],
      "parent": "bobService.1",
      "serviceTemplate":       {
        "id": "4fbd42cfc4aa4c444cc54114",
        "name": "OpSysStorage"
      },
      "attributes": {"moab":       {
        "vc": {"id": "vc58"},
        "job":         {
          "id": "Moab.23",
          "template": "OSStorage",
          "resources": {"OS": 200}
        }
      }},
      "id": "4edff0cc6852f709fa777828"
    }
  ]
}
Querying Services
It is possible to query services by one or more fields based on MongoDB query syntax.Simple Queries
To see only services that are associated with the user "bob" you can use a query such as the following:http://localhost/mws/rest/services?query={"user":"bob"}http://localhost/mws/rest/services?query={"type":"vm"}http://localhost/mws/rest/services?query={"user":"bob","type":"vm"}http://localhost/mws/rest/services?query={"user":{"$ne":"bob"}}More Complex Queries
When the field values of the desired services are a finite set, you can use the$in operator.
For example, to see services that belong to either bob, alice, or charlie, you can do the following:http://localhost/mws/rest/services?query={"user":{"$in":["alice","bob","charlie"]}}http://localhost/mws/rest/services?query={"attributes.moab.job.resources.procs":3}Conditional Operators
You can perform<, <=, >, >= comparisons using the $lt, $lte, $gt, $gte operators.| Operator | Comparison | |
|---|---|---|
| $lt | < | |
| $lte | <= | |
| $gt | > | |
| $gte | >= |
< 2 processors:http://localhost/mws/rest/services?query={"attributes.moab.job.resources.procs":{"$lt":2}}>= 1024 memory:http://localhost/mws/rest/services?query={"attributes.moab.job.resources.mem":{"$gte":1024}}Querying Services by Date
To see all services created after Febuary 8, 2012 at 1:00 PM Mountain Standard Time (MST):http://localhost/mws/rest/services?query={"dateCreated":{"$gt":"2012-02-08 13:00:00 MST"}}http://localhost/mws/rest/services?query={"dateCreated":{"$lte":"2012-02-08 13:00:00 PST"}}http://localhost/mws/rest/services?query={"dateCreated":{"$lte":"2012-02-08 13:00:00 EST","$gte":"2012-02-08 12:00:00 EST"}}Querying Services by Containing Service
Services can contain other services. When a service is contained within another service, you can find out what its container is by looking at the parent field. A service that is not contained in any other service is called a top level service. If you want to see only top level services you need to query for services with a null parent.In MongoDB syntax you query for services whose parent field have a$type of 10 (with 10
representing null). The following query shows all of bob's top level services:http://localhost/mws/rest/services?query={"user":"bob","parent":{"$type":10}}http://localhost/mws/rest/services?query={"user":"bob","parent":"bobService.1"}Sorting
See the sorting section of Global URL ParametersLimiting the Number of Results
If you want to limit the number of results of services you can use themax parameter. For
example, to see only 10 of bob's services:http://localhost/mws/rest/services?query={"user":"bob"}&sort={"name":1}&max=10max with offset as follows:http://localhost/mws/rest/services?query={"user":"bob"}&sort={"name":1}&max=10&offset=90Retrieving a Subset of Fields
To cause only certain fields to return for each service, use thefields parameter. For example, to
show only the name field for each service:http://localhost/mws/rest/services?fields=name
{
  "totalCount": 9,
  "resultCount": 3,
  "results":   [
    {"name": "aliceService.1"},
    {"name": "machine0.1"},
    {"name": "OSStoremachine0.1"}
  ]
}http://localhost/mws/rest/services?fields=name,type,user
{
  "totalCount": 9,
  "resultCount": 3,
  "results":   [
    {
      "name": "aliceService.1",
      "type": "container",
      "user": "alice"
    },
        {
      "name": "machine0.1",
      "type": "vm",
      "user": "alice"
    },
        {
      "name": "OSStoremachine0.1",
      "type": "storage",
      "user": "alice"
    }
  ]
}
3.12.1.2 Get Single Service
URLs and Parameters
GET http://localhost/mws/rest/services/<id>[?[show-recursive-vc|show-vc]=true]
GET http://localhost/mws/rest/services/<name>[?[show-recursive-vc|show-vc]=true]
| Parameter | Required | Valid Values | Description | Example |
|---|---|---|---|---|
| id | Yes | String | The unique identifier of the service. | |
| name | Yes | String | The name of the service. | |
| show-recursive-vc | No | true | Show extended details about the service's virtual container including nested virtual containers and nested jobs. | show-recursive-vc=true |
| show-vc | No | true | Show details about the service's virtual container. | show-vc=true |
| Parameter | Required | Type | Valid Values | Description |
|---|
Only one of id or name are required.
Samples
GET http://localhost/mws/rest/services/bobService.1?
{
  "dateCreated": "2011-12-07 16:03:40 MST",
  "lastUpdated": "2011-12-07 16:03:40 MST",
  "name": "bobService.1",
  "version": 1,
  "type": "container",
  "label": null,
  "user": "bob",
  "account": "bamboo",
  "status": "A custom status message",
  "statusCode": 0,
  "includedServices":   [
    "machine0.1",
    "OSStoremachine0.1"
  ],
  "parent": null,
  "serviceTemplate":   {
    "id": "4fbd42cfc4aa4c444cc54112",
    "name": "CentosVmPlusStorage"
  },
  "attributes": {"moab":   {
    "vc": {"id": "vc56"},
    "dependencies": [    {
      "service": "machine0.1",
      "dependency": ["OSStoremachine0.1"]
    }]
  }},
  "id": "4edff0cc6852f709fa777826"
}
3.12.2 Creating Services
The HTTP POST method is used to create a Service.Quick Reference
POST http://localhost/mws/rest/services
3.12.2.1 Create Service From Service Template
URLs and Parameters
POST http://localhost/mws/rest/services
Simple Case
To create a service from the template named "Rhel54VmPlusStorage":POST http://localhost/mws/rest/services
{
  "user": "steve",
  "account": "cloud",
  "data":   [
    {
      "name": "MyRhel54VmPlusStorage",
      "serviceTemplate": "Rhel54VmPlusStorage",
    }
  ]
}POST http://localhost/mws/rest/services
{
  "user": "steve",
  "account": "cloud",
  "data":   [
    {
      "name": "MyRhel54VmPlusStorage",
      "serviceTemplate": {
        "name":"Rhel54VmPlusStorage"
      }
    }
  ]
}POST http://localhost/mws/rest/services
{
  "user": "steve",
  "account": "cloud",
  "data":   [
    {
      "name": "MyRhel54VmPlusStorage",
      "serviceTemplate": {
        "id":"4fbd2d90c4aa4996400bsa5m"
      }
    }
  ]
}
Extending a Service Template
If you want to create a service from a service template, but wish to extend the service template with some additional variables or generic resources, you can use the extends field. Extending a service template is also helpful when you wish to override certain values, such as the amount of memory or processors the service requires.To extend a service template, you will need to determine the extends path for the service you wish to override. The extends path is the name of the top level service, followed by one or more localNames as described in the includedServices field. All but the last <localName> are nested containers inside the top level container. For example:<top level service name>::<localName>[:<localName>]+
Rhel54VmPlusStorage Service Template
{
   "name":"Rhel54VmPlusStorage",
   "type":"container",
   …
   "includedServices":[
      {
         "localName":"sc1",
         "serviceTemplate":"SubContainer1"
      }
   ]
}MyRhel54VmPlusStorage::sc1
SubContainer1 Service Template
{
   "name":"SubContainer1",
   "type":"container",
   …
   "includedServices":[
      {
         "localName":"sc2",
         "serviceTemplate":"SubContainer2"
      }
   ]
}MyRhel54VmPlusStorage::sc1:sc2
SubContainer1 Service Template
{
   "name":"SubContainer2",
   "type":"container",
   …
   "includedServices":[
      {
         "localName":"rvm",
         "serviceTemplate":"Rhel54Vm"
      },
      {
         "localName":"oss",
         "serviceTemplate":"OpSysStorage"
      }
   ]
}MyRhel54VmPlusStorage::sc1:sc2:rvm MyRhel54VmPlusStorage::sc1:sc2:oss
POST http://localhost/mws/rest/services
{
  "user": "steve",
  "account": "cloud",
  "data":   [
        {
      "name": "MyRhel54VmPlusStorage",
      "serviceTemplate": "Rhel54VmPlusStorage",
      "attributes": {
         "sharedData":{ "extraAttribute":"some attribute not in the Rhel54VmPlusStorage template" }
      }
    },
    {
      "name": "MyRhel54Vm",
      "extends": "MyRhel54VmPlusStorage::sc1:sc2:rvm",
      "attributes": {
          "moab": {"job": {"variables": {"extraVar": "An additional variable not in the Rhel54Vm template"}}},
          "sharedData":{ "extraAttribute":"some attribute not in the Rhel54Vm template" }
      }    },
    {
      "name": "MyOsStorage",
      "extends": "MyRhel54VmPlusStorage::sc1:sc2:oss",
      "attributes": {
          "moab": {"job": {"variables": {"extraVar2": "An additional variable not in the OpSysStorage template"}}},
          "sharedData":{ "extraAttribute":"some attribute not in the OpSysStorage template" }
      }
    }
  ]
}Extending Services and Dependencies in a Container Service
To add a services to a container service that were not in the container's service template you first define the new services in the service request. Then you extend the includedServices field of the container with the newly defined services. This will add the new services to any that are already in the container as defined in the service template. It is only possible to add services to a container. It is not possible to remove services from a container that were defined in the container's service template.For example, say the CentosVmPlusStorage service template contains an OpSysStorage service template and a CentosVm service template.CentosVmPlusStorage Service Template
{
   "name":"CentosVmPlusStorage",
   "type":"container",
   …
   "includedServices":[
      {
         "localName":"oss",
         "serviceTemplate":"OpSysStorage"
      },
      {
         "localName":"cvm",
         "serviceTemplate":"CentosVm"
      }
   ]
}POST http://localhost/mws/rest/services
{
   "user":"bob",
   "account":"cloud",
   "data":[
      {
         "name":"BobsCentosVmPlusStorage",
         "serviceTemplate":"CentosVmPlusStorage",
         "includedServices":[
            "NewStorageToAdd1",
            "NewStorageToAdd2"
         ]
      },
      {
         "name":"NewStorageToAdd1",
         "serviceTemplate":"ExtraStorage"
      },
      {
         "name":"NewStorageToAdd2",
         "serviceTemplate":"ExtraStorage"
      }
   ]
}POST http://localhost/mws/rest/services
{
   "user":"bob",
   "account":"cloud",
   "data":[
      {
         "name":"BobsCentosVmPlusStorage",
         "serviceTemplate":"CentosVmPlusStorage",
         "includedServices":[
            "NewStorageToAdd1",
            "NewStorageToAdd2"
         ],
         "attributes":{
            "moab":{
               "dependencies":[
                  {
                     "service":"BobsCentosVm",
                     "dependency":[
                        "NewStorageToAdd1",
                        "NewStorageToAdd2"
                     ]
                  }
               ]
            }
         }
      },
      {
         "name":"BobsCentosVm",
         "extends":"CentosVmPlusStorage:cvm"
      },
      {
         "name":"NewStorageToAdd1",
         "serviceTemplate":"ExtraStorage"
      },
      {
         "name":"NewStorageToAdd2",
         "serviceTemplate":"ExtraStorage"
      }
   ]
}
Extendable Fields
You can only extend certain fields. Below is a table of fields that can be extended:| Extendable Fields | Notes |
|---|---|
| attributes.moab.dependencies | Dependencies can be added but not removed. Only applicable to containers. |
| attributes.moab.job.features | Features can be added but not removed. |
| attributes.moab.job.requestedHosts | Hosts can be added but not removed. |
| attributes.moab.job.resources | Including procs, mem, disk, and any generic resource. |
| attributes.moab.job.variables | Can either change the value of variables in the template or add new variables. |
| attributes.sharedData | A place for arbitrary, site-specific data. |
| image | |
| includedServices | Services can be added but not removed. Only applicable to containers. |
| label |
Sample Response
If the request was successful, the response includes the unique ID of the new Service. On failure, the response is an error message.JSON Response
{"name":"MyRhel54VmPlusStorage.1"}3.12.2.2 Create Custom Service
URLs and Parameters
POST http://localhost/mws/rest/services
Payload
POST http://localhost/mws/rest/services
{
   "user":"adaptive",
   "account":"cloud",
   "data":[
       {
         "name":"myNewService",
         "type":"container",
         "label":"My New Service",
         "includedServices":[
            "myVmContainer",
            "myNetworkStorageWorkflow",
            "myPmContainer"
         ],
         "attributes":{
            "moab":{
               "dependencies":[
                  {
                     "dependency":[
                        "myNetworkStorageWorkflow"
                     ],
                     "service":"myVmWorkflow"
                  }
               ]
            },
            "sharedData":{
               "extraAttribute":"Some arbitrary value",
               "extraAttribute2":"Another arbitrary value"
            }
         }
      },
      {
         "name":"myVmContainer",
         "type":"container",
         "includedServices":[
            "myVmWorkflow",
            "myOsStorageWorkflow"
         ],
         "attributes":{
            "moab":{
               "dependencies":[
                  {
                     "dependency":[
                        "myOsStorageWorkflow"
                     ],
                     "service":"myVmWorkflow"
                  }
               ]
            }
         }
      },
      {
         "name":"myVmWorkflow",
         "type":"vm",
         "includedServices":[         ],
         "attributes":{
            "moab":{
               "job":{
                  "resources":{
                     "procs":2,
                     "mem":2048,
                     "disk":80
                  },
                  "variables":{
                       "QOS":"Premium"
                  },
                  "image":"centos5.5-stateless",
                  "template":"genericVM",
                  "requestedHosts":["i16"],
                  "features":["vlan3"]
               }
            }
         }
      },
      {
         "name":"myOsStorageWorkflow",
         "type":"storage",
         "includedServices":[         ],
         "attributes":{
            "moab":{
               "job":{
                  "template":"OSStorage",
                  "resources":{
                     "OS":2500
                  }
               }
            }
         }
      },
      {
         "name":"myNetworkStorageWorkflow",
         "type":"storage",
         "includedServices":[         ],
         "attributes":{
            "moab":{
               "job":{
                  "template":"extraStorage",
                  "resources":{
                     "gold":500
                  },
                  "variables":{
                     "mount":"/path/to/mount"
                  }
               }
            }
         }
      },
      {
         "name":"myPmContainer",
         "type":"container",
         "includedServices":[
            "myPmWorkflow"
         ]
      },
      {
         "name":"myPmWorkflow",
         "type":"pm",
         "includedServices":[         ],
         "attributes":{
            "moab":{
               "job":{
                  "resources":{
                     "procs":2,
                     "mem":2048,
                     "disk":100
                  },
                  "variables":{
                     "QOS":"Premium"
                  },
                  "image":"centos5.5-stateless",
                  "template":"genericPM"
               }
            }
         }
      }
   ]
}
Sample Response
If the request was successful, the response includes the unique ID of the new Service. On failure, the response is an error message.JSON Response
{"name":"myNewService.1"}3.12.3 Modifying Services
The HTTP PUT method is used to modify Services.Quick Reference
PUT http://localhost/mws/rest/services/<id>
PUT http://localhost/mws/rest/services/<name>
3.12.3.1 Modify Service
URLs and Parameters
PUT http://localhost/mws/rest/services/<id>
PUT http://localhost/mws/rest/services/<name>
| Parameter | Required | Type | Valid Values | Description |
|---|---|---|---|---|
| id | Yes | String | - | The unique identifier of the Service. |
| name | Yes | String | - | The name of the Service . |
Only one of id or name are required.
Example Request
Only theattributes, status, and statusCode fields may be modified in services.
Note that the status field must be a valid string, and the statusCode field
must be a valid number (long). Any arbitrary string and number may be used to represent
the current state of the service through status and statusCode respectively.PUT http://localhost:8080/mws/rest/services/myStorageService
{
    "status": "Done provisioning!",
    "statusCode": 200,
    "attributes": {
        "mount": "/mnt/myMount",
        "size": "2500",
        "sharedData":{
            "extraAttribute":"Some arbitrary value",
            "extraAttribute2":"Another arbitrary value"
        }
    }
}
The moab element of attributes cannot be modified. An error will be returned
if this is attempted.
Sample Response
JSON Response
{
    "name": "myStorageService",
    "dateCreated": "2012-02-01 14:54:52 MST",
    "lastUpdated": "2012-02-01 14:54:5    2 MST",
    "type": "storage",
    "label": null,
    "user": "john",
    "account": "corp",
    "status": "Done provisioning!",
    "statusCode": 200,
    "includedServices": [],
    "parent": "myVmWithStorage",
    "attributes": {
        "moab": {
            "vc    ": {
                "id": "vc3"
            },
            "job": {
                "id": "Moab.1",
                "template": "extraStorage",
                "resources": {
                    "gold": 2500
                }
            }
        },
        "sharedData":{
            "extraAttribute":"Some arbitrary value",
            "extraAttribute2":"Another arbitrary value"
        },
        "mount": "/mnt/myMount",
        "size": "2500"
    },
    "id": "4f29b4abe4b03c2f8e3a1a40"
}
3.12.4 Deleting Services
The HTTP DELETE method is used to delete Services.Quick Reference
DELETE http://localhost/mws/rest/services/<id>
DELETE http://localhost/mws/rest/services/<name>
3.12.4.1 Delete Service
URLs and Parameters
DELETE http://localhost/mws/rest/services/<id>
DELETE http://localhost/mws/rest/services/<name>
| Parameter | Required | Type | Valid Values | Description |
|---|---|---|---|---|
| id | Yes | String | - | The unique identifier of the Service. |
| name | Yes | String | - | The name of the Service. |
| force-delete | No | Boolean | - | If true MWS will not check service dependencies before deleting it. |
Only one of id or name are required.
Sample Response
JSON Response
{}3.13 Service Templates
This section describes the behavior of the Service Template object in Moab Web Services. It contains the URLs, payloads, and responses delivered to and from Moab Web Services.The Service Template API contains the type and description of all fields in the ServiceTemplate object. It also contains details regarding which fields are valid during PUT and POST actions.
See Create Service From Service Template to create Services from Service Templates.
The Service Template name has the following constraints:
- It must only contain letters, digits, spaces, and these special characters: hyphen, period, question mark, at sign, tilde, pound sign, square brackets, angle brackets, vertical bar, equals sign, ampersand, parentheses, asterisk, curly braces, grave accent, and dollar sign.
- It cannot have the same form as a MongoDB ID (24 characters of 0-9 and a-f)
- It must be unique in the database.
Supported Methods
| Resource | GET | PUT | POST | DELETE |
|---|---|---|---|---|
| /rest/service-templates | Get all Service Templates | Create ServiceTemplate | ||
| /rest/service-templates/id or name | Get specified Service Template | Modify ServiceTemplate | Cancel Service Template |
3.13.1 Getting Service Templates
The HTTP GET method is used to retrieve Service Template information. Queries for all objects and a single object are available.Quick Reference
GET http://localhost/mws/rest/service-templates[?query={"field":"value"}&sort={"field":<1|-1>}]
GET http://localhost/mws/rest/service-templates/<id>
GET http://localhost/mws/rest/service-templates/<name>
3.13.1.1 Get All Service Templates
URLs and Parameters
GET http://localhost/mws/rest/service-templates[?query={"field":"value"}&sort={"field":<1|-1>}]| Parameter | Required | Valid Values | Description | Example |
|---|---|---|---|---|
| query | No | JSON | Queries for specific results. | query={"type":"vm","createdBy":"name"} |
| sort | No | JSON | Sort the results. Use 1 for ascending and -1 for descending. | sort={"name":1} |
Sample Response
JSON Response
{
  "totalCount": 5,
  "resultCount": 5,
  "results": [
    {
      "id": "4f04a93f84ae17912ae2763e",
      "label": "Linux ESA",
      "type": "vm",
      "name": "LinEsaTemplate",
      "modified": "2011-07-04 00:00:00 MDT",
      "createdBy": "TempName",
      "includedServices": [],
      "tags": [
        "tag0",
        "tag1"
      ],
      "attributes": {
        "dependencies": {
          "service": "tid.1",
          "dependency": [
            "tid.2",
            "tid.3"
          ]
        },
        "job": {
          "image": "rhel54-stateless",
          "resources": {
            "procs": 1,
            "mem": 1024,
            "ipaddress": 1
          },
          "template": "new-vm",
          "variables": {
            "foo": "bar"
          }
        },
        "viewpoint": {
          "name": "",
          "service-description": "",
          "form": {
            "f0": "zero",
            "f1": "one"
          },
          "access": {}
        }
      }
    },
    {
      "id": "4f05dd1484ae18e002b22d92",
      "label": "Linux ESA",
      "type": "vm",
      "name": "LinEsa004",
      "modified": "2011-07-04 00:00:00 MDT",
      "createdBy": "TempName",
      "includedServices": [
        {
          "localName": "SQLServ004",
          "serviceTemplate": "LinEsaTemplate"
        }
      ],
      "tags": [
        "tag0",
        "tag1"
      ],
      "attributes": {
        "dependencies": {
          "service": "tid.1",
          "dependency": [
            "tid.2",
            "tid.3"
          ]
        },
        "job": {
          "image": "rhel54-stateless",
          "resources": {
            "procs": 1,
            "mem": 1024,
            "ipaddress": 1
          },
          "template": "new-vm",
          "variables": {
            "foo": "bar"
          }
        },
        "viewpoint": {
          "name": "",
          "service-description": "",
          "form": {
            "f0": "zero",
            "f1": "one"
          },
          "access": {}
        }
      }
    },
    {
      "id": "4f05dd7484ae18e002b22d93",
      "label": "Linux ESA",
      "type": "vm",
      "name": "R",
      "modified": "2011-07-04 00:00:00 MDT",
      "createdBy": "TempName",
      "includedServices": [
        {
          "localName": "SQLServ004",
          "serviceTemplate": "LinEsaTemplate"
        }
      ],
      "tags": [
        "tag0",
        "tag1"
      ],
      "attributes": {
        "dependencies": {
          "service": "tid.1",
          "dependency": [
            "tid.2",
            "tid.3"
          ]
        },
        "job": {
          "image": "rhel54-stateless",
          "resources": {
            "procs": 1,
            "mem": 1024,
            "ipaddress": 1
          },
          "template": "new-vm",
          "variables": {
            "foo": "bar"
          }
        },
        "viewpoint": {
          "name": "",
          "service-description": "",
          "form": {
            "f0": "zero",
            "f1": "one"
          },
          "access": {}
        }
      }
    },
    {
      "id": "4f05e41f84ae18e002b22d94",
      "label": "Linux ESA",
      "type": "vm",
      "name": "5",
      "modified": "2011-07-04 00:00:00 MDT",
      "createdBy": "TempName",
      "includedServices": [
        {
          "localName": "SQLServ004",
          "serviceTemplate": "LinEsaTemplate"
        }
      ],
      "tags": [
        "tag0",
        "tag1"
      ],
      "attributes": {
        "dependencies": {
          "service": "tid.1",
          "dependency": [
            "tid.2",
            "tid.3"
          ]
        },
        "job": {
          "image": "rhel54-stateless",
          "resources": {
            "procs": 1,
            "mem": 1024,
            "ipaddress": 1
          },
          "template": "new-vm",
          "variables": {
            "foo": "bar"
          }
        },
        "viewpoint": {
          "name": "",
          "service-description": "",
          "form": {
            "f0": "zero",
            "f1": "one"
          },
          "access": {}
        }
      }
    },
    {
      "id": "4f05e4a284ae18e002b22d95",
      "label": "Linux ESA",
      "type": "vm",
      "name": "LinEsaServ001",
      "modified": "2011-07-04 00:00:00 MDT",
      "createdBy": "TempName",
      "includedServices": [
        {
          "localName": "SQLServ004",
          "serviceTemplate": "LinEsaTemplate"
        }
      ],
      "tags": [
        "tag0",
        "tag1"
      ],
      "attributes": {
        "dependencies": {
          "service": "tid.1",
          "dependency": [
            "tid.2",
            "tid.3"
          ]
        },
        "job": {
          "image": "rhel54-stateless",
          "resources": {
            "procs": 1,
            "mem": 1024,
            "ipaddress": 1
          },
          "template": "new-vm",
          "variables": {
            "foo": "bar"
          }
        },
        "viewpoint": {
          "name": "",
          "service-description": "",
          "form": {
            "f0": "zero",
            "f1": "one"
          },
          "access": {}
        }
      }
    }
  ]
}
Querying Service Templates
It is possible to query service templates by one or more fields based on the MongoDB query syntax.Simple Queries
To see only service templates that are associated with the user "bob", use a query like the following:http://localhost/mws/rest/service-templates?query={"user":"bob"}http://localhost/mws/rest/service-templates?query={"type":"vm"}http://localhost/mws/rest/service-templates?query={"user":"bob","type":"vm"}http://localhost/mws/rest/service-templates?query={"user":{"$ne":"bob"}}More Complex Queries
When the field values of the desired service templates are a finite set, use the$in operator.
For example, to see service templates that belong to either bob, alice, or charlie, do the following:http://localhost/mws/rest/service-templates?query={"user":{"$in":["alice","bob","charlie"]}}http://localhost/mws/rest/service-templates?query={"attributes.moab.job.resources.procs":3}Conditional Operators
You can perform<, <=, >, >= comparisons using the $lt, $lte, $gt, $gte operators.| Operator | Comparison | |
|---|---|---|
| $lt | < | |
| $lte | <= | |
| $gt | > | |
| $gte | >= |
http://localhost/mws/rest/service-templates?query={"attributes.moab.job.resources.procs":{"$lt":2}}http://localhost/mws/rest/service-templates?query={"attributes.moab.job.resources.mem":{"$gte":1024}}Querying Service Templates by Date
To see all service templates modified after July 4, 2011 at 10:30:00 PM Mountain Standard Time (MST):http://localhost/mws/rest/service-templates?query={"modified":{"$gt":"2011-07-04 22:30:00 MST"}}http://localhost/mws/rest/service-templates?query={"modified":{"$lt":"2011-07-06 00:00:00 PST"}}http://localhost/mws/rest/service-templates?query={"modified":{"$gte":"2011-07-05 00:00:00 EST","$lte":"2011-07-05 23:59:00 EST"}}Sorting
See the sorting section in Global URL Parameters.Limiting the Number of Results
To limit the size of the result set, use themax parameter. For
example, to see only 10 of bob's services:http://localhost/mws/rest/service-templates?query={"user":"bob"}&sort={"name":1}&max=10max with offset as follows:http://localhost/mws/rest/service-templates?query={"user":"bob"}&sort={"name":1}&max=10&offset=90Retrieving a Subset of Fields
To retrieve only certain fields, use thefields parameter. For example,
to show only the name field for each service:http://localhost/mws/rest/service-templates?fields=name
{
  "totalCount": 9,
  "resultCount": 3,
  "results":   [
    {"name": "aliceService.1"},
    {"name": "machine0.1"},
    {"name": "OSStoremachine0.1"}
  ]
}http://localhost/mws/rest/service-templates?fields=name,type,user
{
  "totalCount": 9,
  "resultCount": 3,
  "results":   [
    {
      "name": "aliceService.1",
      "type": "container",
      "user": "alice"
    },
        {
      "name": "machine0.1",
      "type": "vm",
      "user": "alice"
    },
        {
      "name": "OSStoremachine0.1",
      "type": "storage",
      "user": "alice"
    }
  ]
}
3.13.1.2 Get Single Service Template
URLs and Parameters
GET http://localhost/mws/rest/service-templates/<id>
GET http://localhost/mws/rest/service-templates/<name>
| Parameter | Required | Valid Values | Description |
|---|---|---|---|
| id | Yes | String (24 character alphanumeric) | The unique identifier of the service template. |
| name | Yes | String | The name of the service template. |
Only one of id or name is required.
Response
JSON Response
{
  "totalCount": 1,
  "resultCount": 1,
  "results": [  {
    "id": "...",
	…
  }]
}
3.13.2 Creating Service Templates
The HTTP POST method is used to create Service Templates.Quick Reference
POST http://localhost/mws/rest/service-templates
3.13.2.1 Create Service Template
URLs and Parameters
POST http://localhost/mws/rest/service-templates
Payload
The payload below shows some of the fields that are available when creating a Service Template, along with some sample values.JSON Payload
{
    "attributes": {
        "moab": {
            "dependencies": [
                {
                    "dependency": [
                        "oss",
                        "ns"
                    ],
                    "localName": "rvm"
                }
            ],
            "job": {
                "features": [
                    "vlan3"
                ],
                "image": "centos5.5-stateless",
                "requestedHosts": [
                    "i16"
                ],
                "resources": {
                    "disk": 80,
                    "mem": 2048,
                    "procs": 1
                },
                "template": "genericVM",
                "variables": {
                    "QOS": "Premium"
                }
            }
        }
    },
    "createdBy": "bob",
    "includedServices": [
        {
            "localName": "rvm",
            "serviceTemplate": "Rhel54Vm"
        },
        {
            "localName": "oss",
            "serviceTemplate": "OpSysStorage"
        },
        {
            "localName": "ns",
            "serviceTemplate": "NetworkStorage"
        }
    ],
    "label": "Redhat Enterprise Linux 5.4 VM Plus OS and Network Storage",
    "modified": "2011-07-04 00:00:00 MDT",
    "name": "Rhel54VmPlusStorage",
    "tags": [],
    "type": "container"
}
includedServices is a key-value pair of the internal service name and the serviceTemplate. The service name is unique for each service container.
Sample Response
JSON Response for successful POST
{"id":"4f06111184ae2bbfa31fa4c7"}If the Service Template name is not unique:
JSON Response
{
    "messages": [
        "Service template Rhel54Vm could not be created",
        "Request has a non-unique service template name 'Rhel54Vm'",
        "Please correct the request and try again"
    ]
}
If the Service Template included service local name is not unique to this service template:
JSON Response
{
    "messages": [
        "Service template CentOS5 could not be created",
        "Service template request has a non-unique included service template local name ([SQLServ05])",
        "Please correct the request and try again"
    ]
}
}
If the Service Template depends on a non-existent included service:
JSON Response
{
    "messages": [
        "Service template NSStor34 could not be created",
        "Service template requires service template(s) [NewRhel54Vm] which do not exist",
        "Please correct the request and try again"
    ]
}
If the Service Template depends on more than one non-existent included service:
JSON Response
{
    "messages": [
        "Service template NSStor34 could not be created",
        "Service template requires service template(s) [NewRhel54Vm, Storage003] which do not exist",
        "Please correct the request and try again"
    ]
}
If the Service Template name contains a colon:
JSON Response
{
{
    "messages": [
        "Service template Rhel54Vm:C could not be created",
        "Request contains a colon (:) in the service template name 'Rhel54Vm:C'",
        "Please correct the request and try again"
    ]
}
If the Service Template name has the same format as a MongoDB ID (Service Template ID):
JSON Response
{
    "messages": [
        "Service template 4f2049a684ae6e1d4f09bd71 could not be created",
        "Request has a MongoDB Object ID format for the service template name '4f2049a684ae6e1d4f09bd71'",
        "Please correct the request and try again"
    ]
}
3.13.3 Modifying Service Templates
The HTTP PUT method is used to modify Service Templates.The modified field is not automatically updated. It will need to be changed
by the user.Quick Reference
PUT http://localhost/mws/rest/service-templates/<id>
PUT http://localhost/mws/rest/service-templates/<name>
3.13.3.1 Modify Service Template
URLs and Parameters
PUT http://localhost/mws/rest/service-templates/<id>
PUT http://localhost/mws/rest/service-templates/<name>
| Parameter | Required | Valid Values | Description |
|---|---|---|---|
| id | Yes | String (24 character alphanumeric) | The unique identifier of the service template. |
| name | Yes | String | The name of the service template. |
Only one of id or name is required.
Payload
This is similar to create, except you change the payload to what you need modified.The payload below shows some of the fields that are available when modifying a Service Template, along with some sample values.{
"attributes": {
"dependencies": {
"dependency": [
"tid.2",
"tid.3"
],
"service": "tid.1"
},
"job": {
"image": "rhel54-stateless",
"resources": {
"ipaddress": 1,
"mem": 1024,
"procs": 1
},
"template": "new-vm",
"variables": {
"foo": "bar"
}
},
"viewpoint": {
"access": {},
"form": {
"f0": "zero",
"f1": "one"
},
"name": "",
"service-description": ""
}
},
"createdBy": "Newname",
"includedServices": [],
"modified": "2011-07-04 00:00:00 MDT",
"name": "A",
"tags": [
"database",
"ele45",
"tag56"
],
"type": "RhOs"
}Sample Response
JSON Response for successful PUT
{
    "resultCount": 1,
    "results": [
        {
            "attributes": {
                "dependencies": {
                    "dependency": [
                        "tid.2",
                        "tid.3"
                    ],
                    "service": "tid.1"
                },
                "job": {
                    "image": "rhel54-stateless",
                    "resources": {
                        "ipaddress": 1,
                        "mem": 1024,
                        "procs": 1
                    },
                    "template": "new-vm",
                    "variables": {
                        "foo": "bar"
                    }
                },
                "viewpoint": {
                    "access": {},
                    "form": {
                        "f0": "zero",
                        "f1": "one"
                    },
                    "name": "",
                    "service-description": ""
                }
            },
            "createdBy": "Newname",
            "id": "4f0746f684ae23bbd6726852",
            "includedServices": [],
            "label": "Linux ESA",
            "modified": "2011-07-04 00:00:00 MDT",
            "name": "RhOs004",
            "tags": [
                "database",
                "ele45",
                "tag56"
            ],
            "type": "RhOs"
        }
    ],
    "totalCount": 1
}
If the Service Template depends on a non-existent included service:
JSON Response
{
    "messages": [
        "Service template NewR could not be updated",
        "Service template requires service template(s) [RhOs045] which do not exist",
        "Please correct the request and try again"
    ]
}
If the Service Template depends on more than one non-existent included service:
JSON Response
{
    "messages": [
        "Service template NewR could not be updated",
        "Service template requires service template(s) [Stor45, Stor12] which do not exist",
        "Please correct the request and try again"
    ]
}
An attempt to modify the Service Template name to an existing template name:
JSON Response
{
    "messages": [
        "Service template NewR could not be updated",
        "Request has a non-unique service template name 'Stor44'"
    ]
}
3.13.4 Deleting (Canceling) Service Templates
The HTTP DELETE method is used to delete Service Templates.Quick Reference
DELETE http://localhost/mws/rest/service-templates/<id>
DELETE http://localhost/mws/rest/service-templates/<name>
3.13.4.1 Cancel Service Template
URLs and Parameters
DELETE http://localhost/mws/rest/service-templates/<id|name>| Parameter | Required | Valid Values | Description |
|---|---|---|---|
| id | Yes | String (24 character alphanumeric) | The unique identifier of the service template. |
| name | Yes | String | The name of the service template. |
Only one of id or name is required.
Response
A successful deletion
JSON Response
{}If the Service Template ID does not exist
JSON Response
{
    "messages": [
        "Service template not found with ID '4f2049a684ae6e1d4f09bd71'"
    ]
}
If the Service Template name does not exist
JSON Response
{
    "messages": [
        "Service template not found with ID 'Stor44'"
    ]
}
If other Service Templates depend on the one being deleted
JSON Response
{
    "messages": [
        "Service template Cent5 could not be deleted",
        "Service template 'Cent5' cannot be deleted because Service template '[Cent5]' depends on it "
    ]
}
3.14 Standing Reservations
This section describes behavior of the Standing Reservation object in Moab Web Services. It contains the URLs, payloads, and responses delivered to and from Moab Web Services.The Standing Reservation API contains the type and description of all fields in the Standing Reservation object. It also contains details regarding which fields are valid during PUT and POST actions.
Supported Methods
| Resource | GET | PUT | POST | DELETE |
|---|---|---|---|---|
| /rest/standing-reservations | Get all standing reservations | |||
| /rest/standing-reservations/id | Get specified standing reservation |
3.14.1 Getting Standing Reservations
The HTTP GET method is used to retrieve Standing Reservation information. Queries for all objects and a single object are available.Quick Reference
GET http://localhost/mws/rest/standing-reservations/<id>3.14.1.1 Get All Standing Reservations
URLs and Parameters
GET http://localhost/mws/rest/standing-reservations
Sample Response
GET http://localhost/mws/rest/standing-reservations?fields=id
{
  "totalCount": 3,
  "resultCount": 3,
  "results":   [
    {"id": "sr1"},
    {"id": "sr2"},
    {"id": "sr3"}
  ]
}
3.14.1.2 Get Single Standing Reservation
URLs and Parameters
GET http://localhost/mws/rest/standing-reservations/<id>| Parameter | Required | Type | Valid Values | Description |
|---|---|---|---|---|
| id | Yes | String | - | The unique identifier of the object. |
Sample Response
JSON Response
{
  "access": "DEDICATED",
  "accounts": ["account1"],
  "aclRules": [  {
    "affinity": "POSITIVE",
    "comparator": "EQUAL",
    "type": "USER",
    "value": "adaptive",
  }],
  "chargeAccount": "account2",
  "chargeUser": "user2",
  "classes": ["class1"],
  "clusters": ["cluster1"],
  "comment": "comment",
  "days": ["Monday"],
  "depth": 2,
  "disabled": false,
  "endTime": 86415,
  "flags": ["ALLOWJOBOVERLAP"],
  "groups": ["group1"],
  "hosts": ["host1"],
  "id": "fast",
  "jobAttributes": ["TEMPLATESAPPLIED"],
  "maxJob": 2,
  "maxTime": 0,
  "messages": ["message1"],
  "nodeFeatures": ["feature1"],
  "os": "Ubuntu 10.04.3",
  "owner":   {
    "name": "root",
    "type": "USER"
  },
  "partition": "ALL",
  "period": "DAY",
  "procLimit":   {
    "qualifier": "<=",
    "value": 5
  },
  "psLimit":   {
    "qualifier": "<=",
    "value": 60
  },
  "qoses": ["qos1"],
  "reservationAccessList": [],
  "reservationGroup": "group2",
  "resources":   {
    "PROCS": -1,
    "tapes": 1
  },
  "rollbackOffset": 43200,
  "startTime": 347040,
  "taskCount": 0,
  "tasksPerNode": 0,
  "timeLimit": -1,
  "triggers": [],
  "type": "type1",
  "users": ["user1"]
}
3.15 Virtual Containers
This section describes behavior of the Virtual Container object in Moab Web Services. It contains the URLs, payloads, and responses delivered to and from Moab Web Services.The Virtual Container API contains the type and description of all fields in the Virtual Container object. It also contains details regarding which fields are valid during PUT and POST actions.
Supported Methods
| Resource | GET | PUT | POST | DELETE |
|---|---|---|---|---|
| /rest/vcs | Get all Virtual Containers | Create Virtual Container | ||
| /rest/vcs/id | Get specified Virtual Container | Modify Virtual Container | Destroy Virtual Container |
3.15.1 Getting Virtual Containers
The HTTP GET method is used to retrieve Virtual Container information. Queries for all objects and a single object are available.Quick Reference
GET http://localhost/mws/rest/vcs/<id>3.15.1.1 Get All Virtual Containers
URLs and Parameters
GET http://localhost/mws/rest/vcs
Sample Response
GET http://localhost/mws/rest/vcs?fields=id
{
  "totalCount": 5,
  "resultCount": 5,
  "results":   [
    {"id": "vc3"},
    {"id": "vc1"},
    {"id": "vc4"},
    {"id": "vc5"},
    {"id": "vc2"}
  ]
}
3.15.1.2 Get Single Virtual Container
URLs and Parameters
GET http://localhost/mws/rest/vcs/<id>| Parameter | Required | Type | Valid Values | Description |
|---|---|---|---|---|
| id | Yes | String | - | The unique identifier of the object. |
Sample Response
JSON Response
{
  "aclRules": [  {
    "affinity": "POSITIVE",
    "comparator": "LEXIGRAPHIC_EQUAL",
    "type": "USER",
    "value": "root"
  }],
  "createDate": "2011-11-15 14:01:40 MST",
  "creator": "root",
  "description": "vc2",
  "flags": ["DESTROYWHENEMPTY"],
  "id": "vc2",
  "jobs": [
    {"id":"Moab.1"}
  ],
  "nodes": [
    {"id":"node1"}
  ],
  "owner":   {
    "name": "root",
    "type": "USER"
  },
  "reservations": [
    {"id":"system.1"}
  ],
  "variables":   {
    "a": "b",
    "c": "d"
  },
  "virtualContainers": [
    {"id":"vc3"}
  ],
  "virtualMachines": [
    {"id":"vm1"}
  ]
}
3.15.2 Creating Virtual Containers
The HTTP POST method is used to create Virtual Containers.Quick Reference
POST http://localhost/mws/rest/vcs
3.15.2.1 Create Virtual Container
URLs and Parameters
POST http://localhost/mws/rest/vcs
Payload
The payload below shows all the fields that are available when creating a Virtual Container, along with some sample values.JSON Payload
{
  "description": "ted's vc",
  "owner":   {
    "name": "ted",
    "type": "USER"
  }
}
Sample Response
JSON Response for successful POST
{"id": "vc8"}Restrictions
- When creating a Virtual Container, the owner field is ignored unless you set
ENABLEPROXY=TRUEin themoab.cfgfile. Example:
ADMINCFG[1] USERS=root,ted ENABLEPROXY=TRUE
- If
ENABLEPROXYis set and you pass in the owner field as above, then the new Virtual Container will have creator and owner set to that user.
3.15.3 Modifying Virtual Containers
The HTTP PUT method is used to modify Virtual Containers.Quick Reference
PUT http://localhost/mws/rest/vcs/<id>?change-mode=<add|remove|set>
3.15.3.1 Modify Virtual Container
URLs and Parameters
PUT http://localhost/mws/rest/vcs/<id>?change-mode=<add|remove|set>
| Parameter | Required | Type | Valid Values | Description |
|---|---|---|---|---|
| id | Yes | String | - | The unique identifier of the object. |
| change-mode | Yes | String | add | Add the given objects (jobs, VMs, etc) to the objects that already exist. |
| remove | Delete the given objects from the objects that already exist. | |||
| set | Modify the attributes of the virtual container itself and not the associated objects. |
Payload
Here are three examples of Virtual Container updates: add objects, remove objects, and update attributes.Add objects with /rest/vcs/vc1?change-mode=add
{
  "jobs":     [
    {"id": "Moab.37"},
    {"id": "Moab.38"}
  ],
  "nodes":     [
    {"id": "node1"},
    {"id": "node2"}
  ],
  "reservations":     [
    {"id": "system.48"},
    {"id": "system.49"}
  ],
  "virtualContainers":     [
    {"id": "vc93"},
    {"id": "vc94"}
  ],
  "virtualMachines":     [
    {"id": "vm2"},
    {"id": "vm4"}
  ]
}
Remove objects with /rest/vcs/vc1?change-mode=remove
{
  "jobs":     [
    {"id": "Moab.37"},
    {"id": "Moab.38"}
  ],
  "nodes":     [
    {"id": "node1"},
    {"id": "node2"}
  ],
  "reservations":     [
    {"id": "system.48"},
    {"id": "system.49"}
  ],
  "virtualContainers":     [
    {"id": "vc93"},
    {"id": "vc94"}
  ],
  "virtualMachines":     [
    {"id": "vm2"},
    {"id": "vm4"}
  ]
}
Modify VC attributes with /rest/vcs/vc1?change-mode=set
{
  "description": "This is a new description.",
  "flags": ["HOLDJOBS"],
  "owner":     {
    "name": "ted",
    "type": "USER"
  },
  "variables":     {
    "a": "b",
    "c": "d"
  }
}
Sample Responses
These messages may not match the messages returned from Moab exactly, but they are given as examples of the structure of the responses.
JSON response for adding objects
{
  "messages":[
    "job '147' added to VC 'vc3'",
    "job 'Moab.1' added to VC 'vc3'"
  ]
}
JSON response for removing objects
{
  "messages":[
    "job '147' removed from VC 'vc3'",
    "job 'Moab.1' removed from VC 'vc3'"
  ]
}
JSON response for updating attributes
{"messages":["VC 'vc3' successfully modified"]}Restrictions
- You can change the ACL Rules on a Virtual Container, but not using this resource. See Create or Update ACLs.
3.15.4 Destroying Virtual Containers
The HTTP DELETE method is used to destroy Virtual Containers.Quick Reference
DELETE http://localhost/mws/rest/vcs/<id>3.15.4.1 Destroy Virtual Container
URLs and Parameters
DELETE http://localhost/mws/rest/vcs/<id>| Parameter | Required | Type | Valid Values | Description |
|---|---|---|---|---|
| id | Yes | String | - | The unique identifier of the object. |
Sample Response
JSON Response for successful DELETE
{}3.16 Virtual Machines
This section describes behavior of the Virtual Machine object in Moab Web Services. It contains the URLs, payloads, and responses delivered to and from Moab Web Services.The Virtual Machine API contains the type and description of all fields in the Virtual Machine object. It also contains details regarding which fields are valid during PUT and POST actions.
Supported Methods
| Resource | GET | PUT | POST | DELETE |
|---|---|---|---|---|
| /rest/vms | Get all VMs | Create VM | ||
| /rest/vms/id | Get specified VM | Modify VM | Destroy VM | |
| /rest/nodes/nodeId/vms | Get all VMs on a Node |
3.16.1 Getting Virtual Machines
The HTTP GET method is used to retrieve Virtual Machine information. Queries for all objects and a single object are available.Quick Reference
GET http://localhost/mws/rest/vms/<id>
GET http://localhost/mws/rest/nodes/<nodeId>/vms
3.16.1.1 Get All Virtual Machines
URLs and Parameters
GET http://localhost/mws/rest/vms
Sample Response
GET http://localhost/mws/rest/vms?fields=id
{
  "totalCount": 3,
  "resultCount": 3,
  "results":   [
    {"id": "vm1"},
    {"id": "vm2"},
    {"id": "vm3"}
  ]
}
3.16.1.2 Get All Virtual Machines On Node
URLs and Parameters
GET http://localhost/mws/rest/nodes/<nodeId>/vms| Parameter | Required | Type | Valid Values | Description |
|---|---|---|---|---|
| nodeId | Yes | String | - | The ID of the node of interest. |
Sample Response
GET http://localhost/mws/rest/nodes/hv1/vms?fields=id
{
  "totalCount": 3,
  "resultCount": 3,
  "results":   [
    {"id": "vm1"},
    {"id": "vm2"},
    {"id": "vm3"}
  ]
}
3.16.1.3 Get Single Virtual Machine
URLs and Parameters
GET http://localhost/mws/rest/vms/<id>| Parameter | Required | Type | Valid Values | Description |
|---|---|---|---|---|
| id | Yes | String | - | The unique identifier of the object. |
Sample Response
JSON Response
{
  "aliases": [],
  "availableDisk": 1024,
  "availableMemory": 512,
  "availableProcessors": 0,
  "cpuLoad": 0.823,
  "description": "",
  "effectiveTimeToLive": 0,
  "flags":   [
    "CREATION_COMPLETED",
    "CAN_MIGRATE"
  ],
  "genericEvents": [],
  "genericMetrics": {"watts": 250},
  "id": "vm3",
  "job": {"id": "Moab.1"},
  "lastMigrationDate": null,
  "lastSubstate": "",
  "lastSubstateModificationDate": null,
  "lastUpdateDate": null,
  "migrationCount": 0,
  "networkAddress": "10.0.0.5",
  "node": {"id": "hv2"},
  "osList": [],
  "os": "stateless1",
  "powerSelectState": "NONE",
  "powerState": "ON",
  "rack": 0,
  "requestedTimeToLive": 0,
  "slot": 0,
  "startDate": null,
  "state": "BUSY",
  "substate": "",
  "totalDisk": 1024,
  "totalMemory": 512,
  "totalProcessors": 1,
  "trackingJob": {"id": "Moab.5"},
  "triggers": [],
  "variables": {}
}
3.16.2 Creating Virtual Machines
The HTTP POST method is used to create Virtual Machines.Quick Reference
POST http://localhost/mws/rest/vms[?proxy-user=<username>]Restrictions
- The proxy-user parameter is ignored unless you set
ENABLEPROXY=TRUEin themoab.cfgfile. Example:
ADMINCFG[1] USERS=root,ted ENABLEPROXY=TRUE
3.16.2.1 Create Virtual Machine
URLs and Parameters
POST http://localhost/mws/rest/vms[?proxy-user=<username>]| Parameter | Required | Type | Valid Values | Description |
|---|---|---|---|---|
| proxy-user | No | String | - | Perform the action as this user. |
Payload
The payload below shows all the fields that are available when creating a Virtual Machine, along with some sample values. Note that you can pass in an ID for the Virtual Machine. If you do not, Moab will choose an ID for you.JSON Payload
{
  "totalDisk": 1024,
  "totalMemory": 512,
  "totalProcessors": 1,
  "id": "vm3",
  "node": {"id": "hv2"},
  "os": "stateless1",
  "sovereign":true,
  "storage":"os:5'c'%os:10'd'",
  "template":"CustomTemplate",
  "requestedTimeToLive":10000,
  "triggers": [],
  "variables":   {
    "var1": "val1",
    "var2": "val2"
  }
}
Sample Response
JSON Response for successful POST
{"jobId": "vmcreate-25"}The jobId in the response identifies the job that will create the virtual machine.
3.16.3 Modifying Virtual Machines
The HTTP PUT method is used to modify Virtual Machines.Quick Reference
PUT http://localhost/mws/rest/vms/<id>[?proxy-user=<username>]
Restrictions
- The proxy-user parameter is ignored unless you set
ENABLEPROXY=TRUEin themoab.cfgfile. Example:
ADMINCFG[1] USERS=root,ted ENABLEPROXY=TRUE
3.16.3.1 Modify Virtual Machine
URLs and Parameters
PUT http://localhost/mws/rest/vms/<id>[?proxy-user=<username>]
| Parameter | Required | Type | Valid Values | Description |
|---|---|---|---|---|
| id | Yes | String | - | The unique identifier of the object. |
| proxy-user | No | String | - | Perform the action as this user. |
Payload
The payload below shows all the fields that are available when modifying a Virtual Machine, along with some sample values.JSON Payload for VM Modify
{
  "genericEvents": [],
  "genericMetrics": {"watts": 250},
  "os": "stateless1",
  "powerState": "ON",
  "state": "BUSY",
  "triggers": [],
  "variables":   {
    "var1": "val1",
    "var2": "val2"
  }
}
Sample Response
This message may not match the message returned from Moab exactly, but is given as an example of the structure of the response.
JSON Response
{"messages":["successfully updated VM variables"]}3.16.3.2 Migrate Virtual Machine
URLs and Parameters
PUT http://localhost/mws/rest/vms/<id>[?proxy-user=<username>]
| Parameter | Required | Type | Valid Values | Description |
|---|---|---|---|---|
| id | Yes | String | - | The unique identifier of the object. |
| proxy-user | No | String | - | Perform the action as this user. |
Request Body
The request body below shows how to migrate a Virtual Machine to a node with ID "hv2".JSON Request Body for VM Migrate to a specific node
{"node": {"id": "hv2"}}JSON Request Body for VM Migrate to any available node
{"node": {"id": "ANY"}}Sample Response
The HTTP response code for this operation is 202 Accepted. See the responses section for more information.
JSON Response
{"jobId": "vm-migrate1"}Restrictions
- If a migration is requested by setting the node as shown in the above examples, any other properties in the same request body will be ignored.
3.16.4 Destroying Virtual Machines
The HTTP DELETE method is used to destroy Virtual Machines.Quick Reference
DELETE http://localhost/mws/rest/vms/<id>[?proxy-user=<username>]
Restrictions
- The proxy-user parameter is ignored unless you set
ENABLEPROXY=TRUEin themoab.cfgfile. Example:
ADMINCFG[1] USERS=root,ted ENABLEPROXY=TRUE
3.16.4.1 Destroy Virtual Machine
URLs and Parameters
DELETE http://localhost/mws/rest/vms/<id>[?proxy-user=<username>]
| Parameter | Required | Type | Valid Values | Description |
|---|---|---|---|---|
| id | Yes | String | - | The unique identifier of the object. |
| proxy-user | No | String | - | Perform the action as this user. |
Sample Response
JSON Response for successful DELETE
{"jobId": "vmdestroy-26"}The jobId in the response identifies the job that will destroy the virtual machine.
4 Reporting Framework
The reporting framework is a set of tools to make time-based reports from numerical data. The following sections will (1) provide an overview of the framework and the concepts related to it, and (2) work through an example report (CPU Utilization) with details regarding which web services to use and with what data.The REST API reference is located in the Report Resource section.4.1 Overview
4.1.1 Concepts
The reporting framework uses 3 core concepts: reports, datapoints, and samples.- Report - A report is a time-based view of numerical data.
- Datapoint - A datapoint is a consolidated set of data for a certain time period.
- Sample - A sample is a snapshot of a certain set of data at a particular point in time.
2400/12040MB
By recording the memory utilization and time constantly for 1 minute, you could gather the following data:
Each of the rows in the table above represent a sample of data. By averaging the rows we can consolidate them into one or more datapoints:
Time Memory Utilization 3:53:55 PM 2400/12040 MB 3:54:13 PM 2410/12040 MB 3:54:27 PM 2406/12040 MB 3:54:39 PM 2402/12040 MB 3:54:50 PM 2409/12040 MB
Start time End Time Memory Utilization 3:53:30 PM 3:54:00 PM 2400/12040 MB 3:54:00 PM 3:54:30 PM 2408/12040 MB 3:54:30 PM 3:55:00 PM 2406/12040 MB
Note that each datapoint covers exactly the same amount of time, and averages all samples within that period of time.A report, then, is simply a list of datapoints with some additional configuration information:
Datapoints:
Field Value Name Memory Utilization Report Datapoint Duration 30 seconds Report Size 3 datapoints
Start time End Time Memory Utilization 3:53:30 PM 3:54:00 PM 2400/12040 MB 3:54:00 PM 3:54:30 PM 2408/12040 MB 3:54:30 PM 3:55:00 PM 2406/12040 MB
4.1.2 Capabilities
While storing simple information like memory utilization is nice, the reporting framework is built to automatically handle much more complex information.Consolidating Samples
Samples are JSON documents which are pushed into the report using the samples API. Samples are then stored until the consolidation operation creates a datapoint out of them. The table below shows how different data types are handled in this operation:| Type | Consolidation Function Handling |
|---|---|
| Numbers | Numerical data is averaged |
| Strings | Strings are aggregated into an array |
| Objects | The consolidation function recursively consolidates sub-objects |
| Lists | Lists are combined into a single flat list containing all elements |
| Mixed | If samples have different types of data for the same field, the values are aggregated into an array. |
| Null | These values will be ignored unless all values for a sample field are set to null, resulting in a null result. |
If the mixed data types contains at least one number, it will be treated as numerical data. The non-numerical data will be ignored and the result will be averaged.Below is an example of how the consolidation function works:
Samples:Resulting Datapoint after consolidation:
Time NumberEx StringEx ListEx MixedEx MixedNumberEx 3:53:55 PM 2400 "str1" ["elem1"] "str1" "str1" 3:54:13 PM 2410 "str2" ["elem2", "elem3"] ["elem1"] ["elem1"] 3:54:27 PM 2405 "str3" ["elem4"] null 5
Time NumberEx StringEx ListEx MixedEx MixedNumberEx 3:55:00 PM 2405 ["str1", "str2", "str3"] ["elem1", "elem2", "elem3", "elem4"] ["str1", "elem1"] 5
Minimum Number of Samples
If your dataset is highly variable (i.e. values contained in samples are not very close together), converting a single sample into a datapoint may provide misleading information. It may be better to have a datapoint with an "Unknown" value. This can be accomplished by setting the minimum number of samples for a datapoint in the report.TheminimumSampleSize field in the Report API explains that if the specified size of
samples is not met when the consolidation function is performed, the datapoint is considered "null" and no data is available
for it. When this occurs, the sample data is discarded and the data field of the datapoint is set to "null".For information on how to set this option, see the REST API Report Resource section in the documentation.Report Size
Reports have a predetermined number of datapoints, or size, which sets a limit on the amount of data that can be stored. After the report size has been reached, as newly created datapoints are pushed into the report, the oldest datapoints will automatically be deleted. This is to aid in managing the storage capacity of the server hosting MWS.On report creation, a Mongo collection will be initialized that is the maximum size of a single entry (currently 16 MB) multiplied by the report size. Be careful in setting a large report size as this will quickly allocate the entire disk if many reports with large report sizes are created.
4.2 Example Report (CPU Utilization)
To understand how the behavior and usage of the reporting framework, a sample report covering CPU Utilization will be shown in this section. It will not cover how to gather or display data for reports, but will cover some basic operations that are available with Moab Web Services to facilitate reporting.4.2.1 Creating A Report
Before any data is sent to Moab Web Services, a report must first be created. A JSON payload with a HTTP method of POST must be used to do this.POST /rest/reports
{
  "name":"cpu-util",
  "description":"An example report for cpu utilization",
  "consolidationFunction":"average",
  "datapointDuration":600,
  "reportSize":288
}/rest/reports/cpu-util. The
datapointDuration of 600 signifies that the datapoint consolidation should occur once every 10 minutes, while the reportSize
(i.e. number of the datapoints) shows that the report will retain up to 2 days worth of the latest datapoints.GET /rest/reports/cpu-util
{
    "consolidationFunction": "average",
    "datapointDuration": 600,
    "datapoints": [],
    "description": "An example report for cpu utilization",
    "id": "aef6f6a3a0bz7bf6449537c9d",
    "keepSamples": false,
    "minimumSampleSize": 1,
    "name": "cpu-util",
    "reportSize": 288,
    "version": 0
}4.2.2 Adding Samples
Until samples are added and associated with the report, datapoint consolidation will generate datapoints with adata
field equal to null. Once samples are added, however, they will be averaged and inserted into the next datapoint.Create samples for the cpu-util by sending a POST request as follows:POST /rest/reports/cpu-util/samples
[
  {
    "agent": "cpu-monitor",
    "timestamp":"2012-01-01 12:00:00 MST",
    "data": {
      "minutes1": 0.5,
      "minutes5": 0,
      "minutes15": 0
    }
  },
  {
    "agent": "cpu-monitor",
    "timestamp":"2012-01-01 12:01:00 MST",
    "data": {
      "minutes1": 1,
      "minutes5": 0.5,
      "minutes15": 0.05
    }
  },
  {
    "agent": "cpu-monitor",
    "timestamp":"2012-01-01 12:02:00 MST",
    "data": {
      "minutes1": 1,
      "minutes5": 0.5,
      "minutes15": 0.1
    }
  },
  {
    "agent": "cpu-monitor",
    "timestamp":"2012-01-01 12:03:00 MST",
    "data": {
      "minutes1": 0.75,
      "minutes5": 1,
      "minutes15": 0.25
    }
  },
  {
    "agent": "cpu-monitor",
    "timestamp":"2012-01-01 12:04:00 MST",
    "data": {
      "minutes1": 0,
      "minutes5": 1,
      "minutes15": 0.85
    }
  }
]4.2.3 Consolidating Data
A consolidation function must run to generate datapoints from the given samples. This scheduled consolidation will occur at intervals ofdatapointDuration seconds. For each field in the data object in samples, all values will be averaged.
If non-numeric values are included, the following strategies will be followed:
- All fields which contain a single numeric value in any included sample will be averaged and the non-numeric or null values will be ignored.
- All fields which contain a list will be consolidated into a single, flat list.
- All fields which contain only non-numeric or null values will be consolidated into a single, flat list.
datapointDuration. In this example, the scheduled consolidation
is at 10 minutes from the creation date. If historical datapoints are included in the report creation, the latest
datapoint's endDate plus the datapointDuration will be used as the scheduled time. If this date was in the past,
the next scheduled consolidation will occur at the appropriate interval from the last endDate.
4.2.4 Retrieving Report Data
To retrieve the consolidated datapoints, simply perform a GET request on the report once again. Alternatively, the GET for a report's datapoints may be used.GET /rest/reports/cpu-util
{
    "consolidationFunction": "average",
    "datapointDuration": 600,
    "datapoints": [
        {
            "firstSampleDate": null,
            "lastSampleDate": null,
            "data": null,
            "startDate": "2012-01-01 11:49:00 MST",
            "endDate": "2012-01-01 11:59:00 MST"
        },
        {
            "firstSampleDate": "2012-01-01 12:00:00 MST",
            "lastSampleDate": "2012-01-01 12:04:00 MST",
            "data": {
                "minutes1": 0.65,
                "minutes15": 0.25,
                "minutes5": 0.6
            },
            "startDate": "2012-01-01 11:59:00 MST",
            "endDate": "2012-01-01 12:09:00 MST"
        }
    ],
    "description": "An example report for cpu utilization",
    "id": "aef6f6a3a0bz7bf6449537c9d",
    "keepSamples": false,
    "minimumSampleSize": 1,
    "name": "cpu-util",
    "reportSize": 288,
    "version": 0
}null.
Only samples lying within the datapoint's duration, or from the startDate to the endDate, are included in the
consolidation. Therefore the first datapoint, which covered the 10 minute period just before the samples' recorded
timestamps, contained no data. The second, which covers the 10 minute period matching that of the samples, contains
the averaged sample data. This data could be used to display consolidated report data in a custom interface.
4.2.5 Possible Configurations
Configuration options may be changed to affect the process of report generation. These are documented in the API for the Report object and the Sample object.5 MWS Plugins (Beta)
This section describes MWS Plugins, their use, and their creation in Moab Web Services.MWS Plugins are currently in beta. Interfaces may change significantly in future releases.
5.1 Plugin Overview
This section provides an overview of the plugin layer in web services. The following areas will be covered:- An introduction to the concept of MWS plugins
- How to configure Moab Workload Manager to interact with MWS plugins
- A description of the plugin lifecycle
- How plugins are driven by events
- How to expose web services from a plugin
- How data collisions between plugins are resolved
- How calls from Moab are routed to MWS plugins
5.1.1 Introduction
Moab Web Services plugins provide a highly extensible interface to interact with Moab, MWS, and external resources. Plugins can perform some of the same functions as Moab Resource Managers, while also providing many other features not available to RMs. This section will discuss the main features of plugins, some basic terminology, and how MWS plugins can interact with Moab.Features
Plugins can- be created, modified, and deleted without restarting Moab or MWS.
- be defined in Groovy and uploaded to MWS without restarting.
- have individual data storage space and configuration.
- be polled at a regular interval (configured on a per-plugin basis)
- be informed of important system events.
- be individually stopped, started, paused, and resumed.
- expose custom web services for external use.
- be manipulated via a full RESTful API (see Resources for more information).
Terminology
There are two distinct terms in the plugin layer: plugin types and plugins (or plugin instances).Plugin Types
Plugin Types can be considered plugin templates with built-in logic. In object-oriented programming languages, this relates to the concept of a class. They possess certain abilities, or methods, that can be called by Moab Web Services to query information about a certain resource. They also can define methods which will be exposed to external clients as web services. They do not contain any configuration or current data, but they are often tied to a type of component, such as components that communicate with Moab's WIKI Protocol or those that are built on a certain product.They define several types of methods:- Query methods such as
getNodes,getVirtualMachines, andgetNodesthat retrieve the current state of the resources that the plugin monitors. - The poll method (optional) that is called at a configured interval.
- Instance methods that return information about the current plugin, such as
getState. While these are defined in the plugin type, the plugin type itself does not have a state. - Lifecycle methods of plugins created from the plugin type, such as
beforeStartandafterStart. - Web service methods that expose custom functionality as public web services.
Plugins (Instances)
Plugins (also called plugin instances) are created from plugin types. They contain current data or configuration and use the plugin type methods to interact with resources.Interactions with Moab as a Resource Manager
The plugin layer in MWS is integrated with Moab via the Native Resource Manager (RM) interface. When utilizing plugins, MWS is configured as a RM in Moab as explained in the next section. Events from Moab are pushed through the RM interface to MWS which is then pushed to each plugin in turn. The relationship between Moab Web Services, Moab, and plugins is shown in the following image: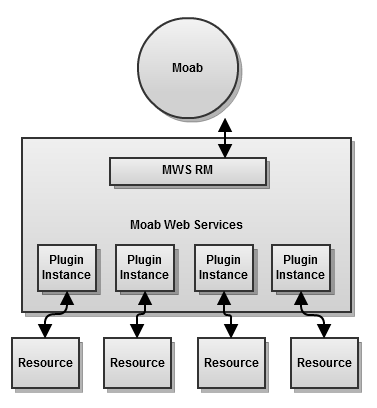
In the diagram above, the MWS RM signifies that MWS is configured as a Moab Resource Manager.
5.1.2 Configuring Moab
To use the full functionality of MWS plugins, Moab must be configured to use MWS as a resource manager. The following lines must be in the/opt/moab/etc/moab.cfg file or one of its included files:RMCFG[mws] TYPE=NATIVE RMCFG[mws] FLAGS=UserSpaceIsSeparate RMCFG[mws] CLUSTERQUERYURL=exec://$TOOLSDIR/mws/cluster.query.mws.pl RMCFG[mws] WORKLOADQUERYURL=exec://$TOOLSDIR/mws/workload.query.mws.pl RMCFG[mws] JOBCANCELURL=exec://$TOOLSDIR/mws/job.cancel.mws.pl RMCFG[mws] JOBMIGRATEURL=exec://$TOOLSDIR/mws/vm.migrate.mws.pl RMCFG[mws] JOBMODIFYURL=exec://$TOOLSDIR/mws/job.modify.mws.pl RMCFG[mws] JOBREQUEUEURL=exec://$TOOLSDIR/mws/job.requeue.mws.pl RMCFG[mws] JOBRESUMEURL=exec://$TOOLSDIR/mws/job.resume.mws.pl RMCFG[mws] JOBSTARTURL=exec://$TOOLSDIR/mws/job.start.mws.pl RMCFG[mws] JOBSUBMITURL=exec://$TOOLSDIR/mws/job.submit.mws.pl RMCFG[mws] JOBSUSPENDURL=exec://$TOOLSDIR/mws/job.suspend.mws.pl RMCFG[mws] NODEMODIFYURL=exec://$TOOLSDIR/mws/node.modify.mws.pl RMCFG[mws] NODEPOWERURL=exec://$TOOLSDIR/mws/node.power.mws.pl RMCFG[mws] RESOURCECREATEURL=exec://$TOOLSDIR/mws/resource.create.mws.pl RMCFG[mws] SYSTEMMODIFYURL=exec://$TOOLSDIR/mws/system.modify.mws.pl RMCFG[mws] SYSTEMQUERYURL=exec://$TOOLSDIR/mws/system.query.mws.pl
/opt/moab/etc/cloud.cfg. Here
are the default values:CONFIG[default] MWS_URL=http://localhost:8080/mws CONFIG[default] MWS_USERNAME=admin CONFIG[default] MWS_PASSWORD=adminpw
TheMWS_USERNAMEandMWS_PASSWORDmust match the values ofauth.defaultUser.usernameandauth.defaultUser.password, respectively, found in/opt/mws/etc/mws-config.groovy.
*.mws.pl scripts should be located in the tools/mws of the Moab home directory.
The Moab/WebServices.pm module must also be available to the scripts. All of these files
may be found in the tools/mws and lib/perl5 directories of the Moab tar file. They
are automatically installed if Moab is configured with the --with-mws flag or they can be
copied directly from there to the tools folder in your Moab home directory.To enable such actions as submitting jobs as different users, the
ENABLEPROXY=TRUE option must be present in the ADMINCFG configuration line and the
OSCREDLOOKUP option must be set to NEVER as follows:ADMINCFG[1] USERS=root ENABLEPROXY=TRUE OSCREDLOOKUP NEVER
5.1.3 Lifecycle States
During the course of a plugin's use, the state of the plugin may change many times. Plugins have four possible states:Stopped, Started, Paused, and Errored.
The flow of a plugin through the states is shown in the following image: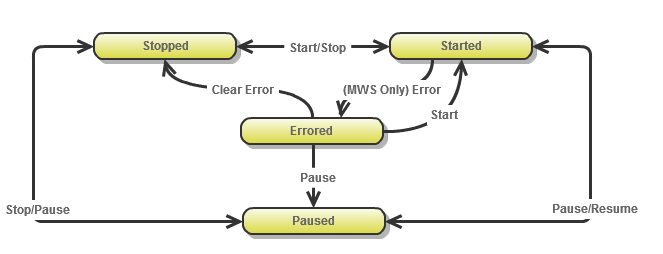 To see descriptions of each state, see the
PluginState API.Events that occur during lifecycle state changes may be found in the Events section.
To see descriptions of each state, see the
PluginState API.Events that occur during lifecycle state changes may be found in the Events section.
5.1.4 Events
Plugins use an event based model in that methods are called on the plugin when certain criteria are met or situations arise. Plugin types may be created to handle certain events by implementing or not implementing certain methods. Events currently exist for polling and certain lifecycle state changes.The Polling Event
To maintain current information, each plugin is polled for node, job, and virtual machine information at a specified time interval. By default, this interval is set to 30 seconds, but can be modified for all or individual plugins as explained in Plugin Management.When a polling event occurs, thepoll method on the target plugin is called. This method may perform
any function desired and should typically make calls to the Plugin Persistence Service
to make updated to nodes, jobs, or virtual machines. For example, the poll method in the
Native plugin type is implemented as follows:This is an extremely simplified version of what is actually implemented in the Native plugin type.
public void poll() {
	getPluginPersistenceService().updateNodes(getNodes());
	getPluginPersistenceService().updateVirtualMachines(getVirtualMachines());
	getPluginPersistenceService().updateJobs(getJobs());
}getNodes, getVirtualMachines, and
getJobs to retrieve node, job, and virtual machine objects. These results are each sent
to the appropriate method in the plugin persistence service. While the specific details of the plugin
persistence service are not important to understand at this point, the objective of this example is to
demonstrate one possible use of the poll event handler. The CSA plugin type, on the
other hand, uses the poll event to retrieve update internal data from its pertinent resources and to update
node and virtual machine information. It does not query or persist any job information.Lifecycle Events
Events are also triggered for certain lifecycle state changes. These are documented in the table below with the associated method that must be implemented on a plugin type to handle the event.| State Change | Event | Description |
|---|---|---|
| Start | beforeStart | Triggered just before starting a plugin. |
| Start | afterStart | Triggered just after a plugin has been started. |
| Stop | beforeStop | Triggered just before stopping a plugin. |
| Stop | afterStop | Triggered just after stopping a plugin. |
5.1.5 Custom Web Services
Although the events interface typically serves most cases, there are some instances where an event is not supported that is desired. This is especially true when an external resource is the source of the event. To address these issues, plugins can expose custom web services to external resources. These web services may be named freely and do anything they wish in the plugin framework.For example, suppose a resource needs to notify a plugin that provisioning of a virtual machine has been completed. Instead of having the plugin poll the resource to verify that the provisioning was finished, the plugin could expose a custom web service to handle notification from the resource itself.Sample custom web service
def vmProvisionFinished(Map params) {
	// Handle event
	return [messages:["Event successfully processed"]]
}5.1.6 Data Collision Detection
At times, plugins can report differing or even contradictory data for nodes, jobs, and virtual machines. This is called a data "collision". Currently, when data from one plugin "collides" with another, the last plugin to report (or persist using the plugin persistence service) the data will be considered the authoritative source for information.For example, suppose two plugins exist,pluginA and pluginB. These plugins both report
data for a node with an ID of node1. However, each reports a different node power state. Plugin A
reports the power as ON, while plugin B reports the power as OFF. The data collision that occurs
due to these two plugins persistence contradictory data is resolved by the timing of their polling.
If plugin A is polled first and plugin B second, the node will be reported as OFF until plugin A
is polled again and vice versa.The simple workaround for this issue is to ensure that no two plugins report the same resource or that
they report different properties of the same resource. For example, if plugin A only modified the power
state and plugin B only modified the available disk, these two plugins would work in harmony to provide
a consistent view of the node resource.
5.1.7 Routing
Due to the fact that Moab Web Services is configured as a Resource Manager (RM) in Moab Workload Manager, events are sometimes triggered by Moab through the RM interface. These actions could be migrating a virtual machine, starting a job, submitting a job, modifying a node, and so forth. The decisions of which plugins are affected and notified is termed routing .Currently all plugins receive all commands from Moab. This means that each plugin will receive the command to start a job if sent from Moab, even if that plugin does not handle the job. This means that plugins must ensure they handle only actions or commands for resources which they report or handle.5.2 Plugin Type Management
Plugin types comprise the methods by which Moab may communicate with resource managers or other external components. They define all operations that can be performed for a "type" or "class" of plugins.Several plugin types are provided with web services, but it is easy to create additional plugin types and add their functionality to web services.5.2.1 Bundled Plugin Types
Several plugin types are provided by Adaptive Computing for use in Moab Web Services. Examples of these include the Native and MSM plugin types.Please see the Bundled Plugin Types item in the Quick Reference menu for all bundled types.
5.2.2 Creating Plugin Types
Creating a plugin type involves using Groovy, which is based on the Java programming language. This section describes the general guidelines and specifics of implementing a simple plugin.5.2.2.1 Plugin Type Guidelines
The com.ace.mws.plugins.AbstractPlugin abstract class is provided to assist in creating plugin types. However, this class need not be extended to provide a fully functional plugin type. In fact, there are only two methods that must be implemented to provide a working plugin type:public String getId();public void setId(String id);
In the following Groovy example, String id will be expanded by the compiler to the full method
definitions given above. Thus no explicit method definitions are actually needed.Basic Groovy Implementation
class BasicPlugin {
	String id
}- The ID getter and setter must be fully implemented (as described above).
- The class name must end in "Plugin".
Dynamic Methods on Plugins
Several methods are dynamically inserted onto each plugin. These methods do not need to be included in the plugin class, and in fact are preferred not to as they will simply be overwritten.These methods are shown below:// Defined in com.ace.mws.plugins.AbstractPlugin public void start() throws PluginStartException; // Equivalent to [pluginControlService.start(String id)|guide:pluginControlLifecycle] public void stop() throws PluginStopException; // Equivalent to [pluginControlService.stop(String id)|guide:pluginControlLifecycle]// Defined in com.ace.mws.plugins.AbstractPluginInfo public String getPluginType(); // Equivalent to [pluginConfigurationService.getPluginType(String id)|guide:pluginConfigurationService] public PluginState getState(); // Equivalent to [pluginConfigurationService.getState(String id)|guide:pluginConfigurationService] public Integer getPollInterval(); // Equivalent to [pluginConfigurationService.getPollInterval(String id)|guide:pluginConfigurationService] public Boolean getAutoStart(); // Equivalent to [pluginConfigurationService.getAutoStart(String id)|guide:pluginConfigurationService] public Map<String, Object> getConfig(); // Equivalent to [pluginConfigurationService.getConfig(String id)|guide:pluginConfigurationService]
Plugin Metadata
Metadata may be included in plugin classes by defining static properties on the classes. Currently, the metadata available isauthor and description. These may be defined in the following manner:The following example does not implement the ID property and therefore would not pass as a valid plugin.
Groovy plugin with Metadata
class ExamplePlugin {
	static author = "Adaptive Computing"
	static description = "A basic example for a plugin with metadata"
}
Exposing Web Services
Any number of methods may be exposed as public web services by following two simple rules:- The method must return a list, map, or a complex object.
- It must define a single argument of a Map.
?param=value¶m2=value2, as
key-value pairs in the POST body of a request, or as JSON in the body.
For the first two cases, the parameters will be available on the Map argument passed into the web service
call as key value pairs matching those of the request. Note that in these cases all keys and values will be
interpreted as strings.GET PLUGIN_SERVICE_URL?key=value&key2=true&key3=5def serviceMethod(Map params) { assert params.key=="value" assert params.key2=="true" assert params.key3=="5" }
body in the Map
argument. In this scenario, the types of the values are preserved by the JSON format.POST PLUGIN_SERVICE_URL with JSON body of
{"key":"value","key2":true,"key3":5}def serviceMethod(Map params) {
assert params.body.key=="value"
assert params.body.key2==true
assert params.body.key3==5
}Events
For events that trigger method calls on plugins, these methods may be implemented on custom plugin types to handle the event. For more information, see the Plugin Events section.External Dependencies
External dependencies (e.g. JAR files) may be included and referenced in custom plugin types. However, certain rules must be followed in order to have these load correctly:- The plugin type must be bundled and uploaded as a JAR file.
- The plugin type must bundle all external dependency JARs in the root of the plugin type JAR file.
- An entry must be included in the
MANIFEST.MFfile that references each of these bundled JAR files as a space separated list:
Class-Path: dependency1.jar dependency2.jar dependency3.jar5.2.2.2 API Classes and Interfaces
There are several packages and classes available to assist in creating plugin types. These can all be found in the API documentation under thecom.ace.mws.plugins package.Here is a brief synopsis of the classes that can and should be used:Interfaces
The com.ace.mws.plugins package contains the interfaces AbstractPluginInfo and AbstractPlugin that should form the basis of any new plugin type.Only thegetId()andsetId()functions must be implemented for a fully operational plugin. All other methods will be inserted dynamically if they do not exist on startup.
Services
The com.ace.mws.plugins.services package contains interfaces for all services available to plugin types. These may be used as discussed in Services.Exceptions
The com.ace.mws.plugins.exceptions package contains several exceptions that may be used and in some cases, should be caught.5.2.2.3 Plugin Type Example
A sample plugin type in Groovy would resemble the following:package testimport com.ace.mws.plugins.* import com.ace.mws.plugins.exceptions.*class UploadTestPlugin { static author = "Adaptive Computing" static description = "A simple plugin in groovy" String id public void verifyConfiguration() throws InvalidPluginConfigurationException { def myConfig = config def errors = [] if (!myConfig.arbitraryKey) errors << "Missing arbitraryKey!" if (errors) throw new InvalidPluginConfigurationException("Invalid plugin ${id} configuration", errors) } }
5.2.3 Plugin Services
Several services are available for use by any plugin type. To use services, they must be declared within the class of the plugin type. For example, to use the plugin control service, apluginControlService property of type
IPluginControlService or "def" must be declared on the plugin type.
The actual service will be inserted or injected into the plugin class when the plugin is used.Injected typed service
package exampleimport com.ace.mws.plugins.services.IPluginControlServicepublic class ExamplePlugin {
	IPluginControlService pluginControlService	public void someMethod() {
		// Use the control service
		pluginControlService.[method]();
	}
}
Injected untyped service
package examplepublic class ExamplePlugin {
	def pluginControlService	public void someMethod() {
		// Use the control service
		pluginControlService.[method]();
	}
}
Do not attempt to create a new instance of the services before use, such as in a constructor. The services will be automatically injected before any methods are called on the plugin.
The injected service property must be named correctly to use it, regardless of the type used.
5.2.3.1 Configuration Service
The configuration service controls all configuration options for plugins. Typically this service does not need to be called directly as methods are provided on all plugins which are routed to the configuration service as explained in the guidelines under Dynamic Methods.ThepluginConfigurationService property will be injected with a class of type
IPluginConfigurationService.
5.2.3.2 Control Service
The control service allows lifecycle management operations to be performed on plugins. It also provides methods to create and retrieve plugins. Note that the plugin control service may be used by other plugins, allowing one plugin to dynamically create, retrieve, start, or stop plugins. The CSA plugin does exactly this by creating a new plugin (SA for example) for each supported provider in CSA.ThepluginControlService property will be injected with a class of type
IPluginControlService.Creating Plugins
Several methods are provided to allow on-the-fly creation of new plugins. Generally, they allow a plugin with a specific ID and plugin type (as a string or as a Groovy Class) to be created with optional configuration properties. These properties should match the fields in the Plugin API. If specific or all configuration properties are omitted, the defaults will be used as described in the Plugin Management with Configuration file section.In each case, a boolean value is returned indicating whether the creation succeeded or not. Additionally, thecreatePlugin methods will initialize the plugin for retrieval or usage and
attempt to start the plugin if the autoStart property is true.Create plugin with default configuration
try {
	if (pluginControlService.createPlugin("myPlugin", "Native"))
		println "myPlugin was created successfully!"
	else
		println "There was an error creating myPlugin"
} catch(PluginStartException e) {
	println "There was a problem starting the new plugin: ${e.message}"
} catch(InvalidPluginConfigurationException e) {
	println "There were errors with the plugin's configuration: ${e.errors}"
}
Create plugin with custom configuration
if (pluginControlService.createPlugin("myPlugin", "Native", [autoStart:false, pollInterval:600]))
	println "myPlugin was created successfully!"
else
	println "There was an error creating myPlugin"
Retrieving Plugins
Retrieving plugins requires either a unique identifier or the type and configuration option(s).Retrieving by Unique Identifier
Get plugin by ID
IPlugin plugin = pluginControlService.getPluginById("plugin1");Retrieving by Type and Configuration Properties
The second method of retrieving Plugins involves sending a type and configuration properties as a map. Both parameters are required; however, the configuration map may be empty as in the following example.Get plugin by Type Only
Map<String, String> config = new HashMap<String, String>();
IPlugin plugin = pluginControlService.getPlugin("Native", config);
null is returned.If the configuration properties map is filled with any properties, all keys and values in it must
be matched for a plugin to be successfully retrieved. For example, if the current plugin list
looks like the following:test {
pluginType = "Native"
config = [test:"true"]
}
test2 {
pluginType = "Native"
config = [test2:"true"]
}IPlugin plugin; Map<String, String> config = new HashMap<String, String>();config.put("test", "true"); plugin = pluginControlService.getPlugin("Native", config); assert "test"==plugin.getId();config.put("test2", "true"); plugin = pluginControlService.getPlugin("Native", config); assert plugin==null;config.remove("test"); plugin = pluginControlService.getPlugin("Native", config); assert "test2"==plugin.getId();
Starting or Stopping Plugins
Plugins may be started or stopped on demand. These two methods are exposed directly asstart and stop on the plugin control service. Although each method does not
return any data, exceptions are thrown if errors are encountered.These methods correctly handle lifecycle events and changing plugin state. These should never be modified directly!
Start Plugin
try {
	pluginControlService.start("myPlugin")
} catch(PluginStartException e) {
	println "There was a problem starting the plugin: ${e.message}"
} catch(InvalidPluginException) {
	println "The plugin 'myPlugin' is invalid"
} catch(InvalidPluginConfigurationException e) {
	println "The plugin has an invalid configuration: ${e.errors}"
}
Stop Plugin
try {
	pluginControlService.stop("myPlugin")
} catch(PluginStopException e) {
	println "There was a problem stopping the plugin: ${e.message}"
} catch(InvalidPluginException) {
	println "The plugin 'myPlugin' is invalid"
}
Verifying Plugin Configuration
Finally, the plugin control service may be used to verify plugin configuration at any point instead of just when the plugin is started or modified. This may be useful to attempt to modify plugin configuration directly through the Configuration Service and then verify that the new configuration is valid for the plugin. Exceptions are thrown if the plugin or the configuration is invalid.Verify plugin configuration
try {
	pluginControlService.verifyConfiguration("myPlugin")
} catch(InvalidPluginException) {
	println "The plugin 'myPlugin' is invalid"
} catch(InvalidPluginConfigurationException e) {
	println "The plugin has an invalid configuration: ${e.errors}"
}
5.2.3.3 Data Persistence Service
The data persistence service is provided to ease the storage of Moab state data such as nodes, jobs, and virtual machines. Objects passed to the service are saved to the Moab Web Services database. It also handles data collisions as explained in the Overview.If the plugin uses thegetNodes, getJobs, or getVirtualMachines methods exclusively for handling polling, the service
will likely never be used directly. This is due to the fact that the default AbstractPlugin implementation of the poll method
uses the persistence service with the results from these methods. The persistence service, however, is used in all plugins that
persist job, node, or virtual machine data.The pluginPersistenceService property will be injected with a class of type
IPluginPersistenceService.All examples use a custom web service to create events.Note that in all cases, the Node, Job, and VirtualMachine objects are intentionally not saved before being passed to the persistence service.
Persisting Data to the Database
In this most typical use case of the persistence service, it may be used to persist node, job, and virtual machine data to the database.Persisting Nodes
Persisting Nodes in Groovy
package exampleimport com.ace.mws.nodes.Nodepublic class ExamplePlugin {
	def pluginPersistenceService	public def updateNodesService(Map params) {
		def nodes = ...// create Node objects here
		if (pluginPersistenceService.updateNodes(nodes))
			log.info("Nodes successfully updated")
		else
			log.info("There was an error updating nodes")
	}
}
Persisting Jobs
Persisting Jobs in Groovy
package exampleimport com.ace.mws.jobs.Jobpublic class ExamplePlugin {
	def pluginPersistenceService	public def updateJobsService(Map params) {
		def jobs = ...// create Job objects here
		if (pluginPersistenceService.updateJobs(jobs))
			log.info("Jobs successfully updated")
		else
			log.info("There was an error updating jobs")
	}
}
Persisting Virtual Machines
Persisting Virtual Machines in Groovy
package exampleimport com.ace.mws.vms.VirtualMachinepublic class ExamplePlugin {
	def pluginPersistenceService	public def updateVirtualMachinesService(Map params) {
		def vms = ...// create Virtual Machine objects here
		if (pluginPersistenceService.updateVirtualMachines(vms))
			log.info("VMs successfully updated")
		else
			log.info("There was an error updating VMs")
	}
}
Removing Data from the Database
On the other hand, the plugin persistence service may also be used to remove state data from the database by using theremove* methods.Removing Nodes
Removing Nodes in Groovy
package exampleimport com.ace.mws.nodes.Nodepublic class ExamplePlugin { def pluginPersistenceService public def removeNodesService(Map params) { def nodes = ...// load Node objects here if (pluginPersistenceService.removeNodes(nodes)) log.info("Nodes successfully removed") else log.info("There was an error removing nodes") } }
Removing Jobs
Removing Jobs in Groovy
package exampleimport com.ace.mws.jobs.Jobpublic class ExamplePlugin { def pluginPersistenceService public def removeJobsService(Map params) { def jobs = ...// load Job objects here if (pluginPersistenceService.removeJobs(jobs)) log.info("Jobs successfully removed") else log.info("There was an error removing jobs") } }
Removing Virtual Machines
Removing Virtual Machines in Groovy
package exampleimport com.ace.mws.vms.VirtualMachinepublic class ExamplePlugin { def pluginPersistenceService public def removeVirtualMachinesService(Map params) { def vms = ...// load VirtualMachine objects here if (pluginPersistenceService.removeVirtualMachines(vms)) log.info("Virtual machines successfully removed") else log.info("There was an error removing virtual machines") } }
5.2.3.4 Individual Datastore Service
The individual datastore service is provided to allow a plugin to persist data to the database that is isolated from all other persistent data. It is not designed to store Moab data such as nodes, jobs, or virtual machines, but custom, arbitrary data pertinent only to the individual plugin.ThepluginDatastoreService property will be injected with a class of type
IPluginDatastoreService.Persisting Custom Data
The datastore service may be used to persist custom, arbitrary data to the database. Multiple collections may be used by a single plugin and can be named arbitrarily. Although non-alphanumeric characters may be used, it is not recommended as it could cause loss of data between collections.Always use theidof the current plugin when calling thepluginDatastoreServicemethods. Failure to do so will cause issues with other plugins.
Adding A Single Entry
Persisting Custom Entry in Groovy
package examplepublic class ExamplePlugin { def pluginDatastoreService public def addDataEntryService(Map params) { def collectionName = "collection1" def data = [:] // Add data here to the Map if (pluginDatastoreService.addData(id, collectionName, data)) log.info("Data successfully added") else log.info("There was an error adding the data") } }
Adding Multiple Entries
Persisting Multiple Entries in Groovy
package examplepublic class ExamplePlugin { def pluginDatastoreService public def addDataEntriesService(Map params) { def collectionName = "collection1" def dataList = [] dataList.add( /* Custom Map of data here */) dataList << // Custom Map of data here if (pluginDatastoreService.addData(id, collectionName, dataList)) log.info("Data entries successfully added") else log.info("There was an error adding the data entries") } }
Updating A Single Entry
Updating Entry in Groovy
package examplepublic class ExamplePlugin { def pluginDatastoreService public def updateDataEntryService(Map params) { def collectionName = "collection1" def data = [:] // Add data here to the Map if (pluginDatastoreService.updateData(id, collectionName, "key", "value", data)) log.info("Data successfully updated") else log.info("There was an error updating the data") } }
Querying Data
The datastore service may also be used to query for collections and specific entries in each collection.Find If A Collection Exists
Collection Exists in Groovy
package examplepublic class ExamplePlugin { def pluginDatastoreService public def addDataEntryService(Map params) { def collectionName = "collection1" if (pluginDatastoreService.exists(id, collectionName)) log.info("Collection exists") else log.info("The collection does not exist") } }
Get Contents Of A Collection
Get Collection in Groovy
package examplepublic class ExamplePlugin { def pluginDatastoreService public def addDataEntriesService(Map params) { def collectionName = "collection1" def dataList = pluginDatastoreService.getCollection(id, collectionName) if (dataList!=null) log.info("Collection successfully queried") else log.info("There was an error querying the collection") } }
Get A Single Entry From A Collection
Get Single Entry in Groovy
package examplepublic class ExamplePlugin { def pluginDatastoreService public def updateDataEntryService(Map params) { def collectionName = "collection1" def data = pluginDatastoreService.getData(id, collectionName, "key", "value") if (data!=null) log.info("Data successfully retrieved") else log.info("There was an error retrieving the data") } }
Removing Data
The data in the individual datastore may also be cleared out or removed on a collection or single entry basis.Removing A Collection
Removing Collection in Groovy
package examplepublic class ExamplePlugin { def pluginDatastoreService public def addDataEntryService(Map params) { def collectionName = "collection1" def data = pluginDatastoreService.clearCollection(id, collectionName) // Data now contains the collection that was cleared if (data!=null) log.info("Collection successfully cleared") else log.info("There was an error clearing the collection") } }
Removing A Single Entry
Remove Single Entry in Groovy
package examplepublic class ExamplePlugin { def pluginDatastoreService public def addDataEntriesService(Map params) { def collectionName = "collection1" if (pluginDatastoreService.removeData(id, collectionName, "key", "value")) log.info("Data entry successfully removed") else log.info("There was an error removing the data entry") } }
5.2.4 Uploading Plugin Types
Plugin types can be uploaded into Moab Web Services using the user interface or REST API.5.2.4.1 Upload with the User Interface
The user interface may be used to upload plugins using a file, a Java Archive (JAR) file, or pasted Groovy code.Single Class File
Groovy files containing a single plugin class may be uploaded at the /mws/admin/plugin-types/create URL.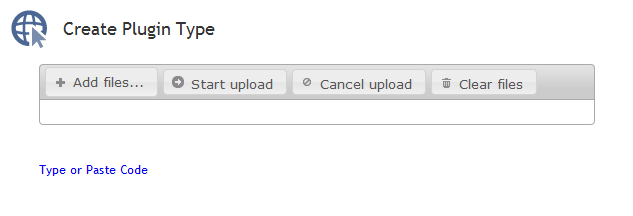 Simply click
 Add files..., select the .groovy class file, and click the Start upload button.
If the plugin type was successfully uploaded and initialized, the size of the file uploaded will
be displayed.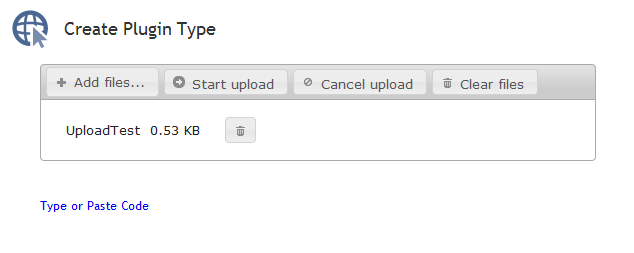 If the upload failed or an error occurred during initialization of the plugin, an error message
will be displayed. See the log file for additional details and error messages.
If the upload failed or an error occurred during initialization of the plugin, an error message
will be displayed. See the log file for additional details and error messages.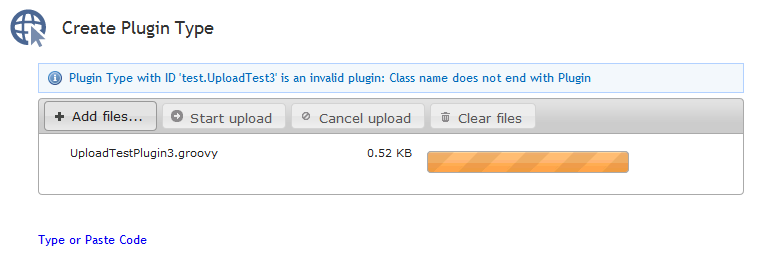
JAR File
A JAR file containing one or more plugins may also be uploaded using the same process as the Groovy file.Navigate to the /mws/admin/plugin-types/create URL. ClickAdd files..., select the .jar class file,
and click the Start upload button. If the upload failed or an error occurred during initialization
of the plugin(s), an error message will be displayed. See the log file for additional details and error messages.The JAR upload process differs from the single file in that if successful, the name of each
successfully loaded plugin class will be displayed. There are two ways that the plugins are extracted from the JAR file: the manifest file and autodetection.
Manifest File
The manifest file, located atMETA-INF/MANIFEST.MF, will be loaded and an attribute named MWS-Plugin-Types will be used.
This attribute's value should be a comma-separated list of full class names of all plugin types, including the package.example.jar/META-INF/MANIFEST.MF Example
Manifest-Version: 1.0 MWS-Plugins: example.package.ExamplePlugin, example.package.AnotherExamplePlugin
Autodetect
If no manifest attribute is specified, or the manifest file does not exist, then MWS will search in the JAR for file names that end withPlugin. If it finds any, it will attempt to load them as plugin
classes.Code
Code may also be written dynamically in the browser which is then uploaded and compiled as Groovy code. Make sure to refer to the plugin type Guidelines before finishing the upload process.Navigate to the /mws/admin/plugin-types/create URL and clickPaste Source Code to open the text area
where code should be placed.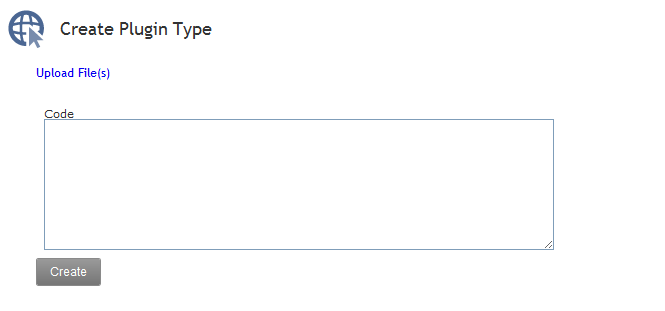
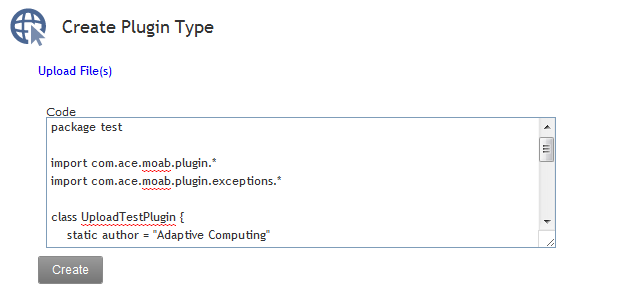 Paste or type the code into the field and click
 Create. If the upload succeeded, the user interface
will be redirected to the plugin type show page. If the upload failed or an error occurred during
initialization of the plugin, an error message will be displayed. See the log file for additional details
and error messages.
5.2.4.2 Uploading with REST API
Alternatively, the same file formats may be uploaded to Moab Web Services using a REST API. The URLs, payloads, and responses are fully documented in the Updating Plugin Types section.When using the REST API, the code and single Class files use the same operation.5.2.5 Listing Plugin Types
Finally, it is possible to list the available plugin types with their associated authors and descriptions through either the REST API or the user interface.Listing in REST API
Retrieving all or specific plugin types is fully documented in the Getting Plugin Types resource section.Listing in User Interface
To retrieve a list of all plugin types, navigate to /mws/admin/plugin-types/list.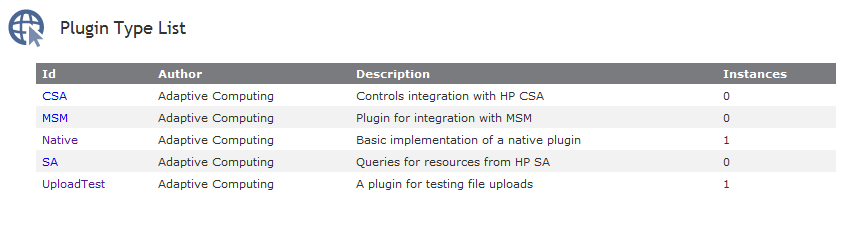 The ID of each plugin type may be clicked to navigate to a page with more information concerning the type,
including the current instances using it. A link is also provided to create a new plugin from the currently
displayed type.
The ID of each plugin type may be clicked to navigate to a page with more information concerning the type,
including the current instances using it. A link is also provided to create a new plugin from the currently
displayed type.
5.3 Plugin Management and Usage
Plugins may be managed and accessed with Moab Web Services dynamically, even while running. This includes plugin instance configuration, controlling plugin lifecycle, and accessing custom web services.5.3.1 Configuring Plugins
Configuring plugins may be done by any of these methods:- Using the MWS configuration file which is read during the MWS startup process.
- Using the user interface through a web browser.
- Using the REST API through scripts or other web client utilities.
5.3.1.1 Managing with Configuration File
Only new plugins (those with IDs that do not exist in the database) are loaded on startup. The database is considered the authoritative source for all current plugin configuration.Configuration of plugins with a file involves setting the Configuration fields in the Moab Web Services configuration file. See the MWS configuration guide for more information on the configuration file.Two areas can be configured within the file: default values and plugin configuration.
Changing Default Values
Configuration may be specified for default values for all new plugins as follows:All settings are optional for the default configuration. If no values are specified, the default values will be used as shown in the Configuration reference guide.
Default plugin configuration
plugins {
pollInterval = 30
pollEnabled = true
autoStart = true
config {
arbitraryKey = "arbitrary value"
username = "admin"
password = "pass"
}
}config entries.Additionally, the pluginType and id fields may be given a default value that will be used in the
User Interface for creating new plugins as follows:Setting UI Defaults
plugins {
id = "companyId00"
pluginType = "Native"
}Instance Configuration
New plugins can be created by using the configuration file. Please note, however, that if a plugin already exists in the database with the same ID when the configuration file is read, the configuration file settings will be ignored. In other words, the database data is taken over all configuration file data.To define plugins, simply include aninstances block in the configuration file. Each new block
within instances is the ID of a new plugin and contains all desired configuration for it.Sample plugin 'native1'
plugins {
instances {
native1 {
pluginType = "Native"
pollInterval = 25
autoStart = false
}
}
}id and pluginType,
are optional.Default vs Instance Config
Anyconfig entries defined in the instances block will be merged with the default config entries with
the plugin entries taking precedence. For example, for the following configuration:Config Entries
plugins {
config {
key = "defaultKey"
defaultKey = "defaultValue"
}
instances {
native1 {
pluginType = "Native"
config {
key = "pluginKey"
pluginKey = "pluginValue"
}
}
}
}config {
key = "pluginKey"
defaultKey = "defaultValue"
pluginKey = "pluginValue"
}5.3.1.2 Managing with User Interface
Plugins may be listed, created, modified, and deleted by navigating to /mws/admin/plugins.New plugins may be created by navigating to /mws/admin/plugins/create. This interface exposes the same configuration options that are in the External File configuration. The same validation occurs through the user interface for required and optional fields.5.3.1.3 Managing with REST API
The URLs, payloads, and responses of managing plugins through the REST API are fully documented in the Plugins Resource sections.5.3.2 Controlling Plugin Lifecycle
Monitoring and lifecycle control of plugins may be performed on a single page located at /mws/admin/plugins/control/list. This page displays the current state of all plugins as well as their polling status.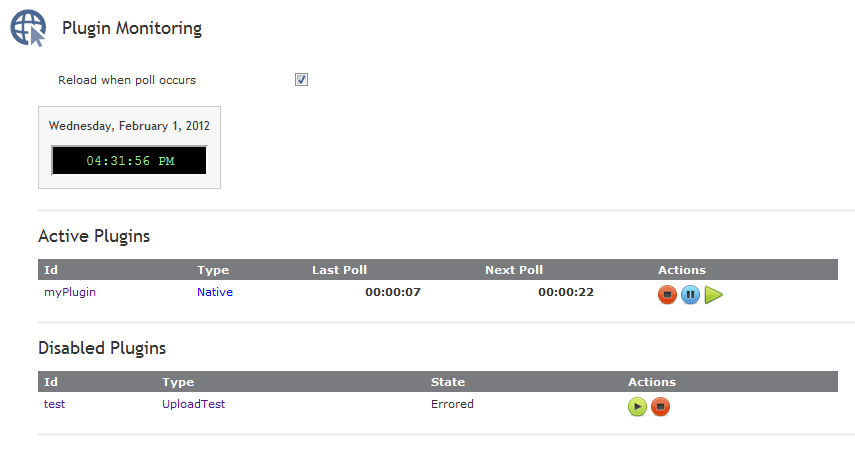
Active Plugins
Active plugins are those which are in the Started or Paused states. These are available to receive events such as polling. If paused, a plugin will not receive events but is not actually stopped, therefore no stop events are triggered.The following images demonstrate the status of plugins in the active states. A started plugin which includes the relative time of the last poll as well as the time of the next poll in
a countdown format. Action buttons are available to stop or pause the plugin as well as trigger an
immediate poll event.
A started plugin which includes the relative time of the last poll as well as the time of the next poll in
a countdown format. Action buttons are available to stop or pause the plugin as well as trigger an
immediate poll event. A paused plugin which includes only the last polling time. Action buttons are available to stop or resume
the plugin, as well as trigger an immediate poll event.
A paused plugin which includes only the last polling time. Action buttons are available to stop or resume
the plugin, as well as trigger an immediate poll event.Disabled Plugins
Disabled plugins are those which are in the Stopped or Errored states. These plugins do not receive events such as polling. If errored, a plugin may either be stopped, which represents a "clearing" of the error, or started normally. However, if no action is taken on an errored plugin, it likely will not start due to the fact that most plugins are put into the errored state during startup of the plugin.The following images demonstrate the representation of plugins in the disabled states. A stopped plugin. A single action button is available to attempt to start the plugin.
 An errored plugin. As mentioned previously, action buttons are available to stop the plugin or clear the
error as well as attempt to start the plugin. If the start fails, an error message will be displayed.
An errored plugin. As mentioned previously, action buttons are available to stop the plugin or clear the
error as well as attempt to start the plugin. If the start fails, an error message will be displayed.
5.3.3 Accessing Web Services
As mentioned in the Overview, custom web services may be available in plugins. These web services may be called externally by resources and arbitrary consumers or internally by other plugins.Access Web Services Externally
To access the custom web services defined by the plugin, navigate to or call /mws/rest/plugins/ ID /services/ SERVICE_METHOD whereID is the unique identifier for the
plugin, and SERVICE_METHOD is the method name of the exposed service.Parameters may be passed into the web service call as normal URL parameters such as
?param=value¶m2=value2, in the POST body of a request, or as JSON in the body.Additionally, translation is done to map CamelCase service names
to dash-separated names in the URL. For example, a web service method named notifyEvent on a plugin with an ID of
notifications can be called with the following URLs.// Camel case /mws/rest/plugins/notifications/services/notifyEvent // Dash separated /mws/rest/plugins/notifications/services/notify-event
Web Service Calls from Internal Plugins
In some cases, it may be desirable to access the custom web services from another plugin internally. To do so, simply retrieve the plugin using the plugin control service and call the desired method directly.For example, if a plugin exists with an ID of "yourPlugin", and another plugin identified as "myPlugin" wants to access a custom web service defined as the following:yourPlugin web service
def notifyEvent(Map params) {
// Handling of the event
return [processed:true]
}Call plugin's custom service
IPluginControlService pluginControlServicevoid poll() {
// This plugin is "myPlugin"
assert id=="myPlugin" // Retrieve "yourPlugin"
def yourPlugin = pluginControlService.getPluginById("yourPlugin")
assert yourPlugin.id=="yourPlugin" // Call custom web service internally
def result = yourPlugin.notifyEvent([:])
assert result.processed==true
}